Channels
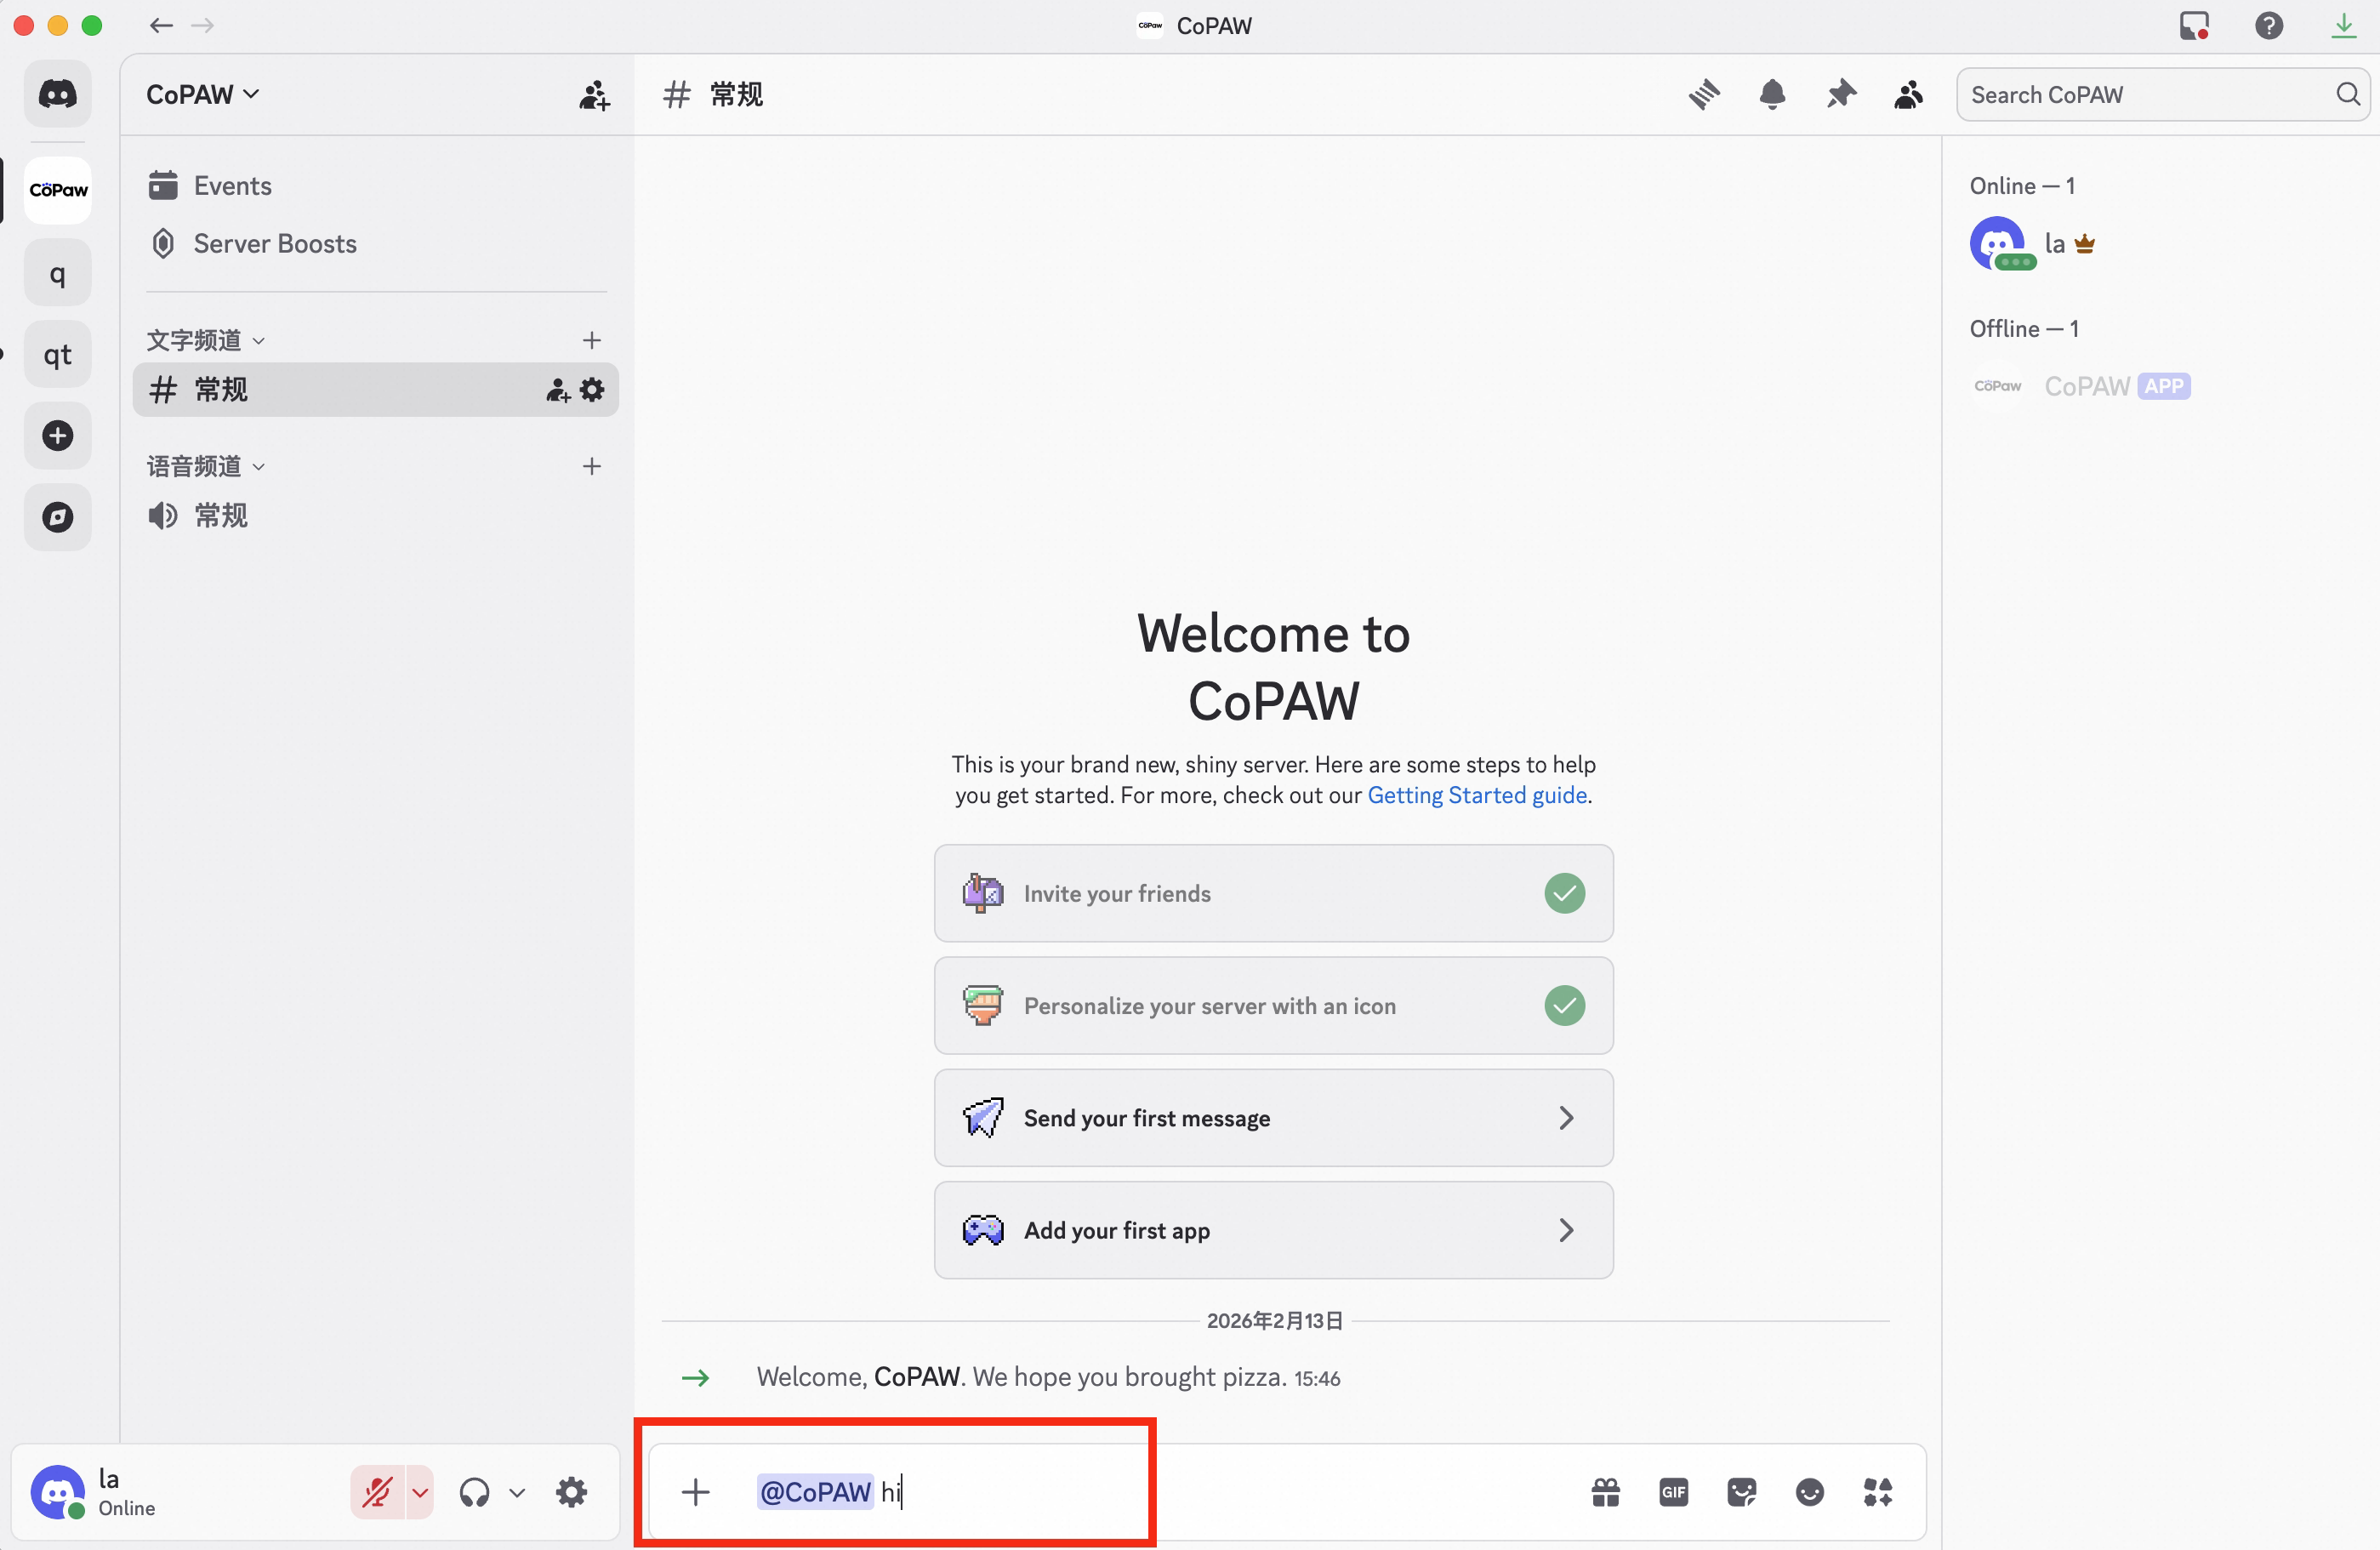
A channel is where you talk to CoPaw: connect DingTalk and it replies in DingTalk; same for QQ, etc. If that term is new, see Introduction.
Two ways to configure channels:
- Console (recommended) — In the Console under Control → Channels, click a channel card, enable it and fill in credentials in the drawer. Changes take effect when you save.
- Edit
config.jsondirectly — Default~/.copaw/config.json(created bycopaw init), setenabled: trueand fill in that platform's credentials. Saving triggers a reload without restarting the app.
All channels share two fields:
- enabled — Turn the channel on or off.
- bot_prefix — Prefix for bot replies (e.g.
[BOT]) so they're easy to spot.
Below is how to get credentials and fill config for each channel.
DingTalk (recommended)
Create a DingTalk app
Video tutorial:
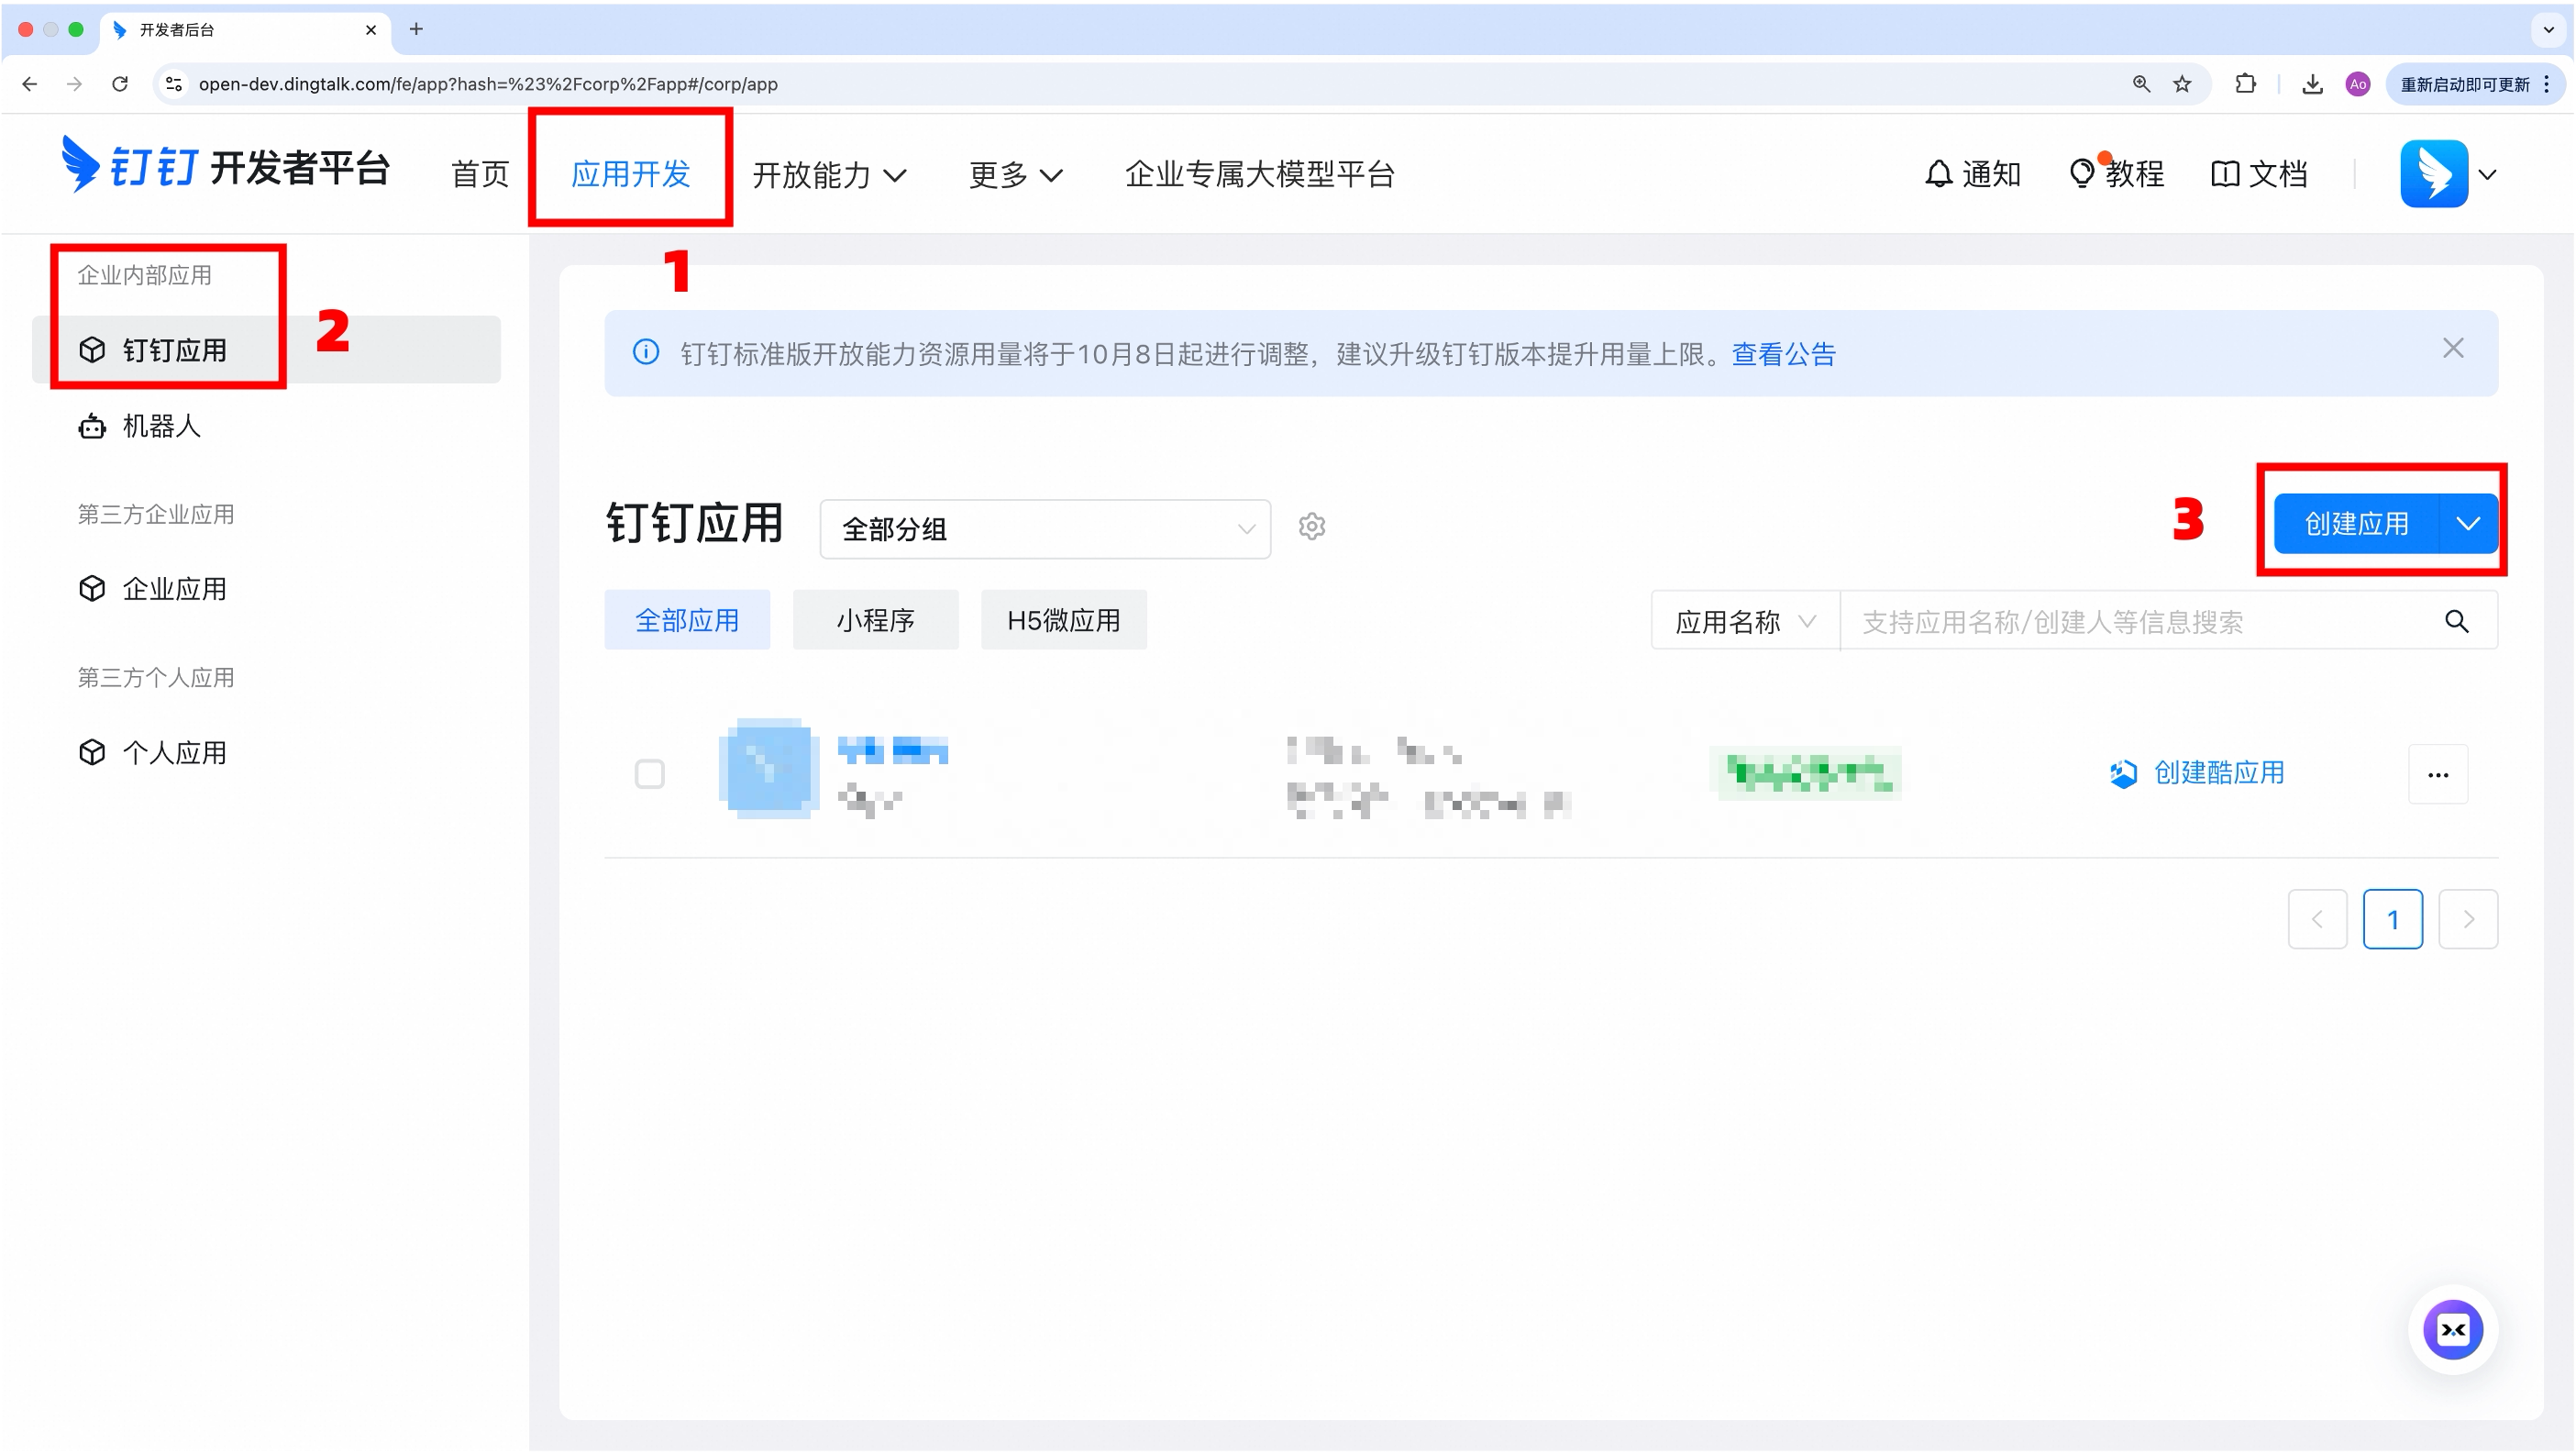
Step-by-step:
-
Open the DingTalk Developer Portal
-
Create an internal enterprise app
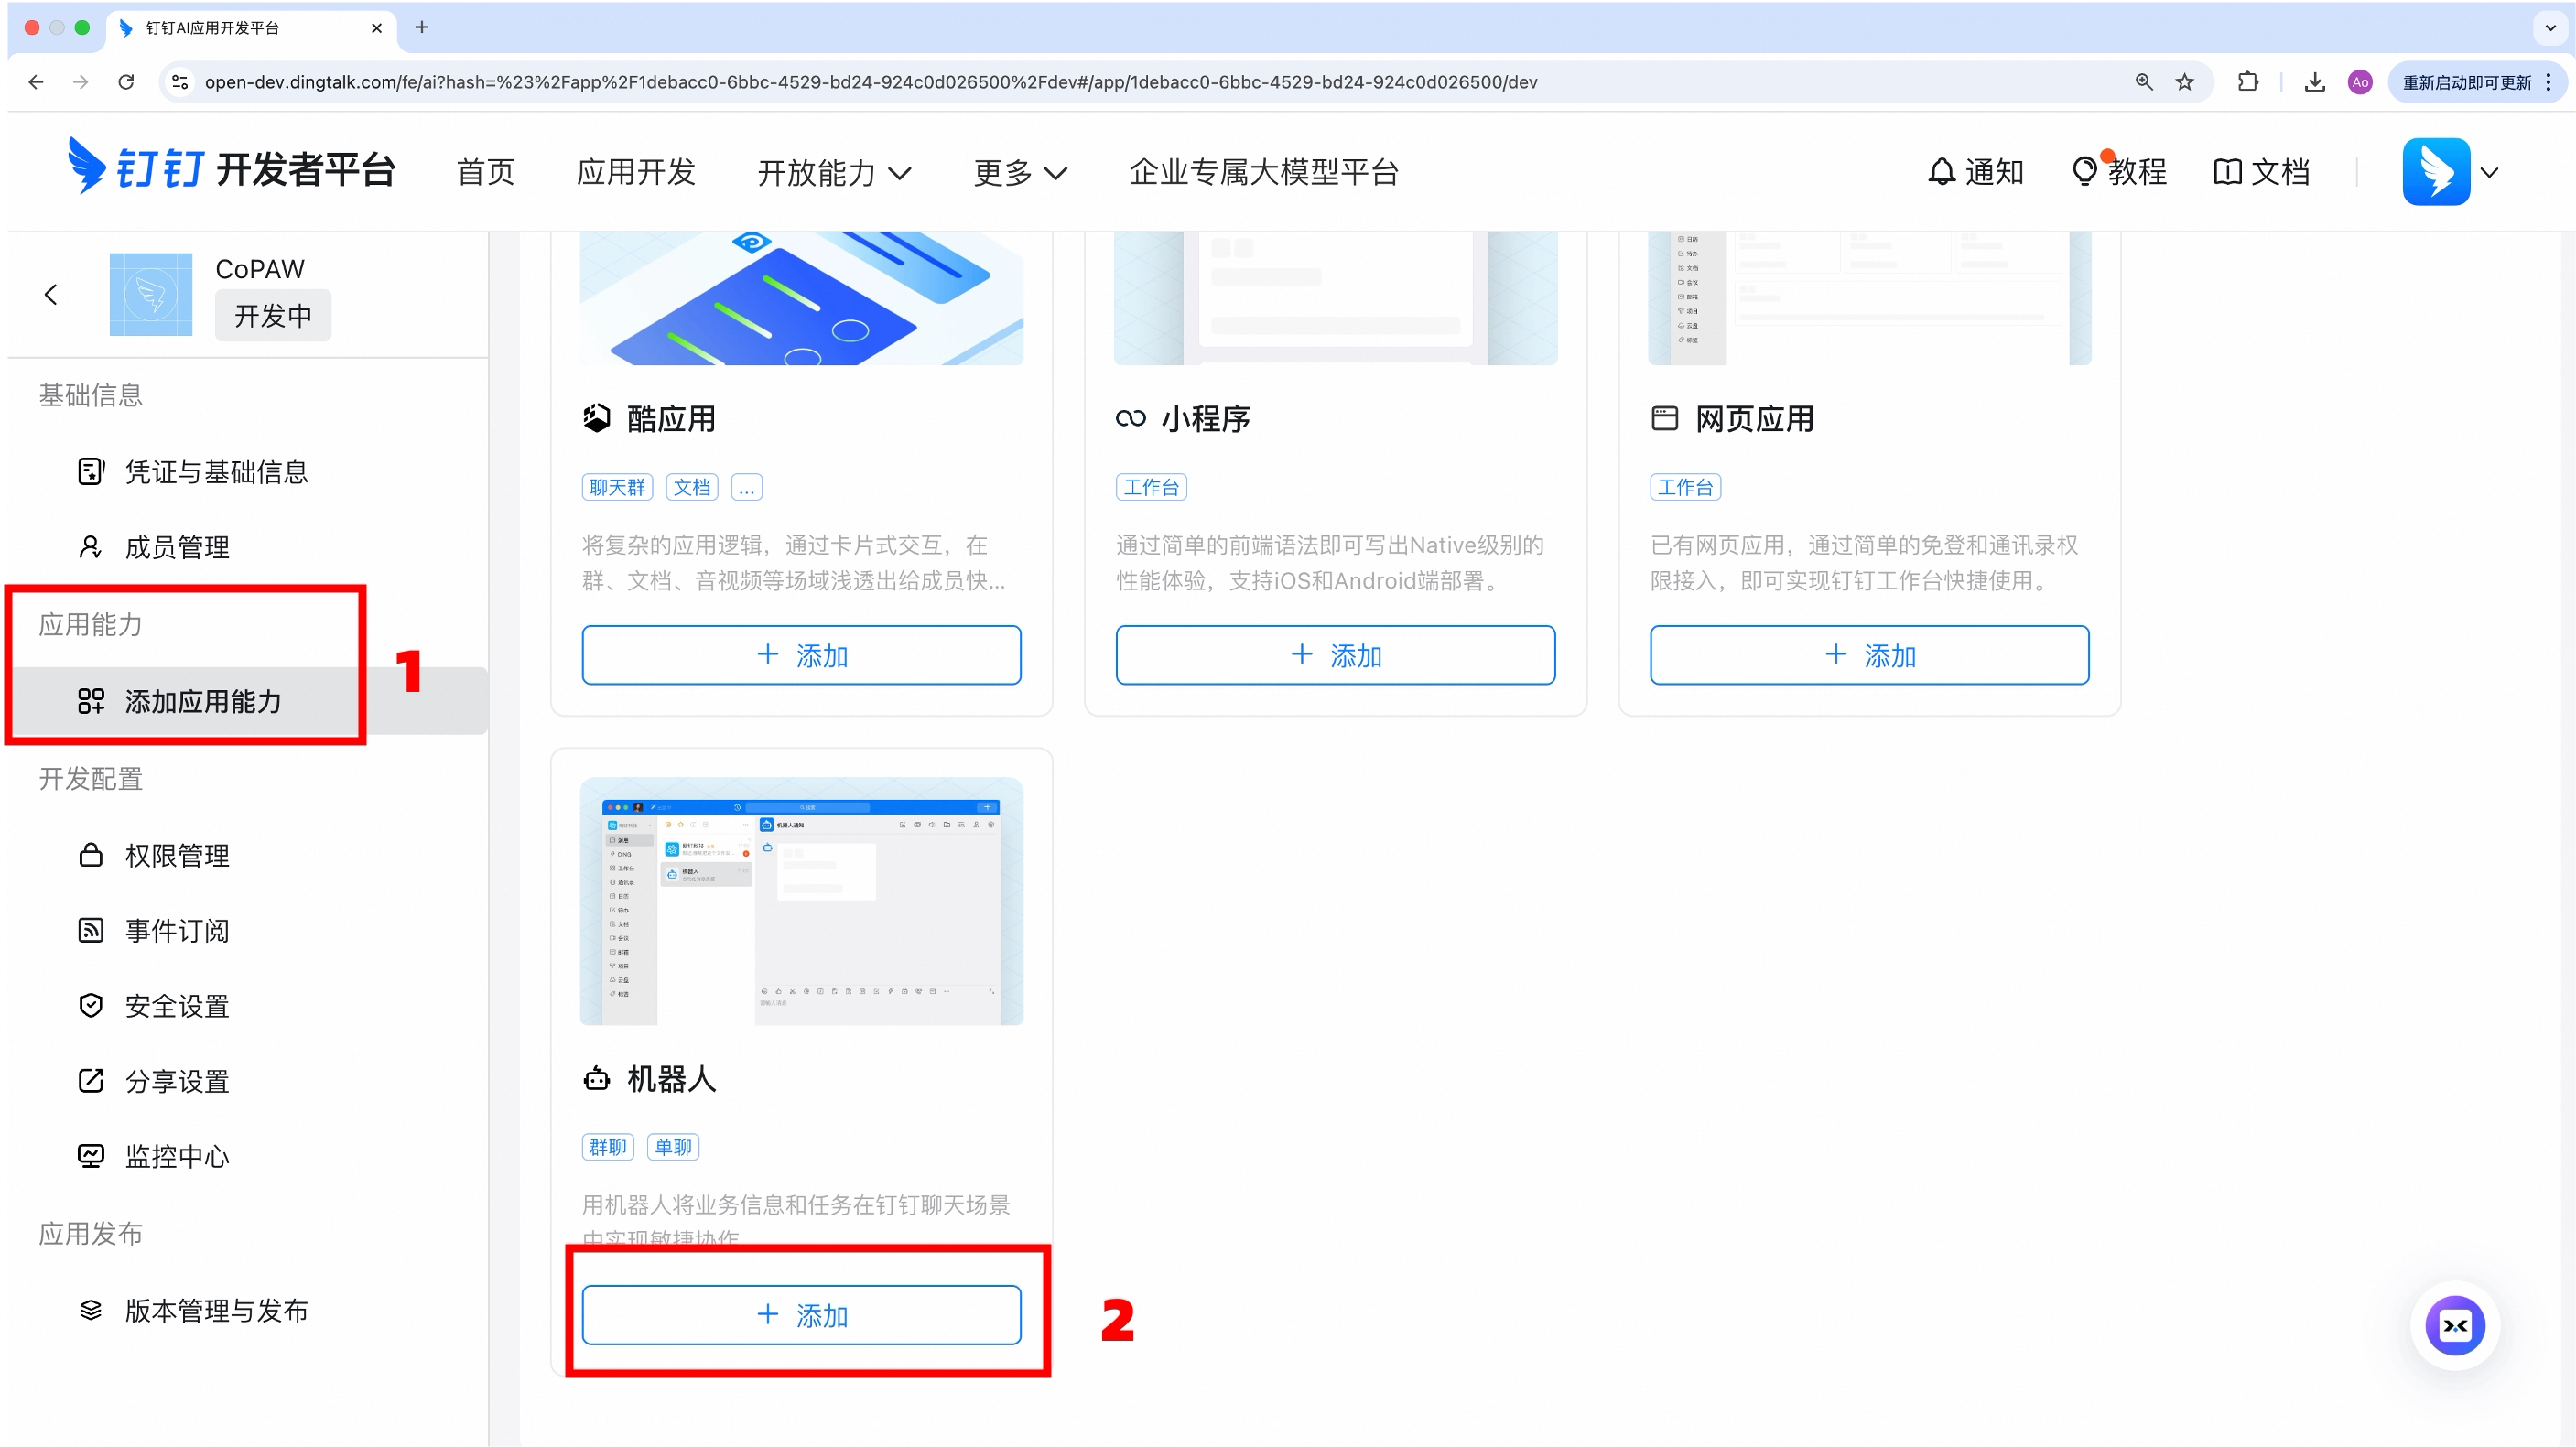
-
Add the «Robot» capability
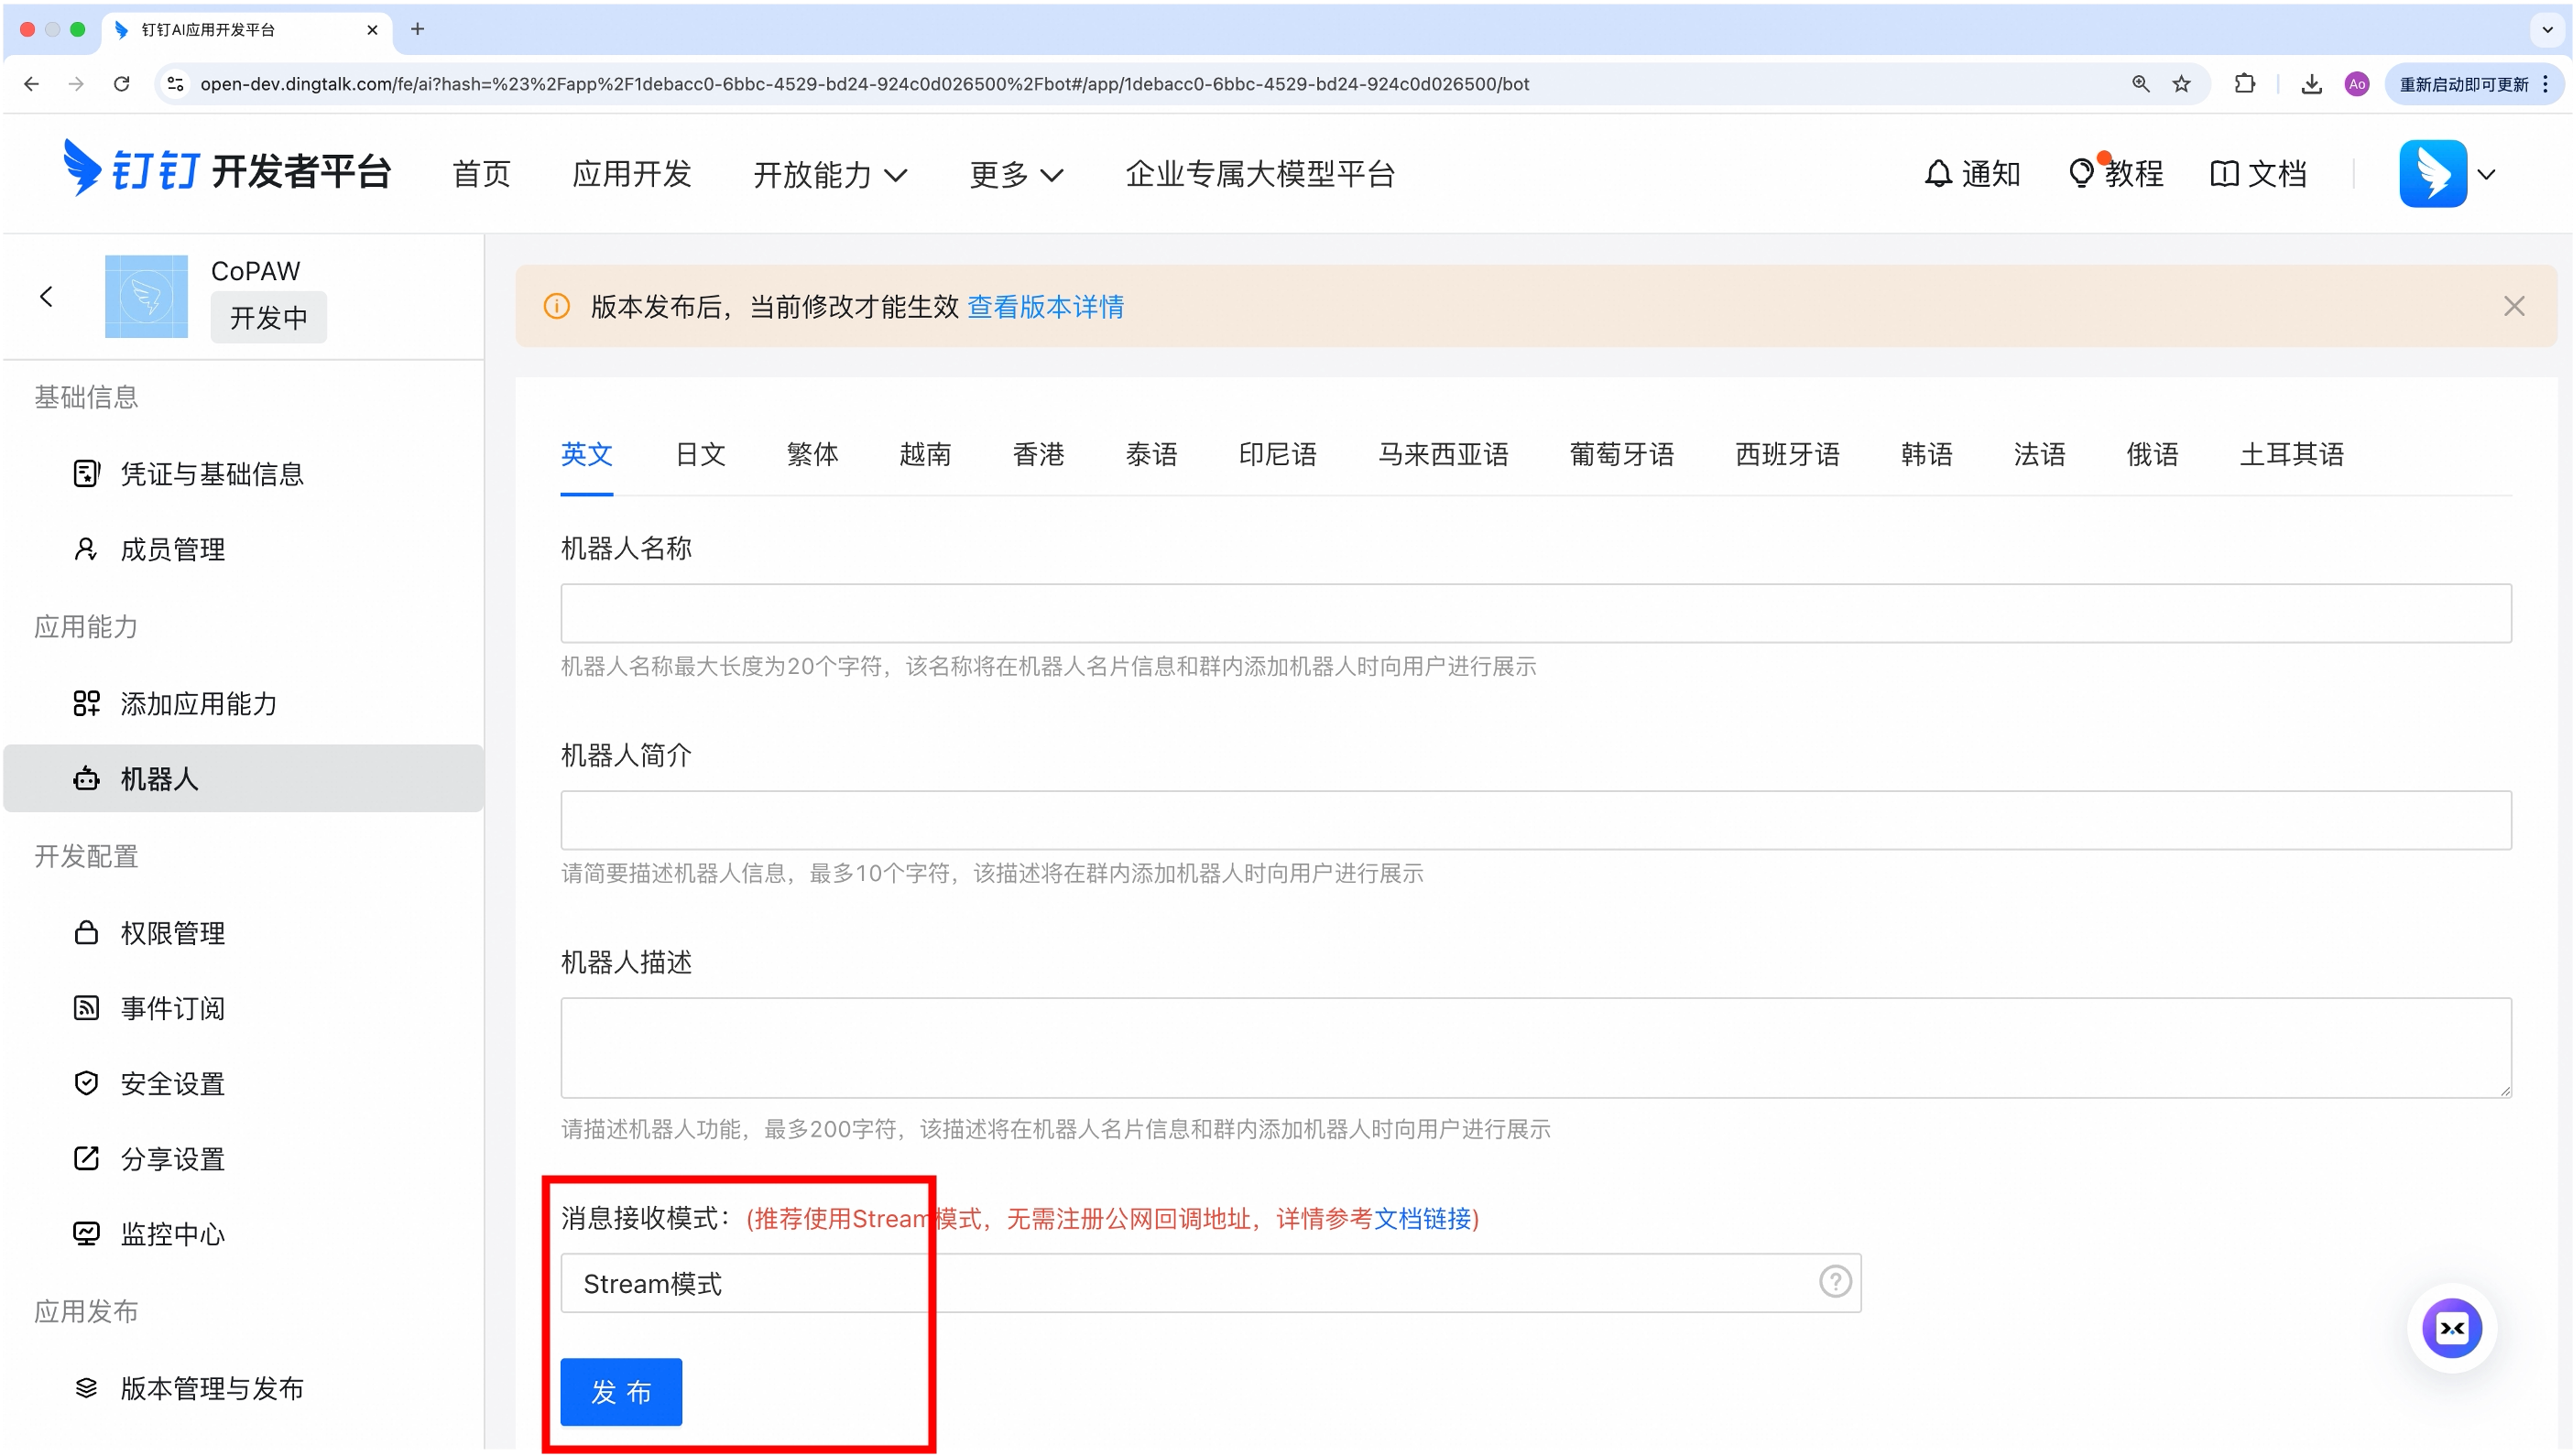
-
Set message receiving mode to Stream then publish

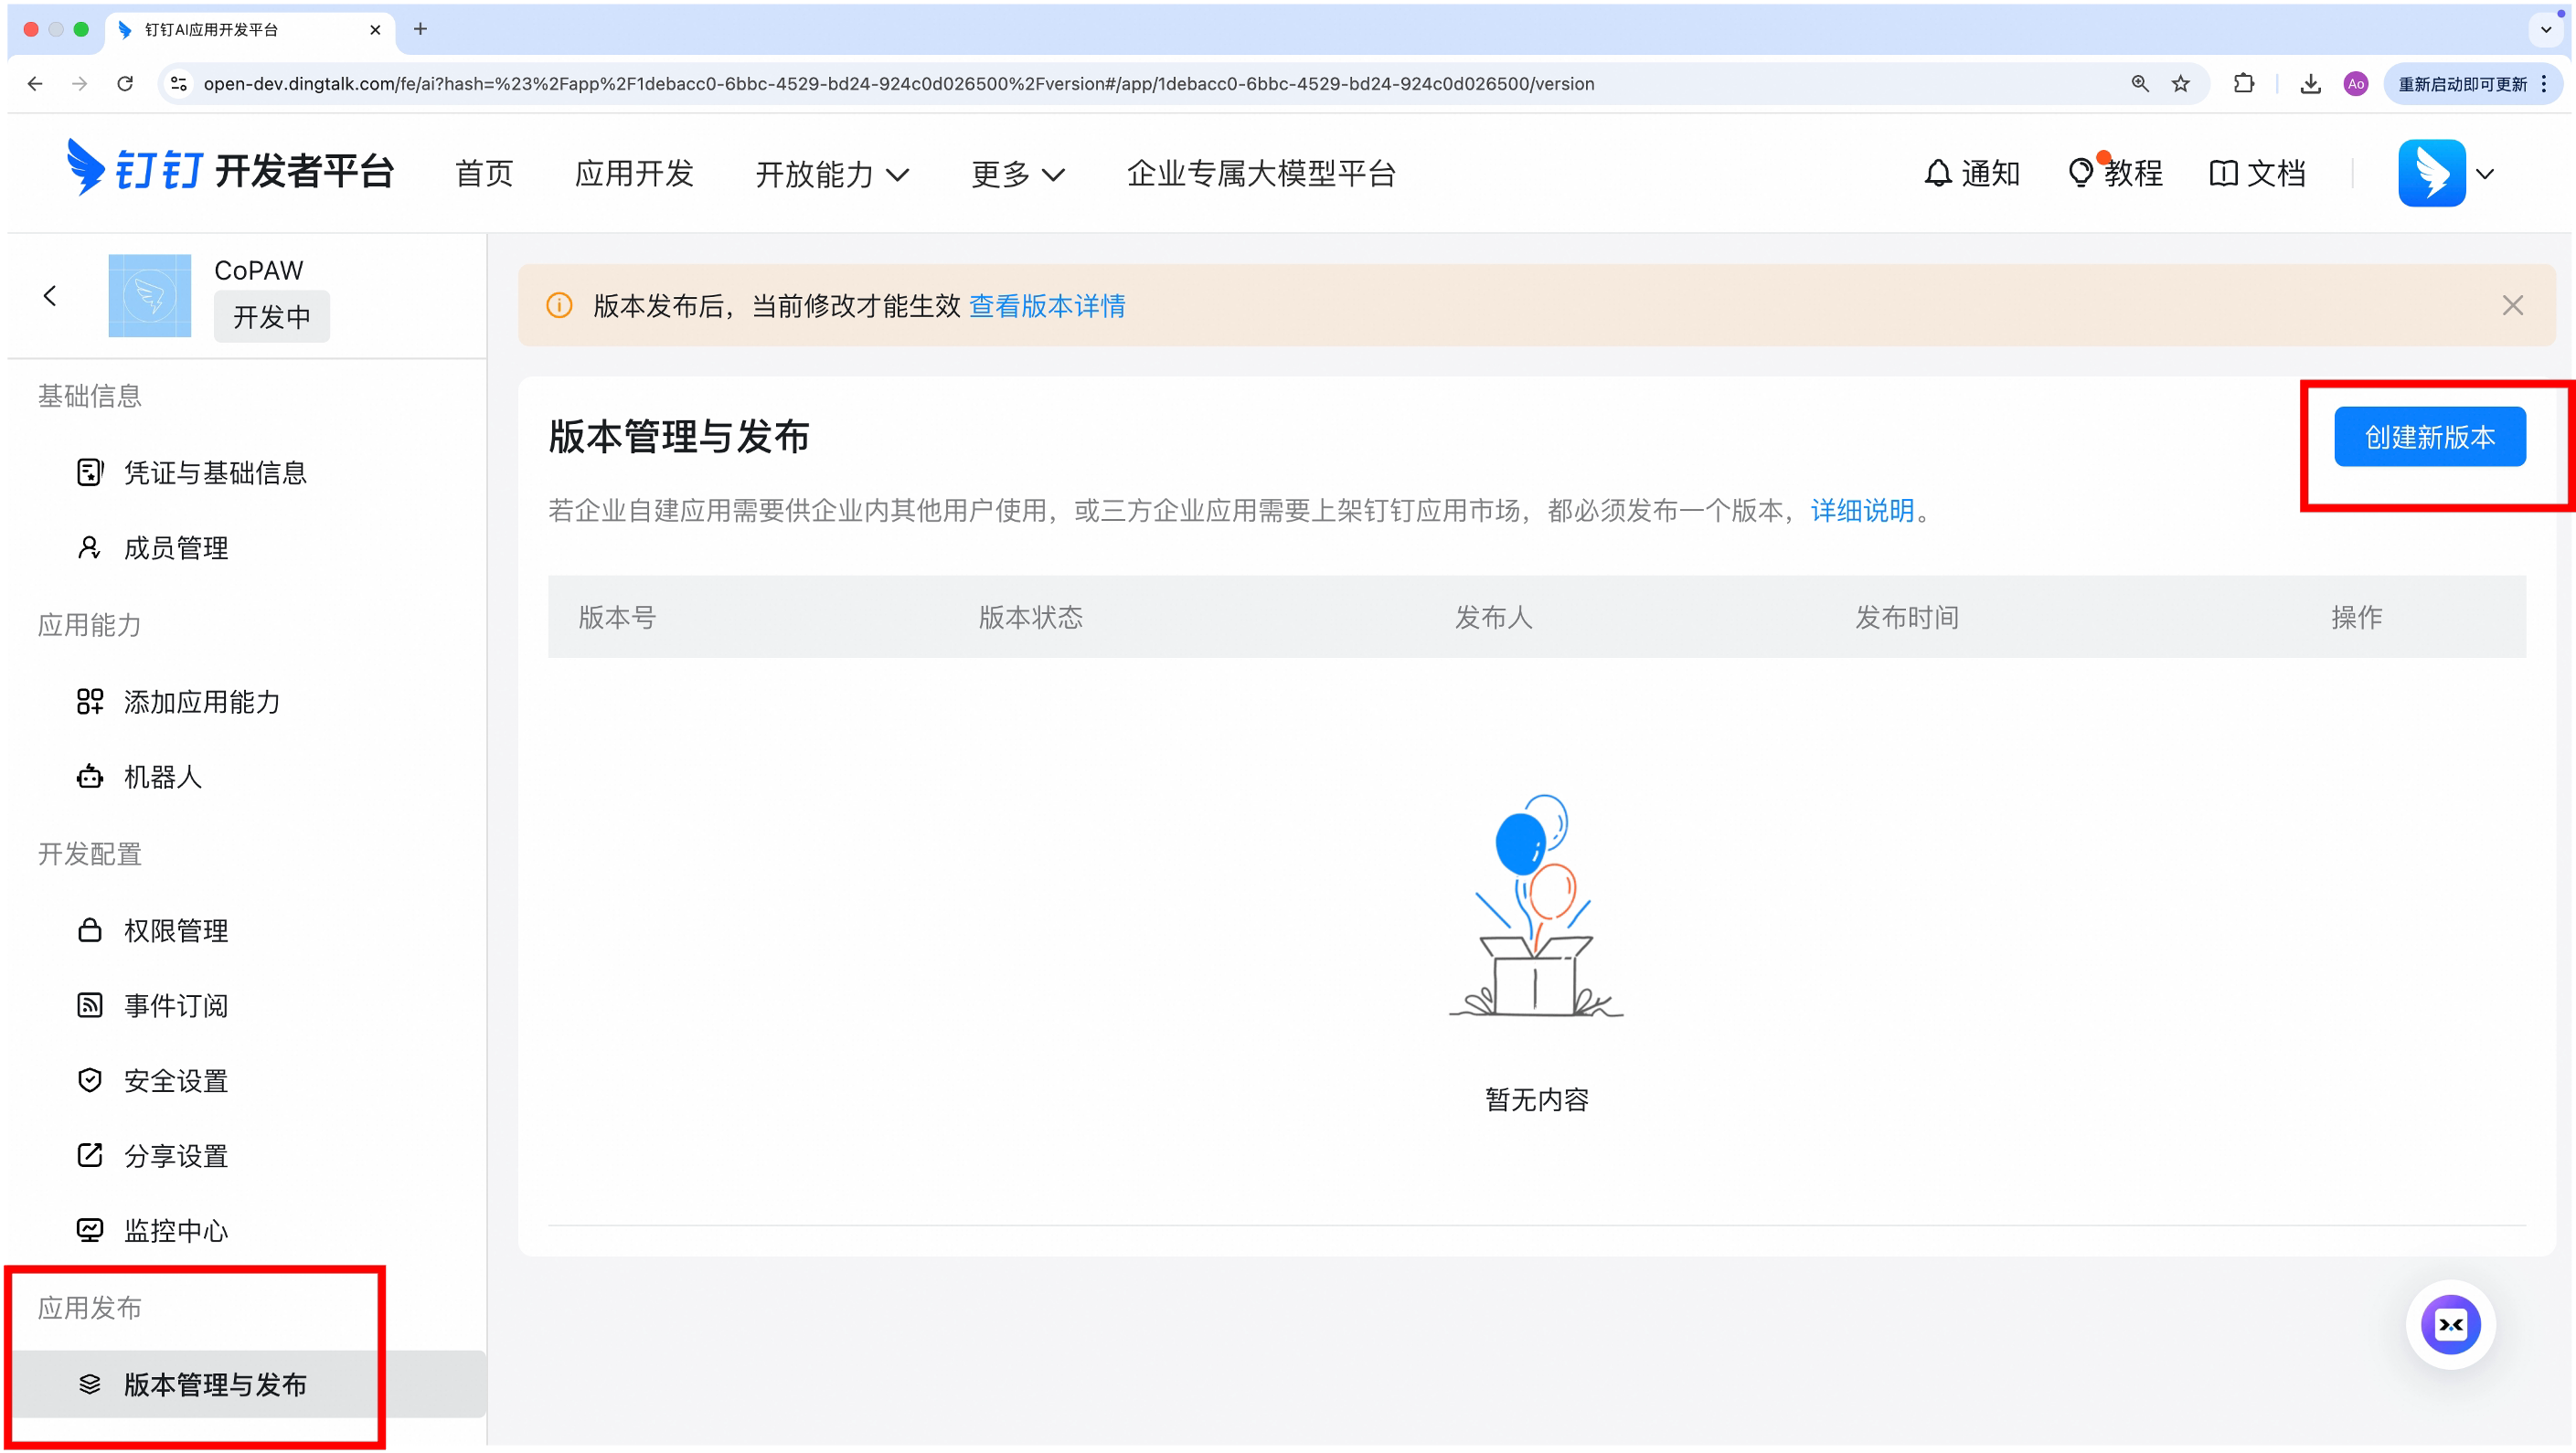
-
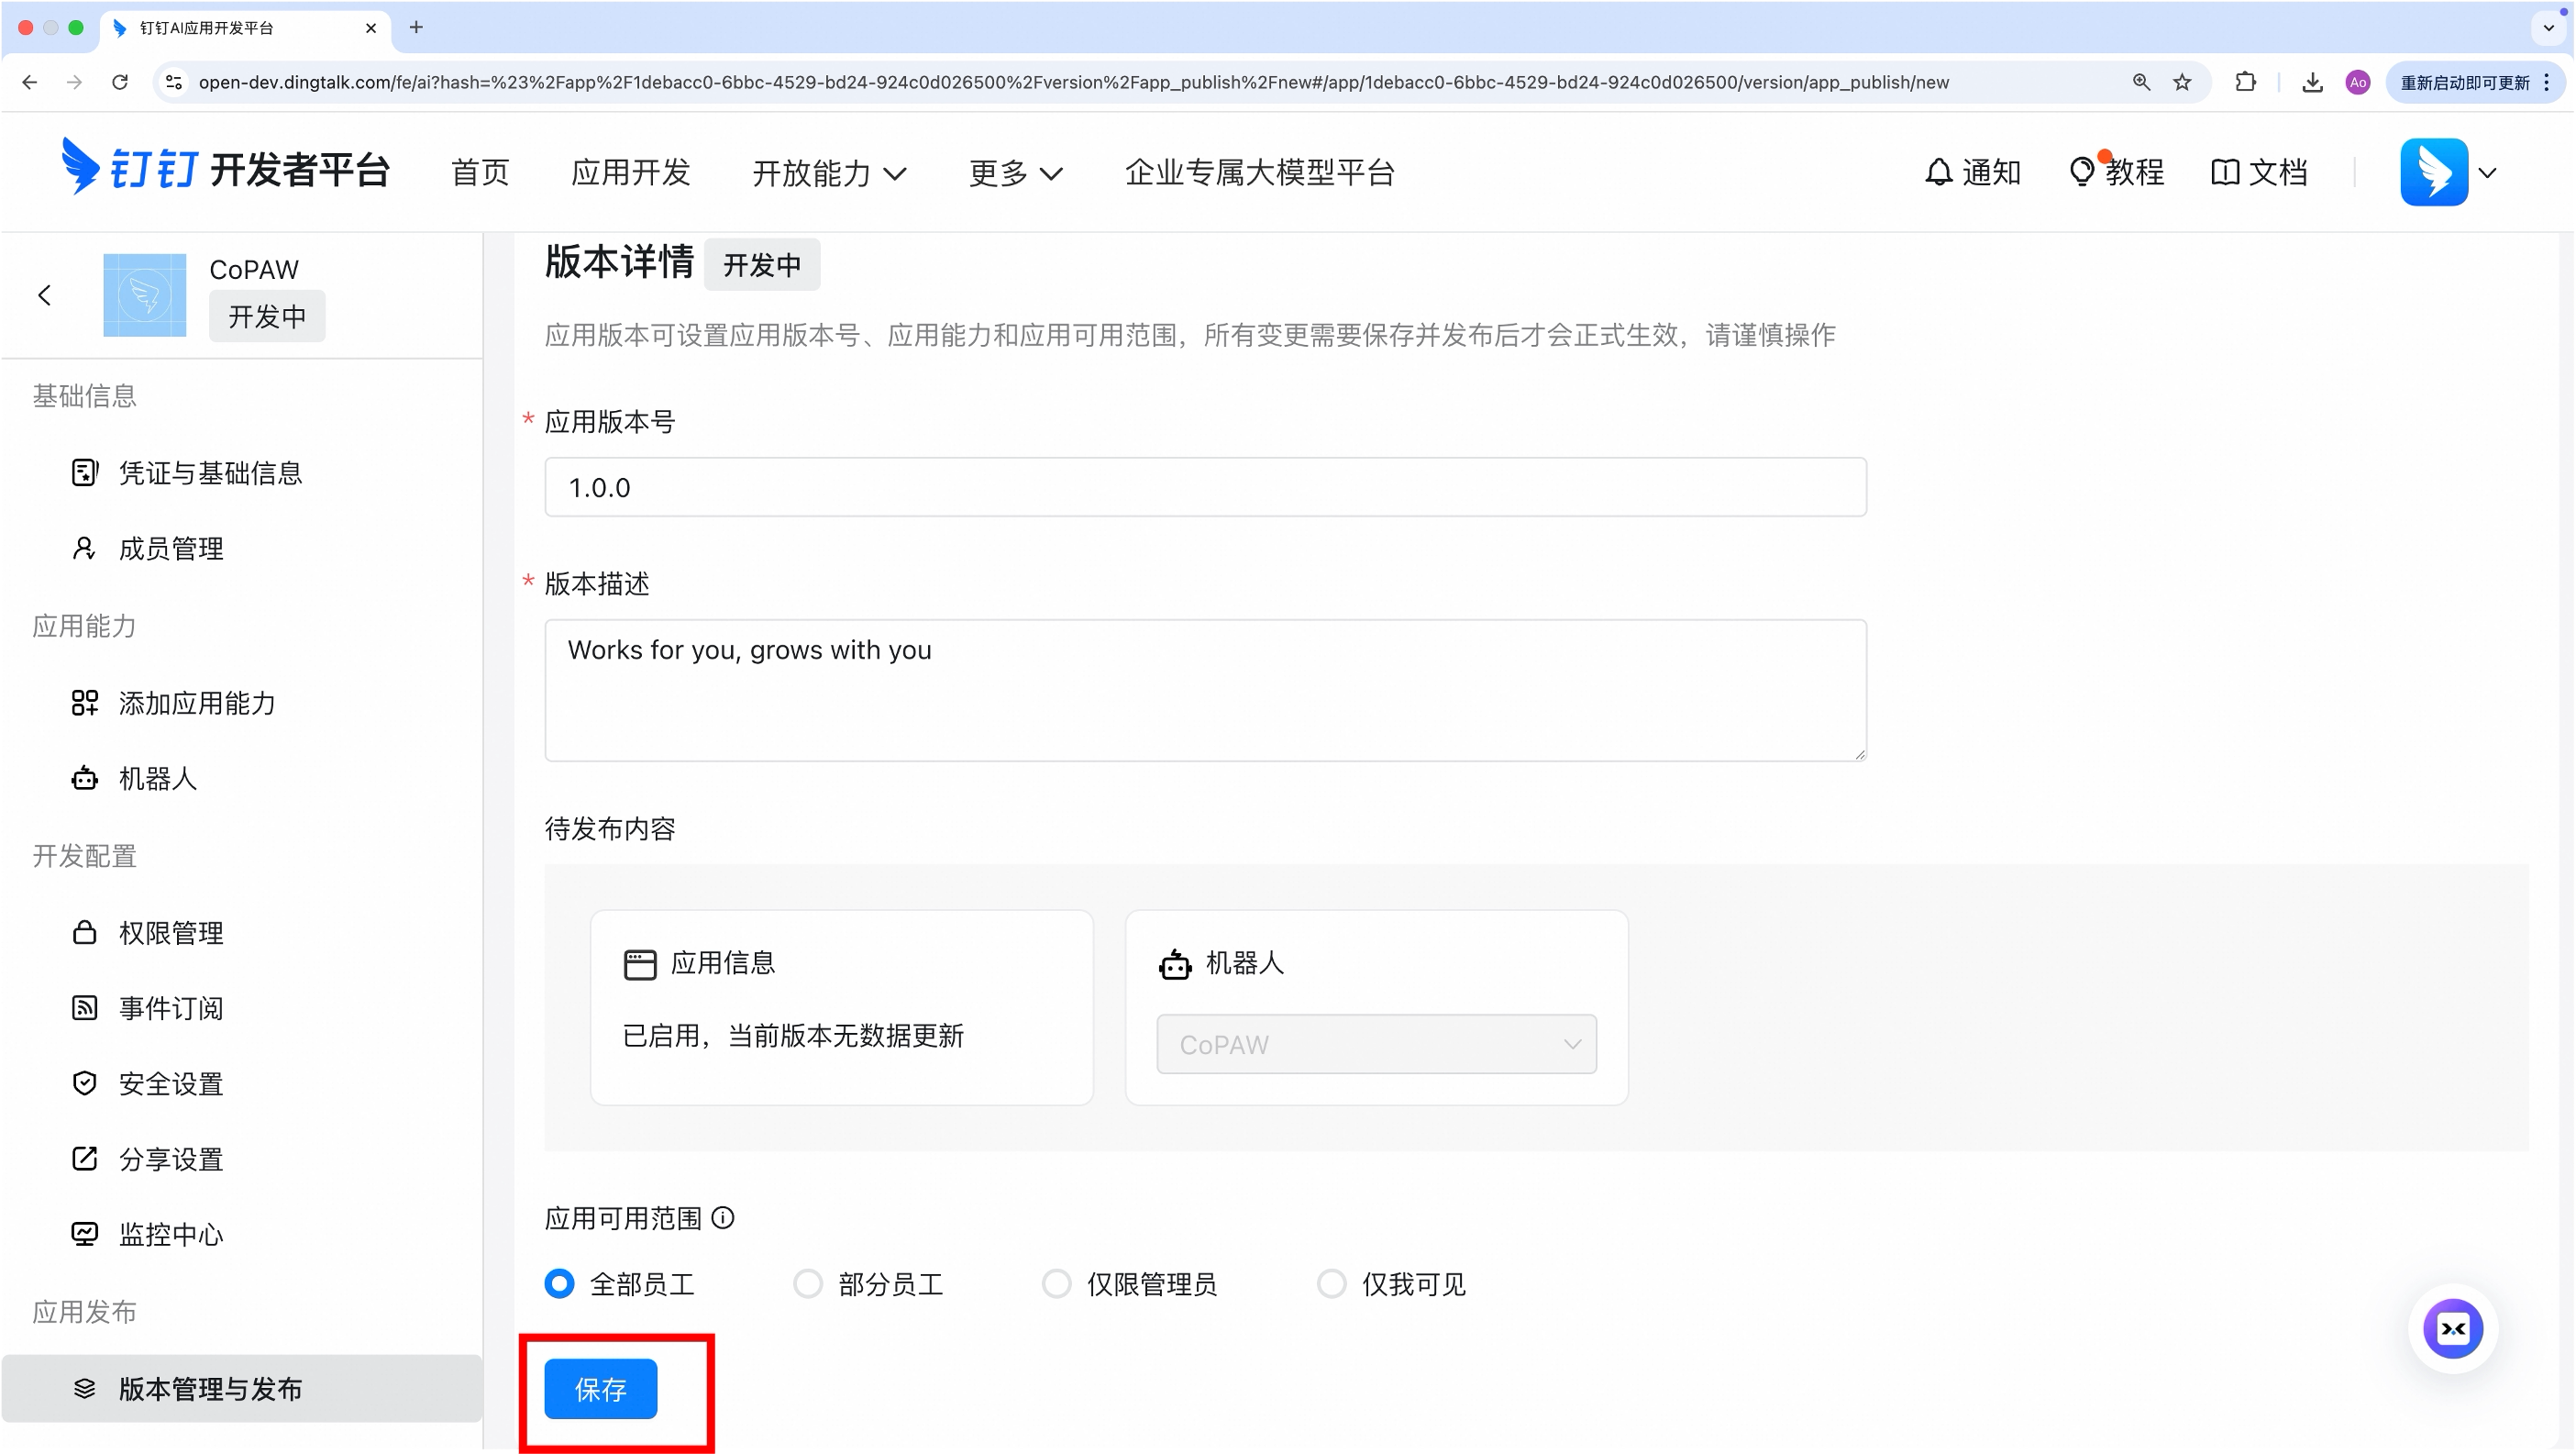
Create a new version to publish, fill in basic info and save
-
In the app details, copy:
- Client ID (AppKey)
- Client Secret (AppSecret)

-
(Optional) Add your server's IP to the whitelist — this is required for features that call the DingTalk Open API (e.g. downloading images and files sent by users). Go to "Security & Compliance → IP Whitelist" in your app settings and add the public IP of the machine running CoPaw. You can find your public IP by running
curl ifconfig.mein a terminal. If the IP is not whitelisted, image and file downloads will fail with aForbidden.AccessDenied.IpNotInWhiteListerror.
Link the app
You can configure it either in the Console frontend or by editing ~/.copaw/config.json.
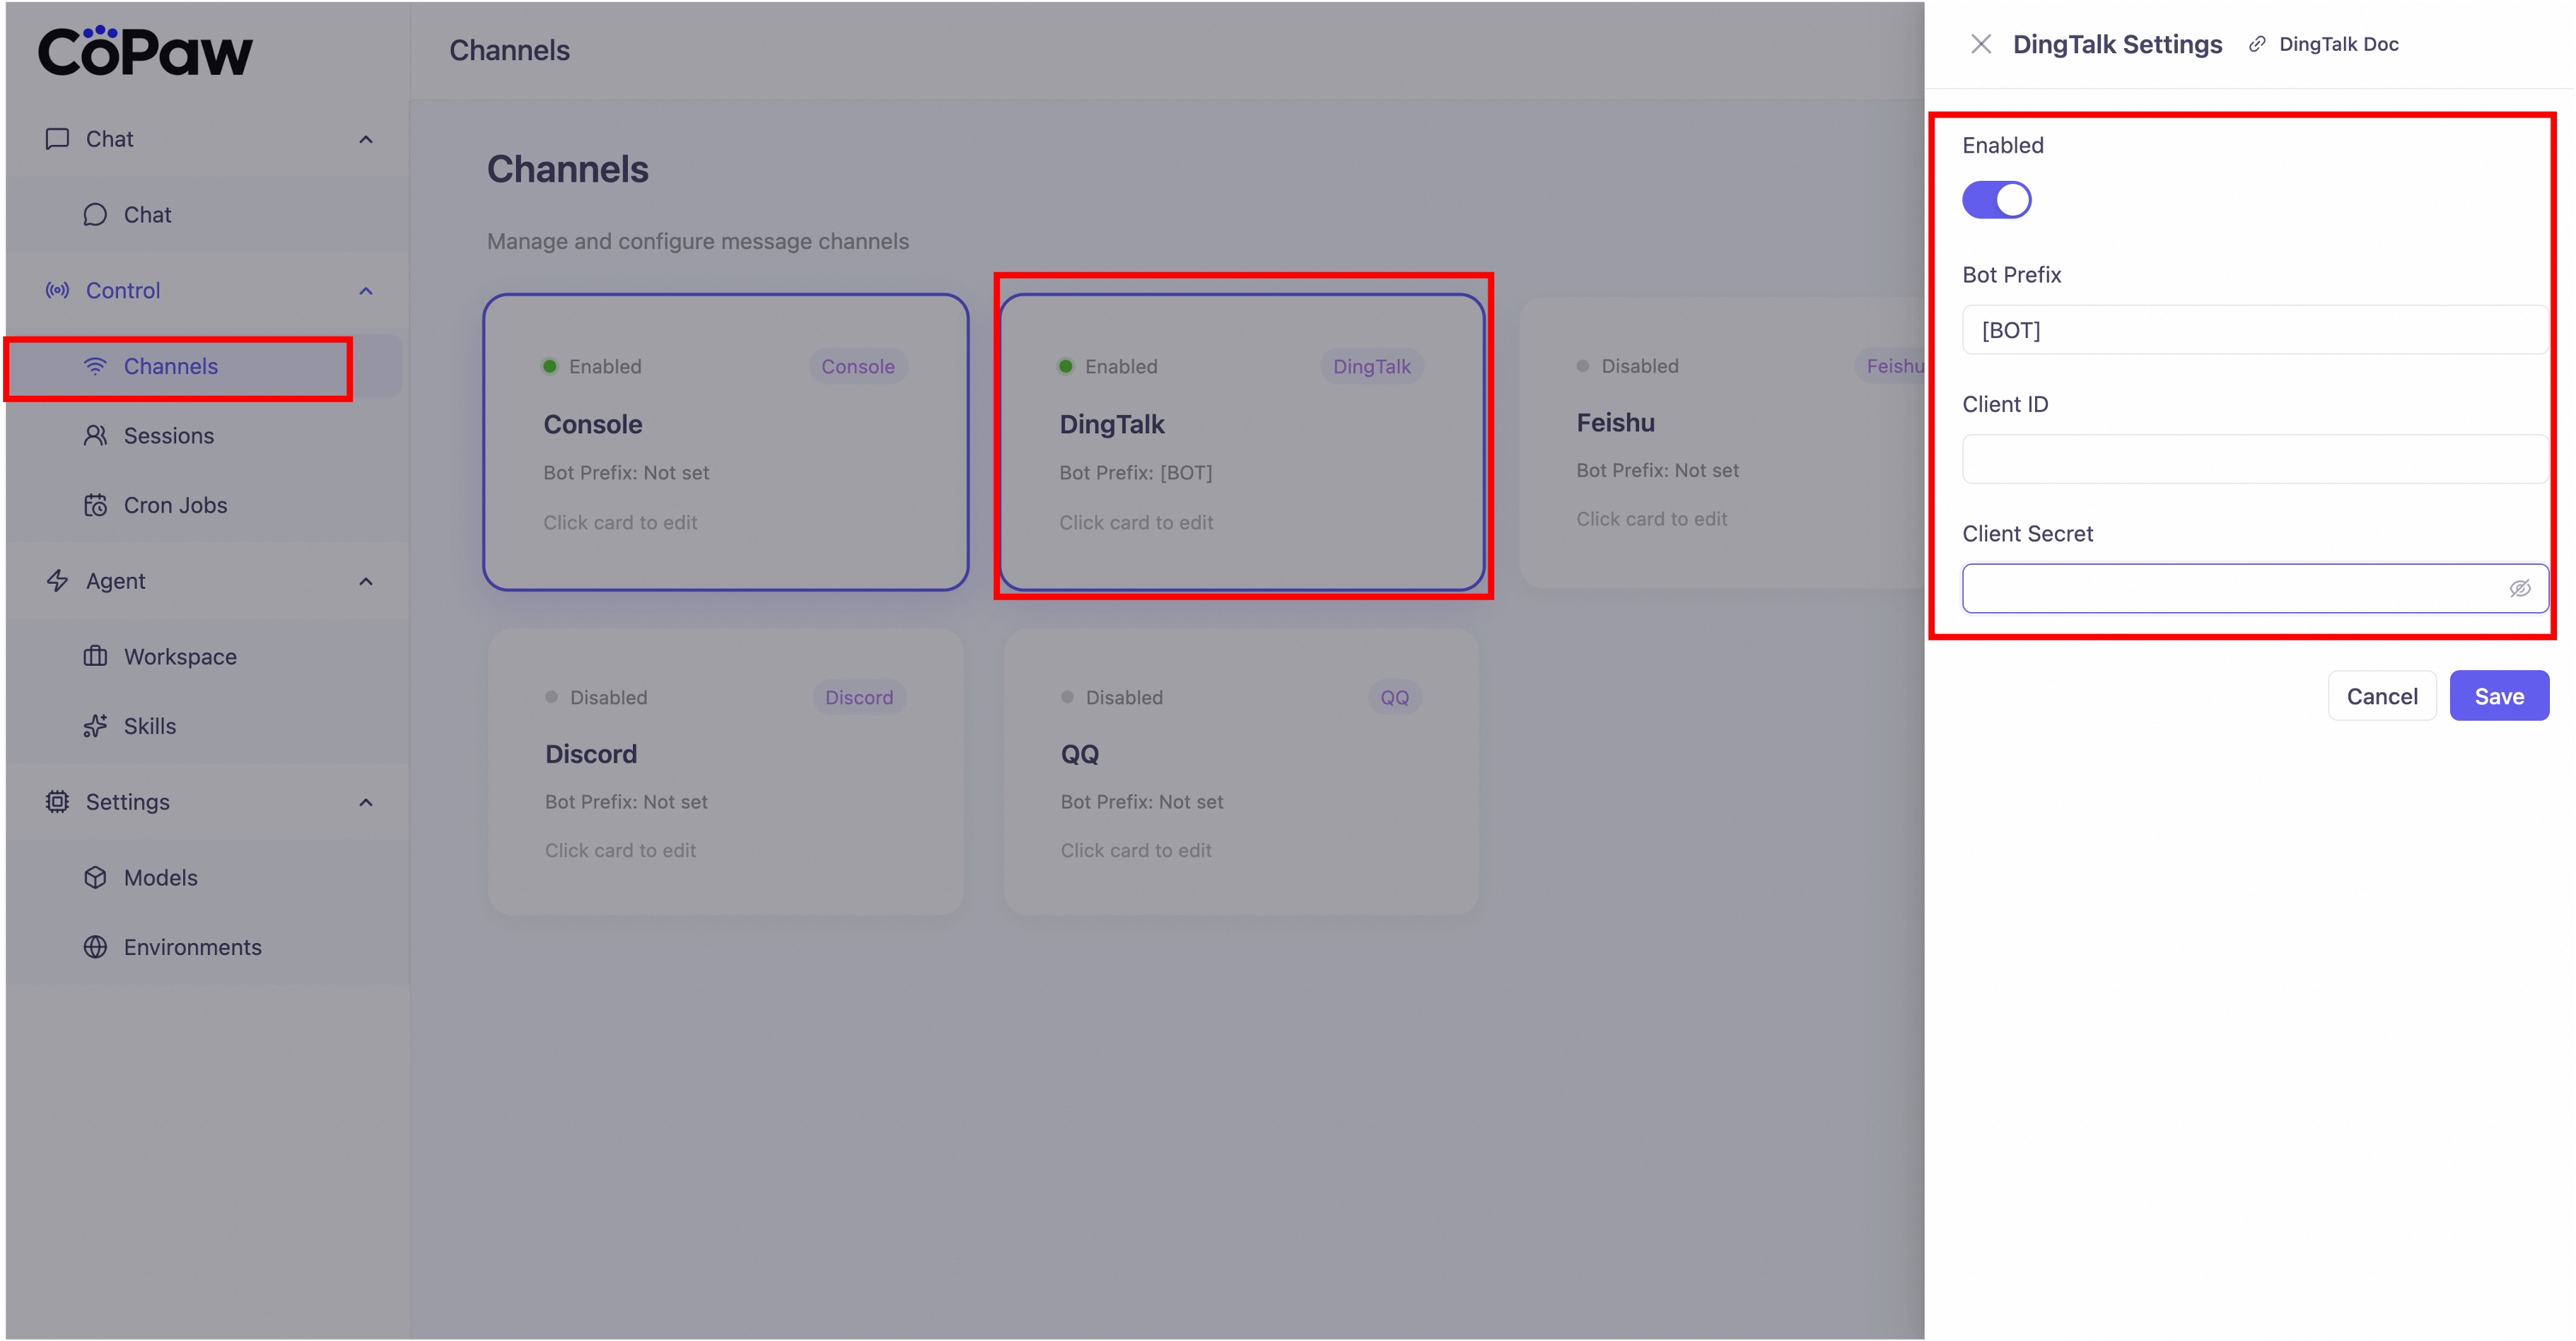
Method 1: Configure in the Console frontend
Go to "Control→Channels", find DingTalk, click it, and enter the Client ID and Client Secret you just obtained.
Method 2: Edit ~/.copaw/config.json
In config.json, find channels.dingtalk and fill in the corresponding information, for example:
"dingtalk": {
  "enabled": true,
  "bot_prefix": "[BOT]",
  "client_id": "your Client ID",
  "client_secret": "your Client Secret"
}
Save the file; if the app is already running, the channel will reload. Otherwise run copaw app.
Find the created app
Video tutorial:
Step-by-step:
-
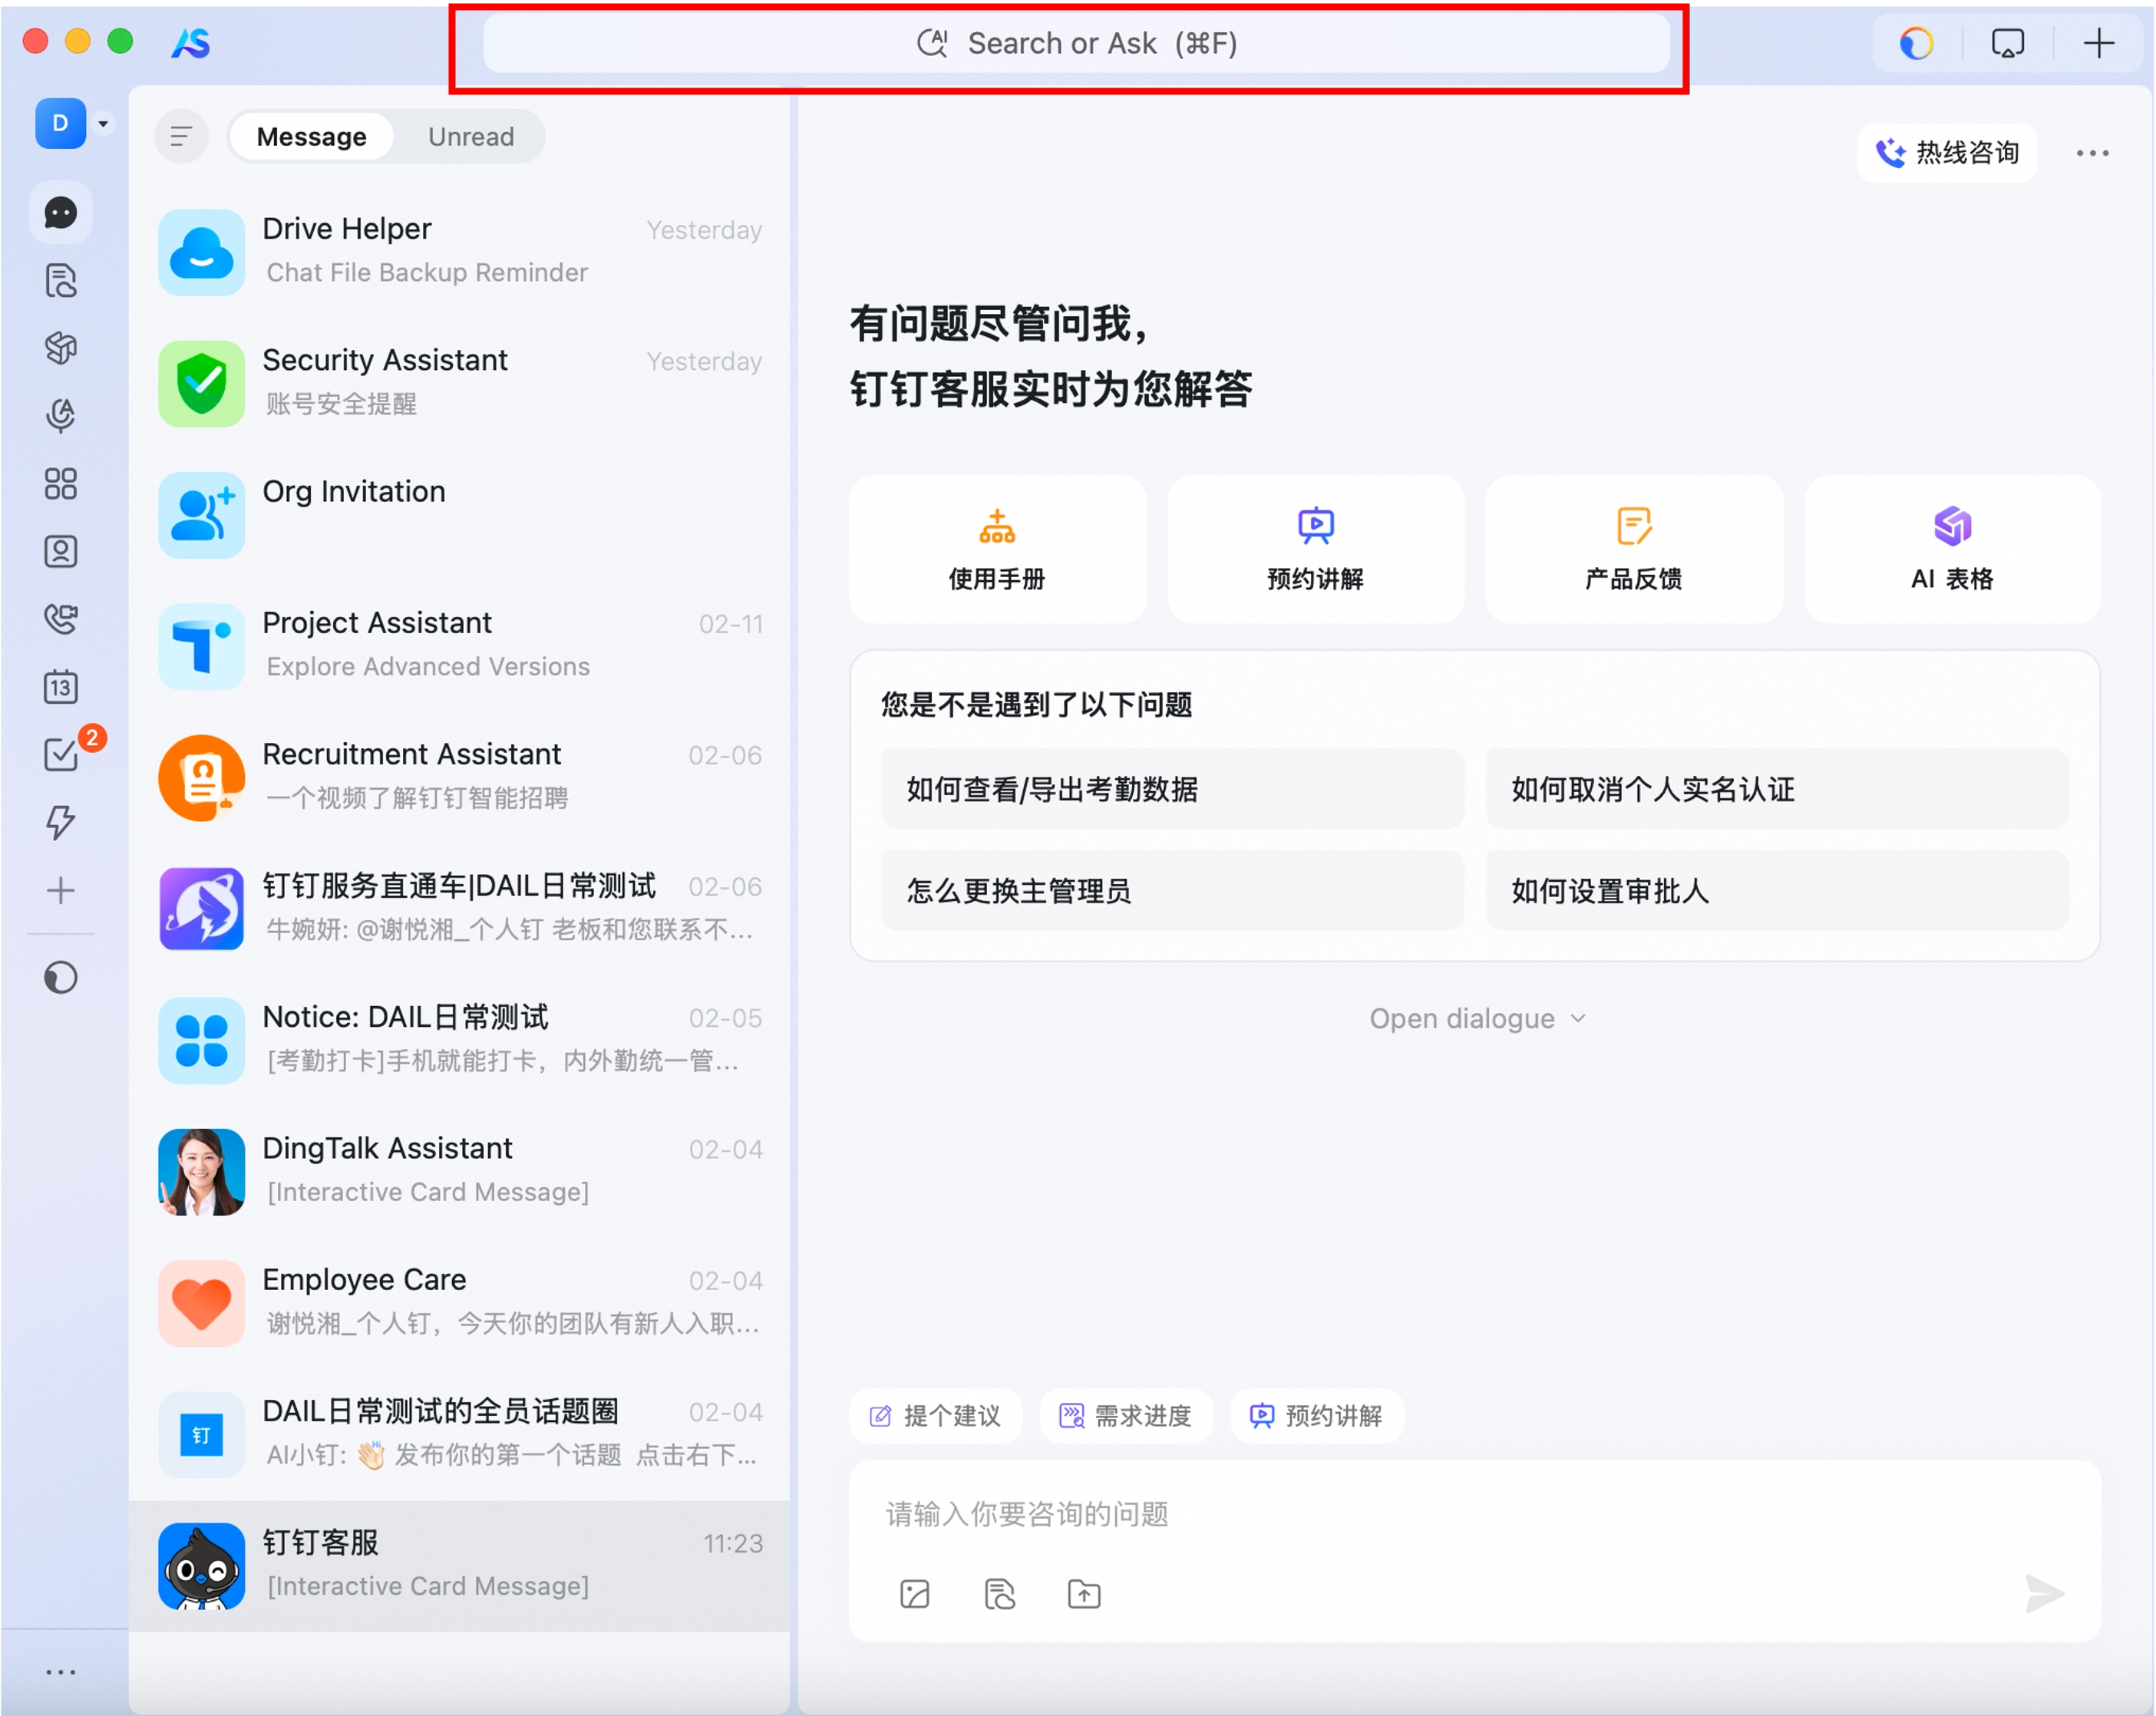
In DingTalk, tap the search box in the [Messages] tab
-
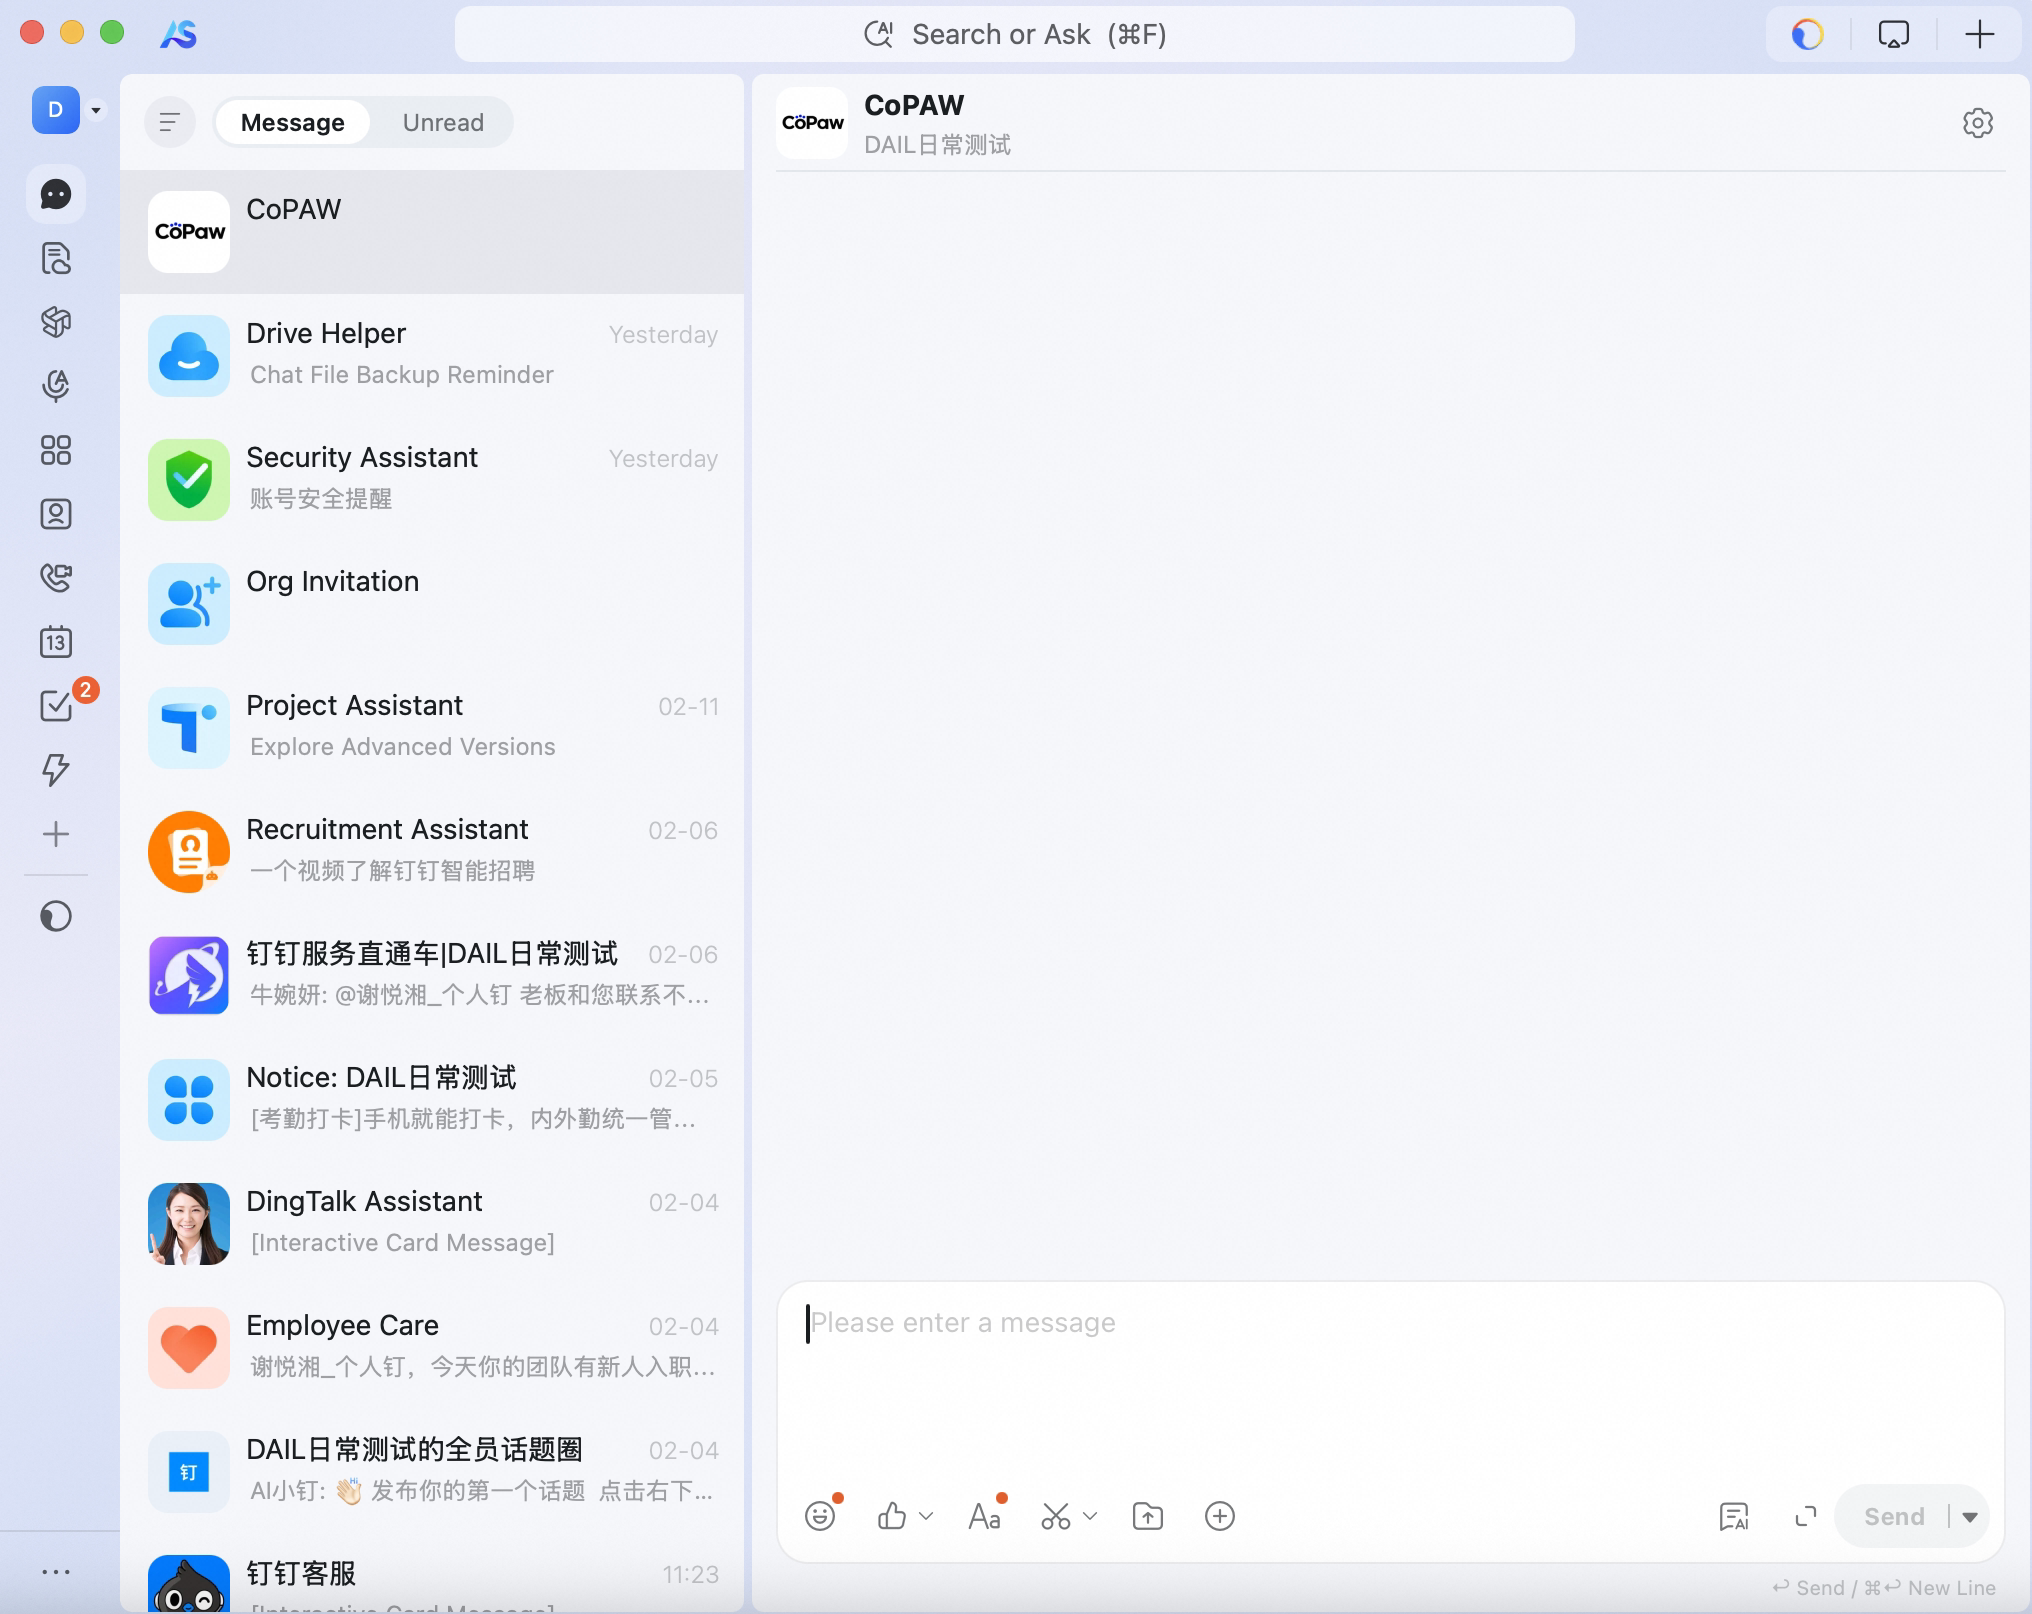
Search for the bot name you just created; find the bot under [Functions]

-
Tap to open the chat
You can add the bot to a group chat via Group Settings → Bots → Add a robot in DingTalk. If you create a group chat from your one-on-one chat with the bot, the bot's replies will not be triggered.
Feishu (Lark)
The Feishu channel receives messages via WebSocket long connection (no public IP or webhook). Sending uses the Feishu Open API. It supports text, image, and file in both directions. For group chats, chat_id and message_id are included in the request message metadata for downstream deduplication and context.
Create a Feishu app and get credentials
-
Open the Feishu Open Platform and create an enterprise app
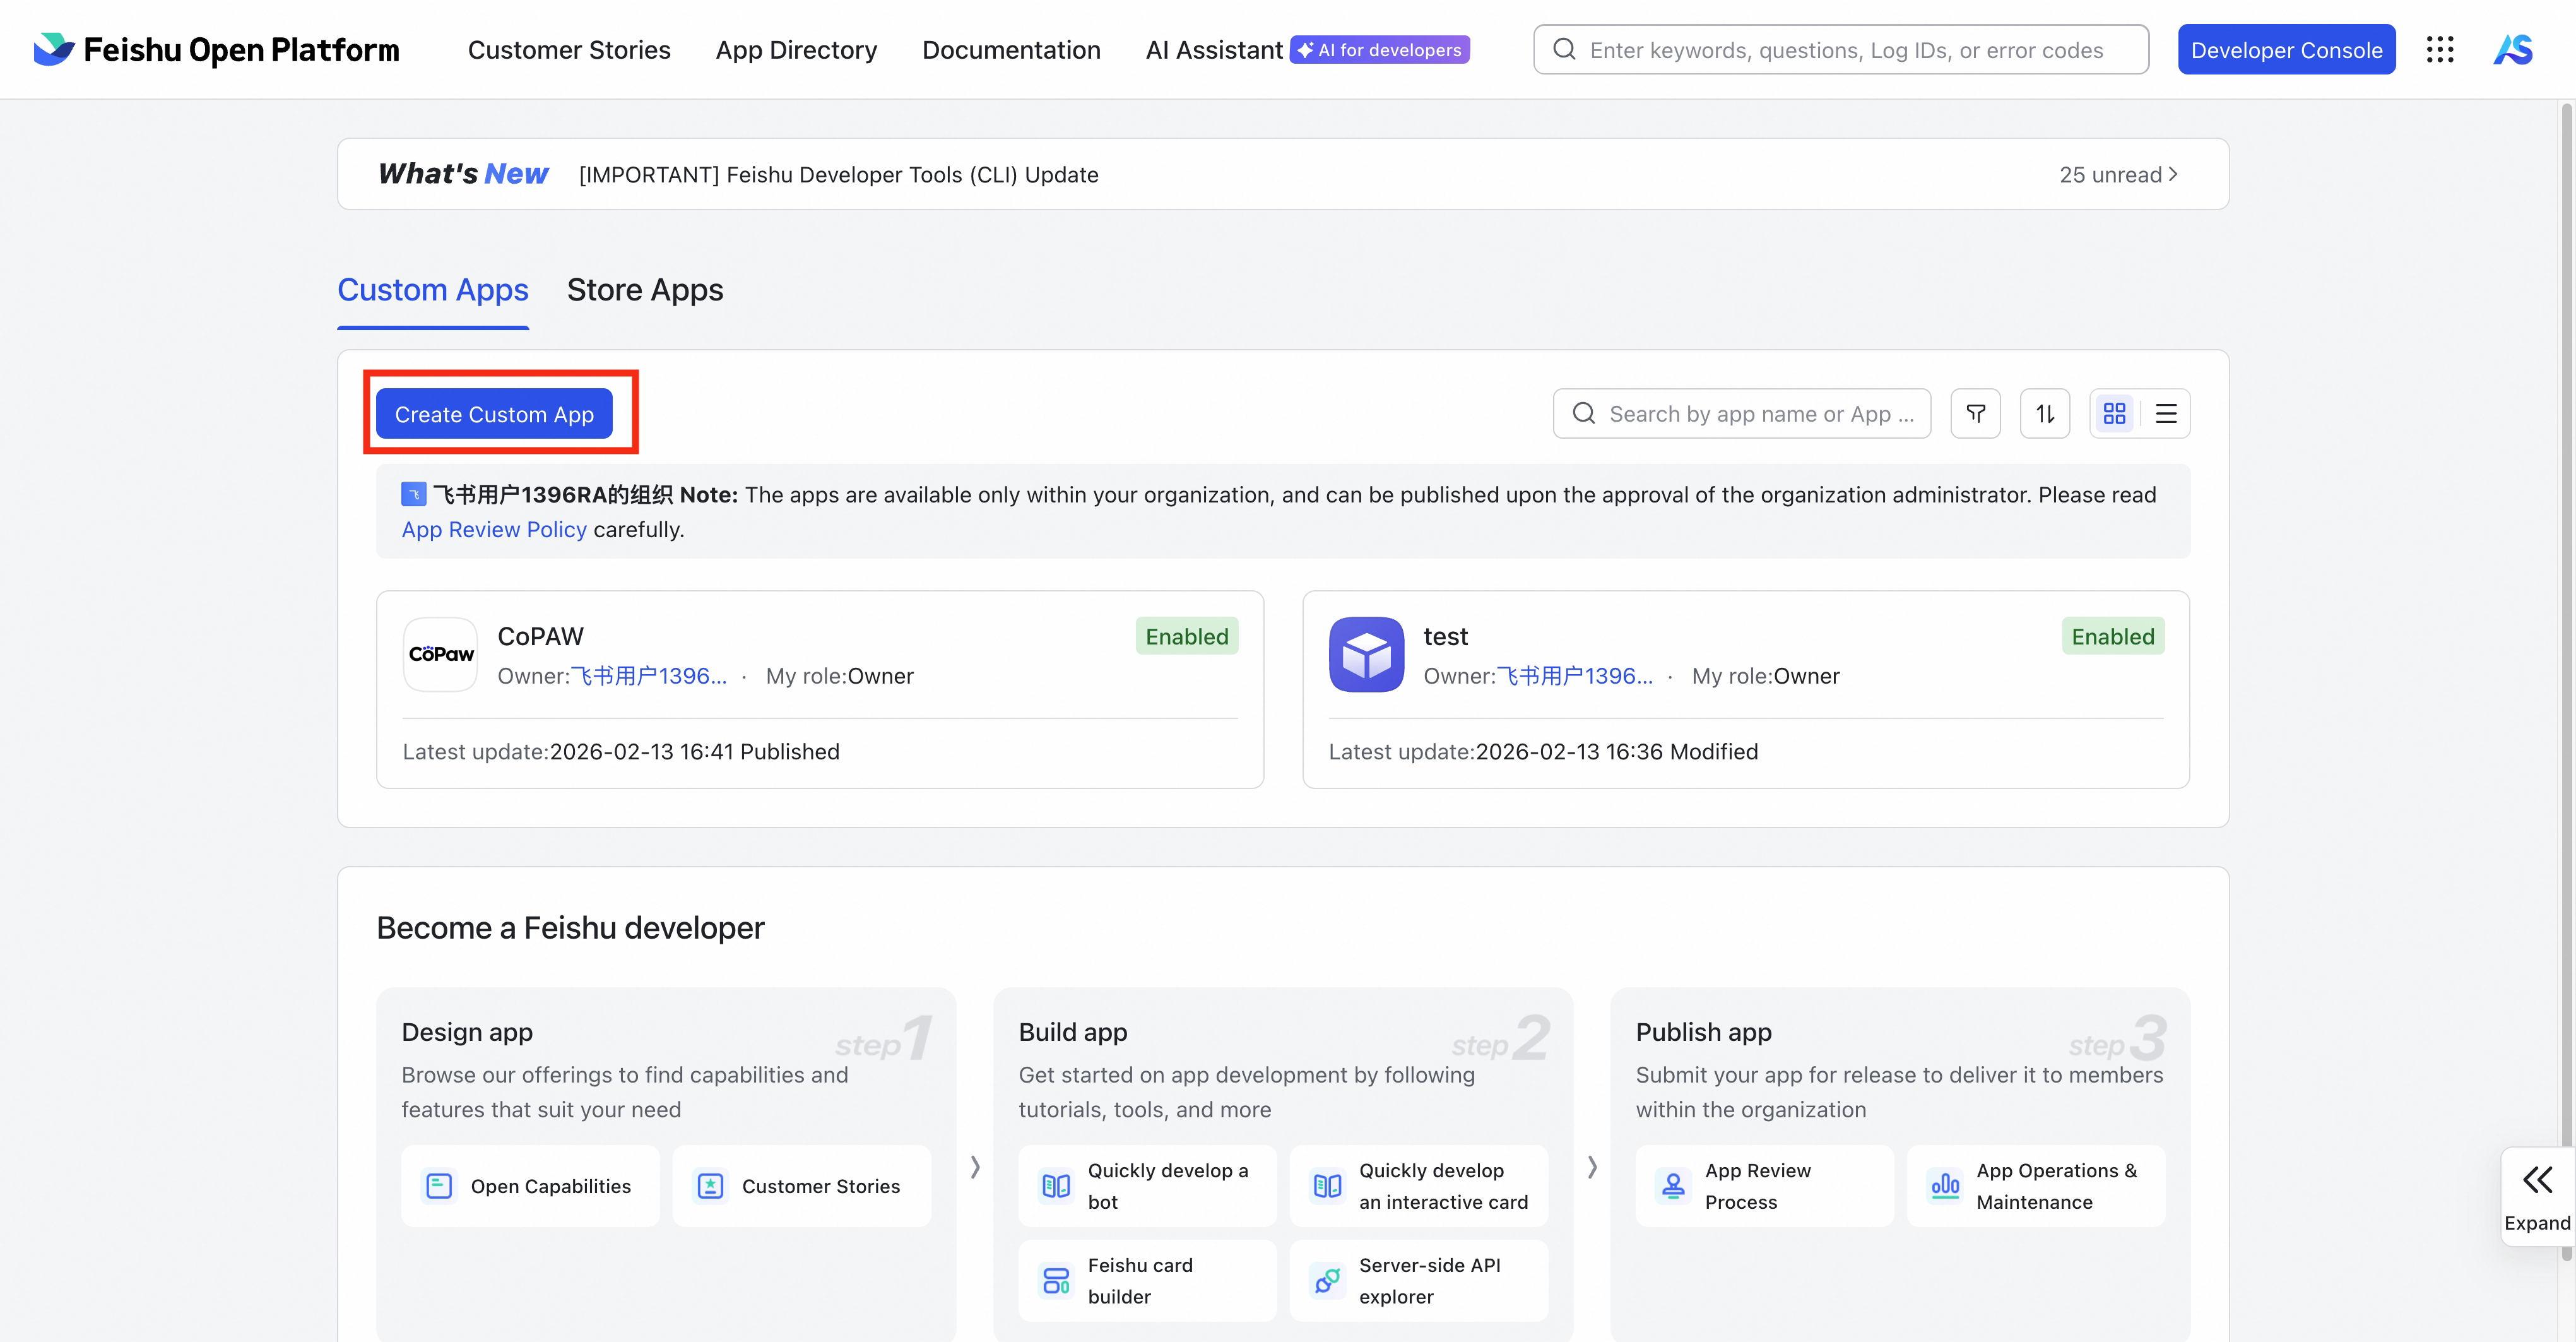
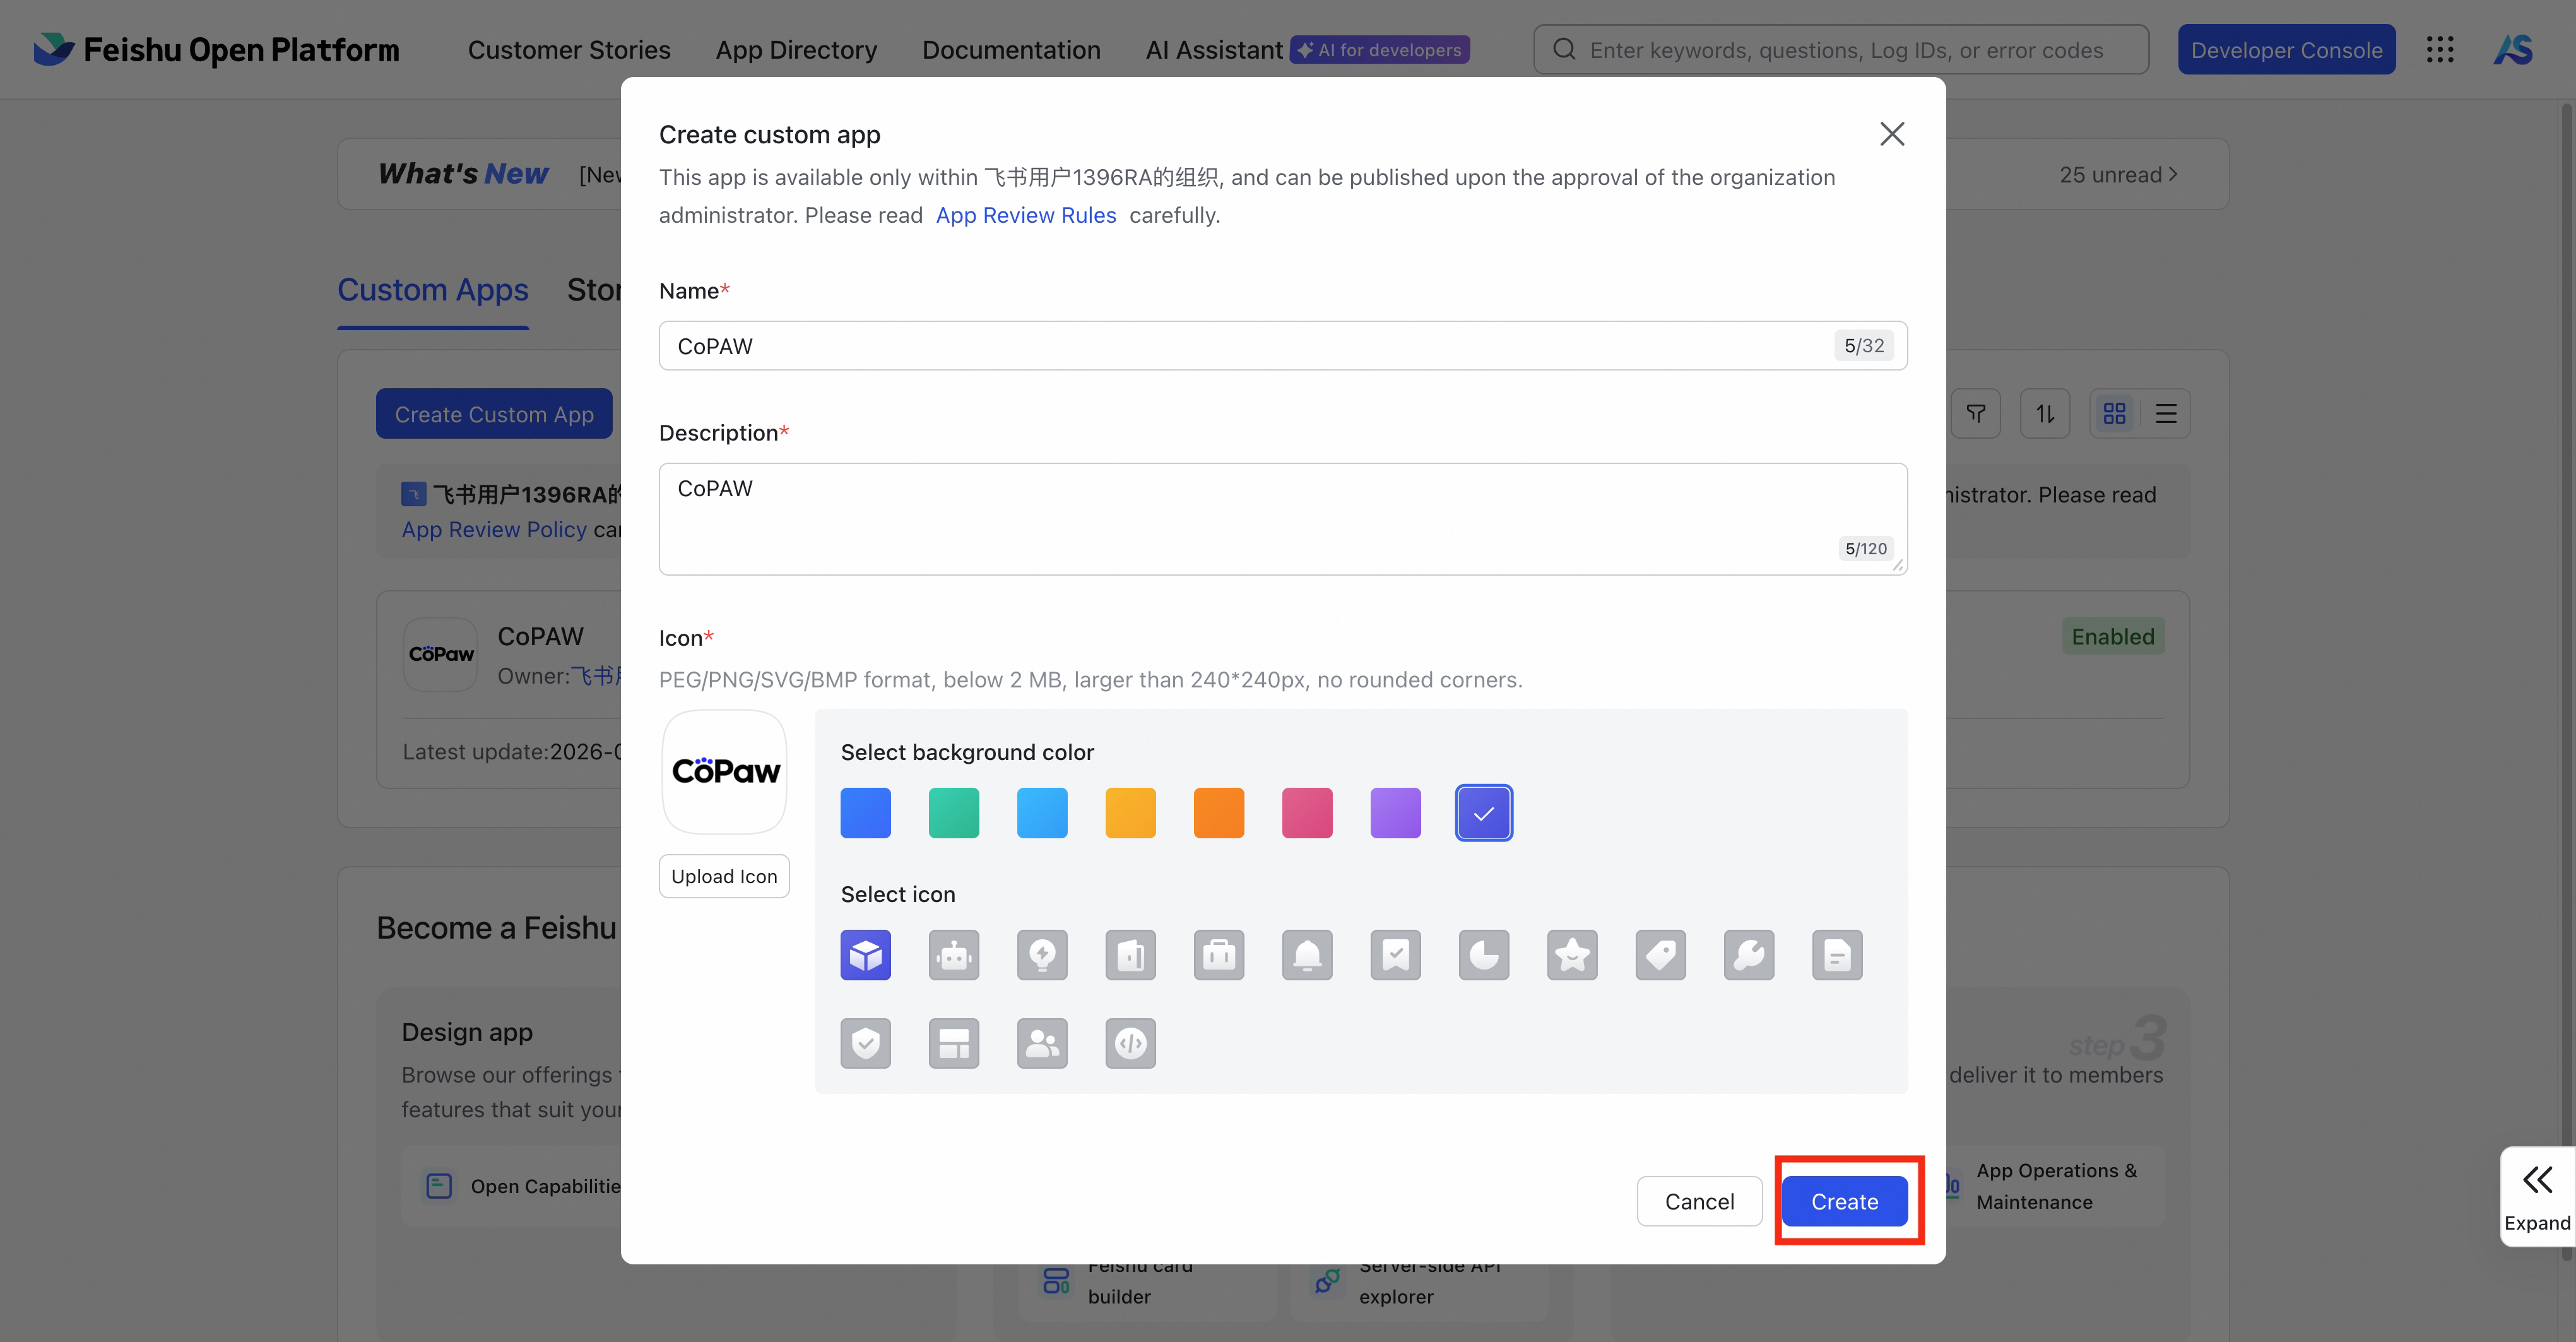
-
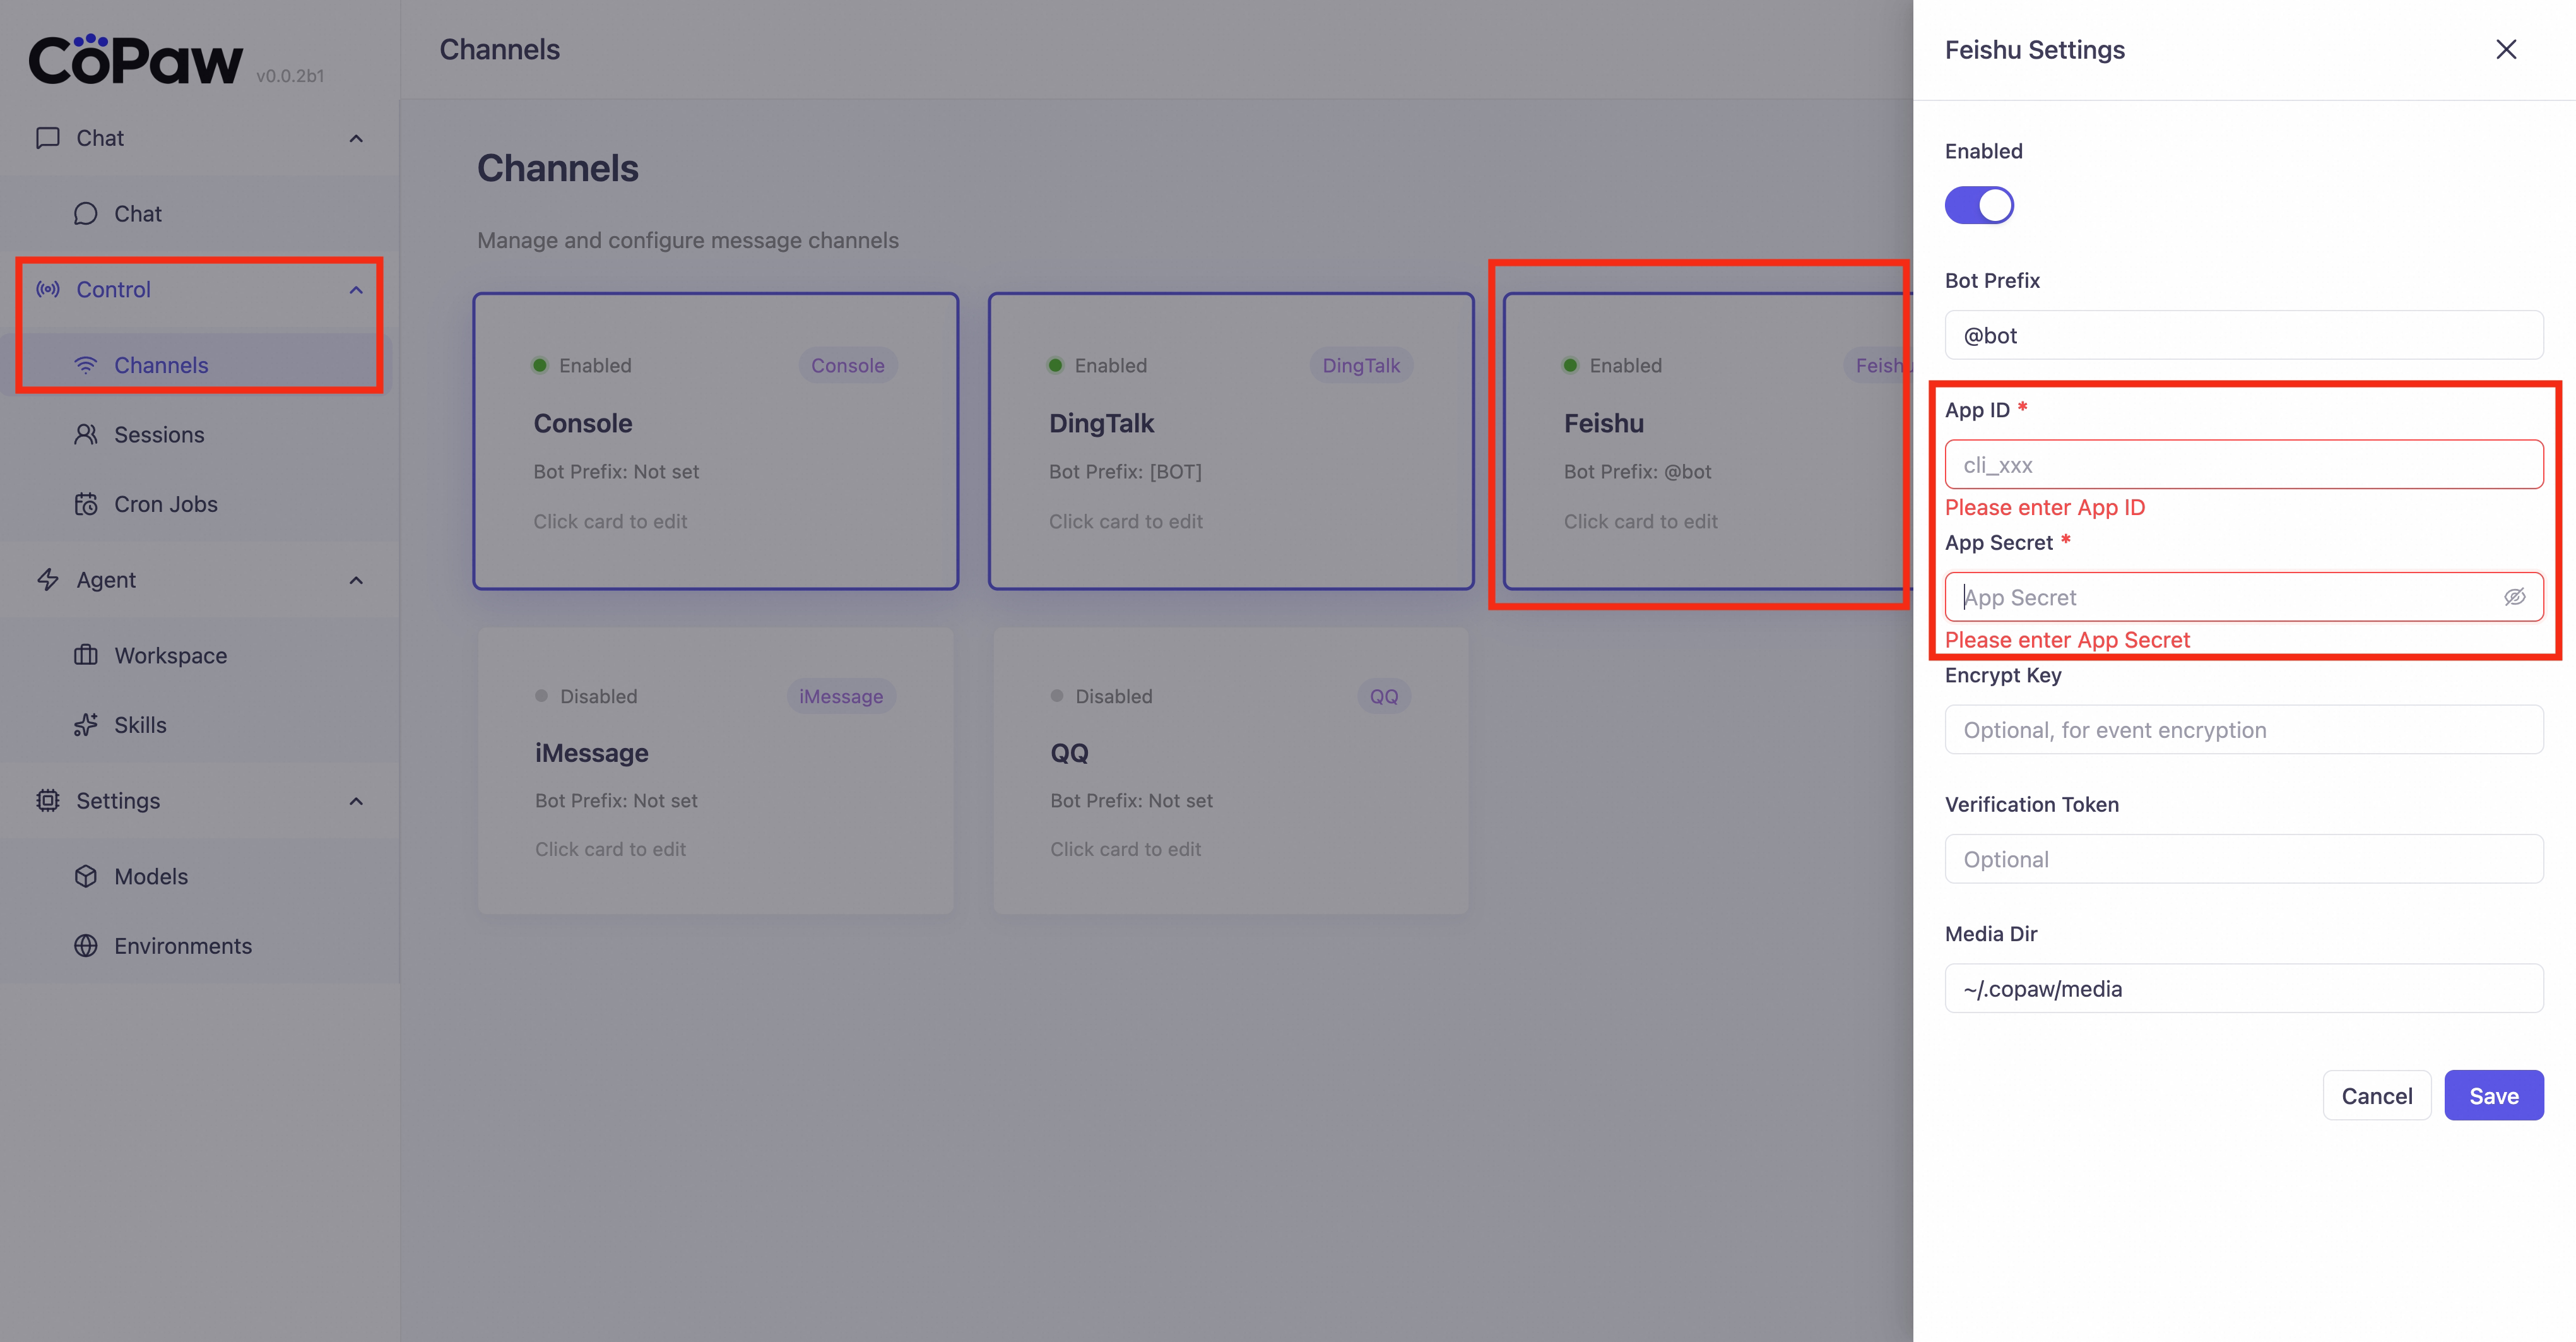
In Credentials & Basic Info, copy App ID and App Secret

-
Fill App ID and App Secret in
config.json(see "Fill config.json" below) and save -
Run
copaw appto start CoPAW -
Back in the Feishu console, enable Bot under Add Features
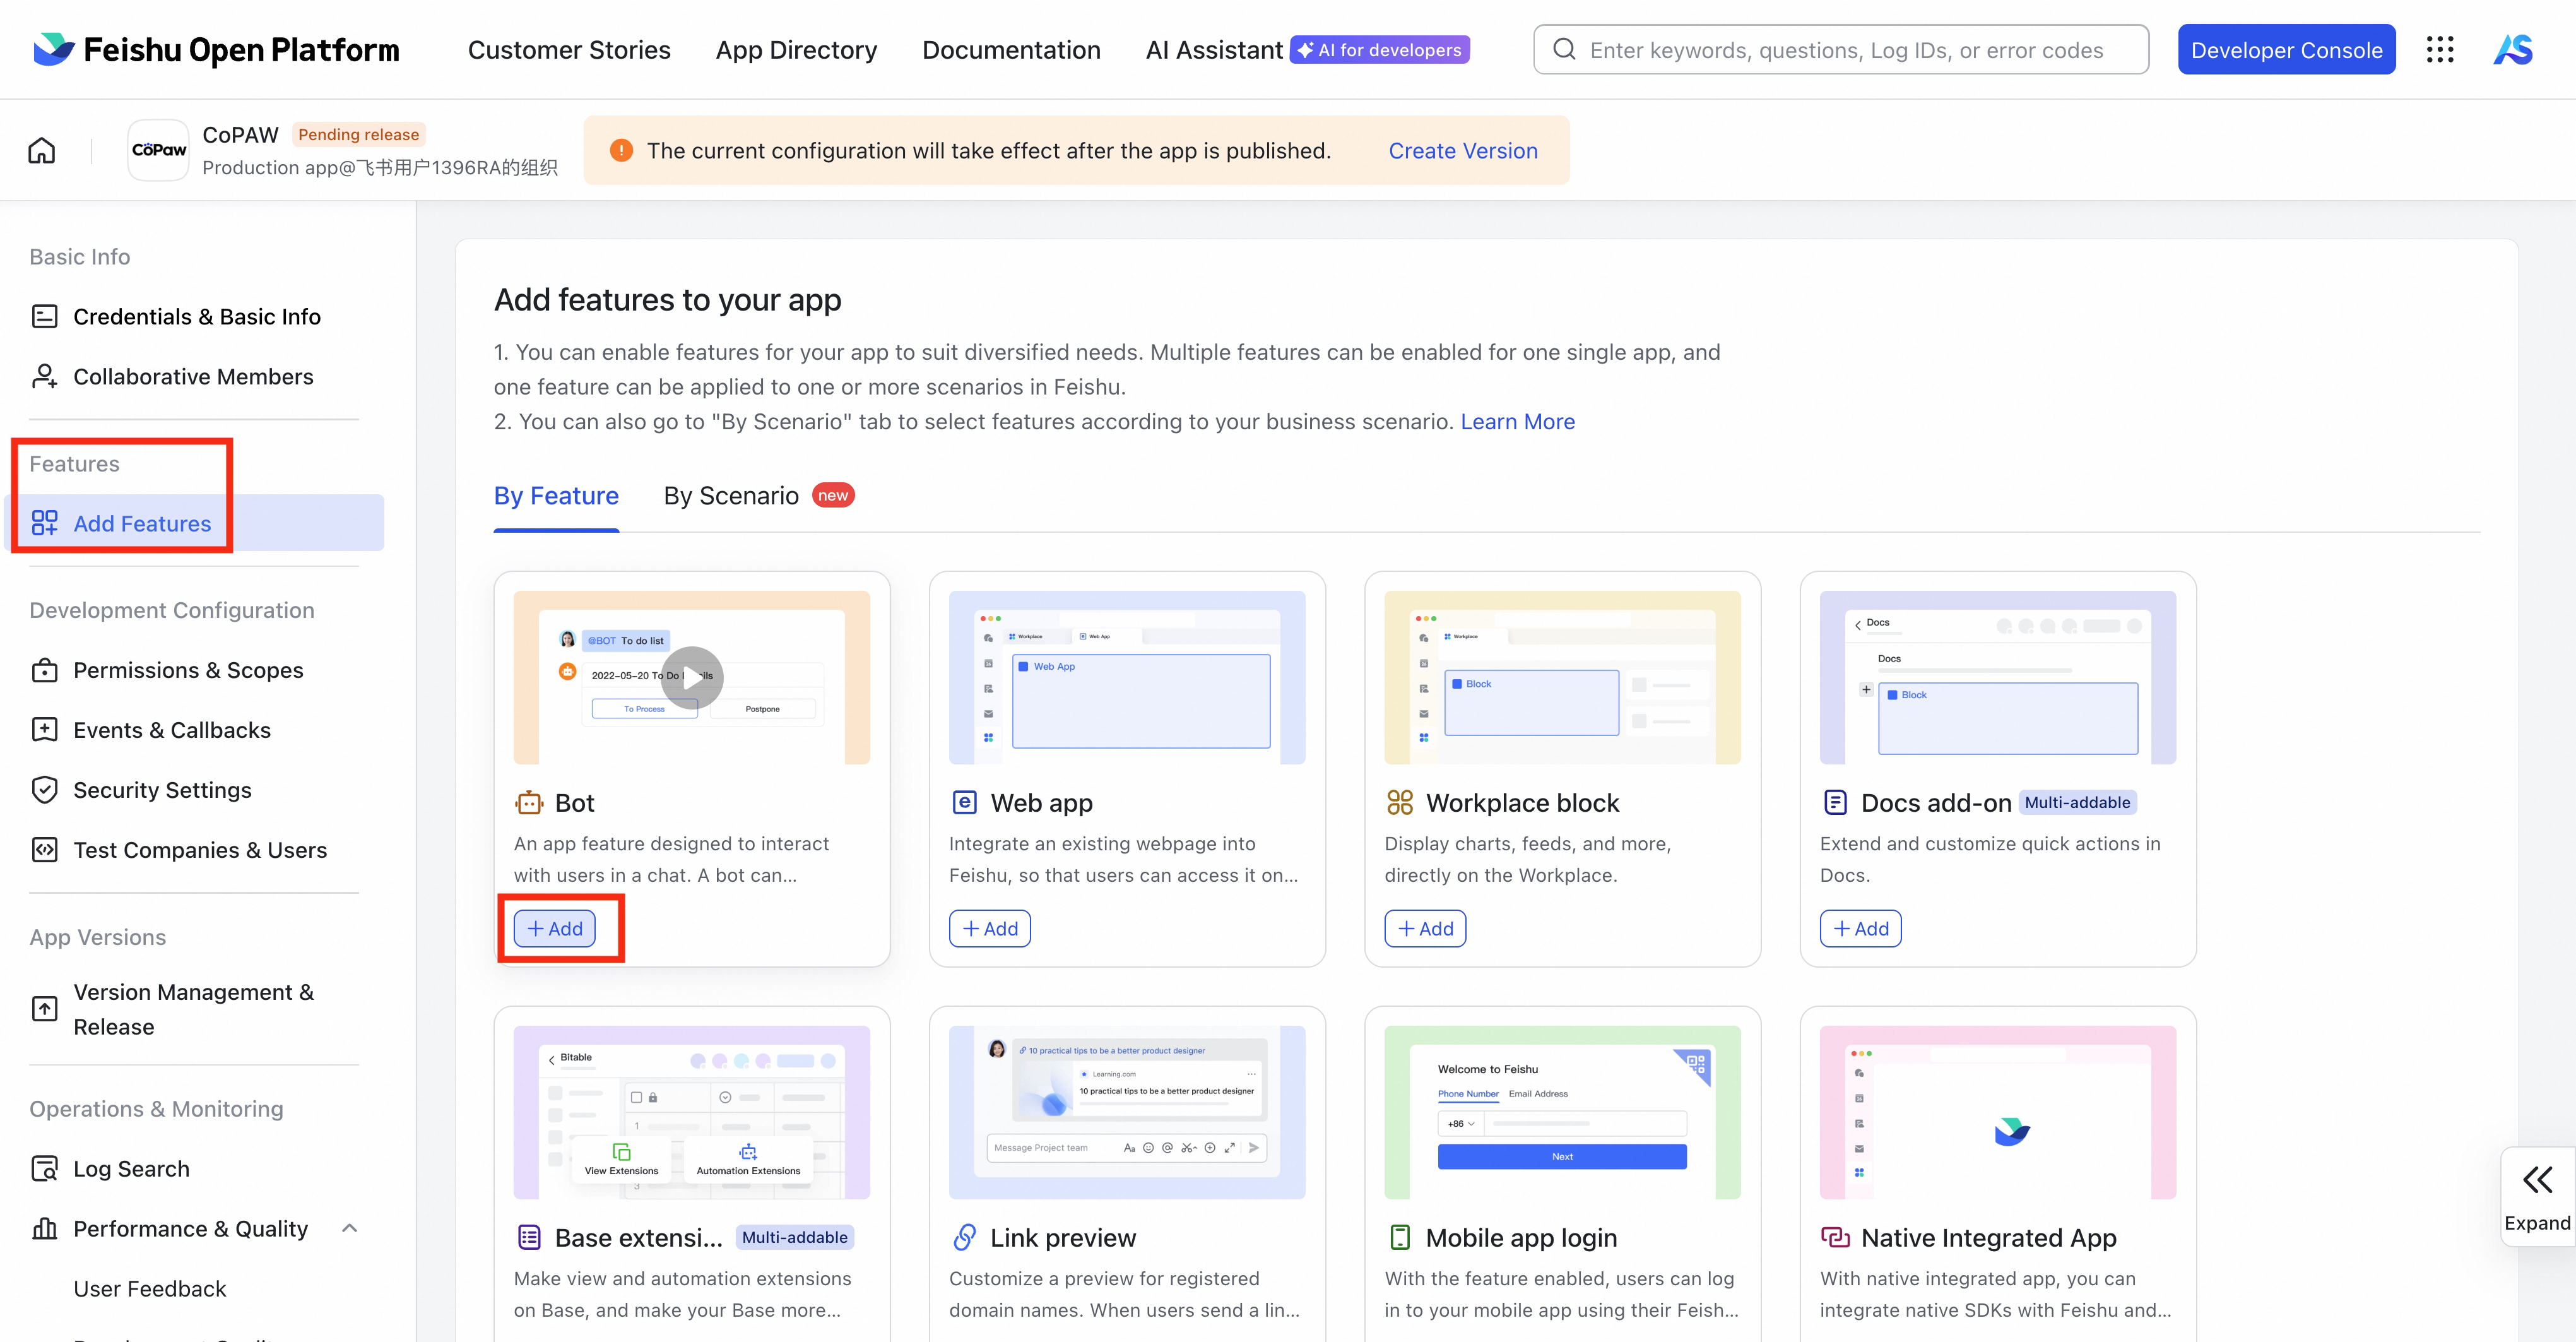
-
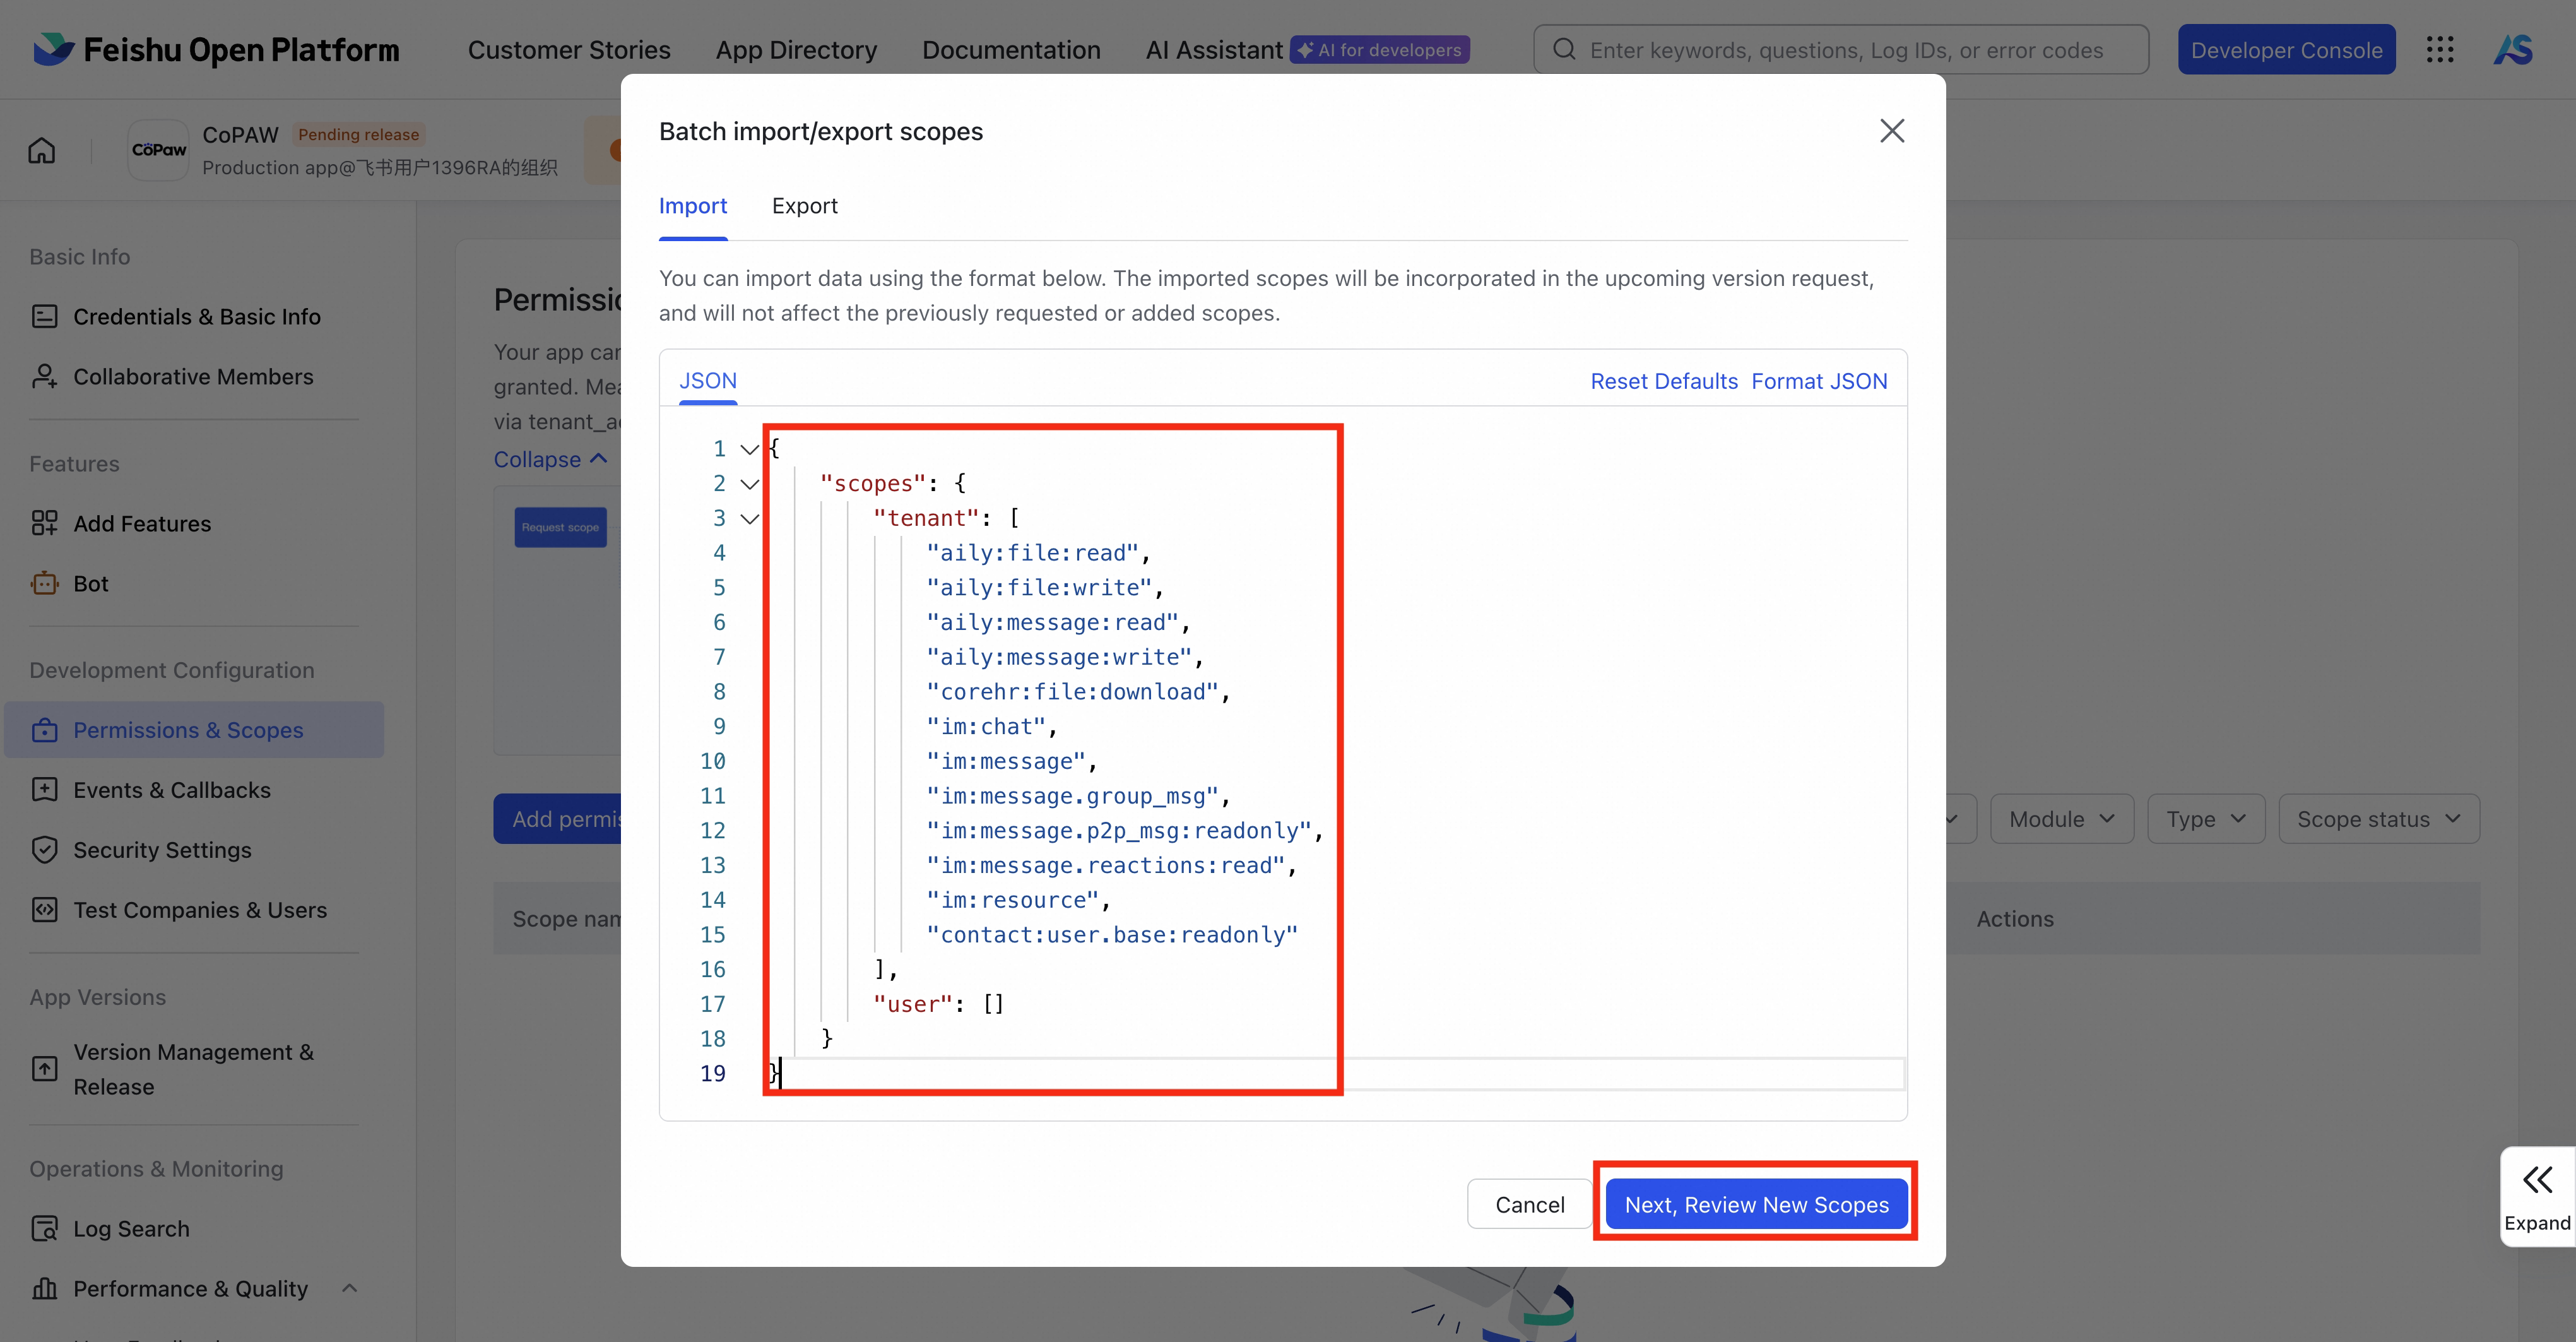
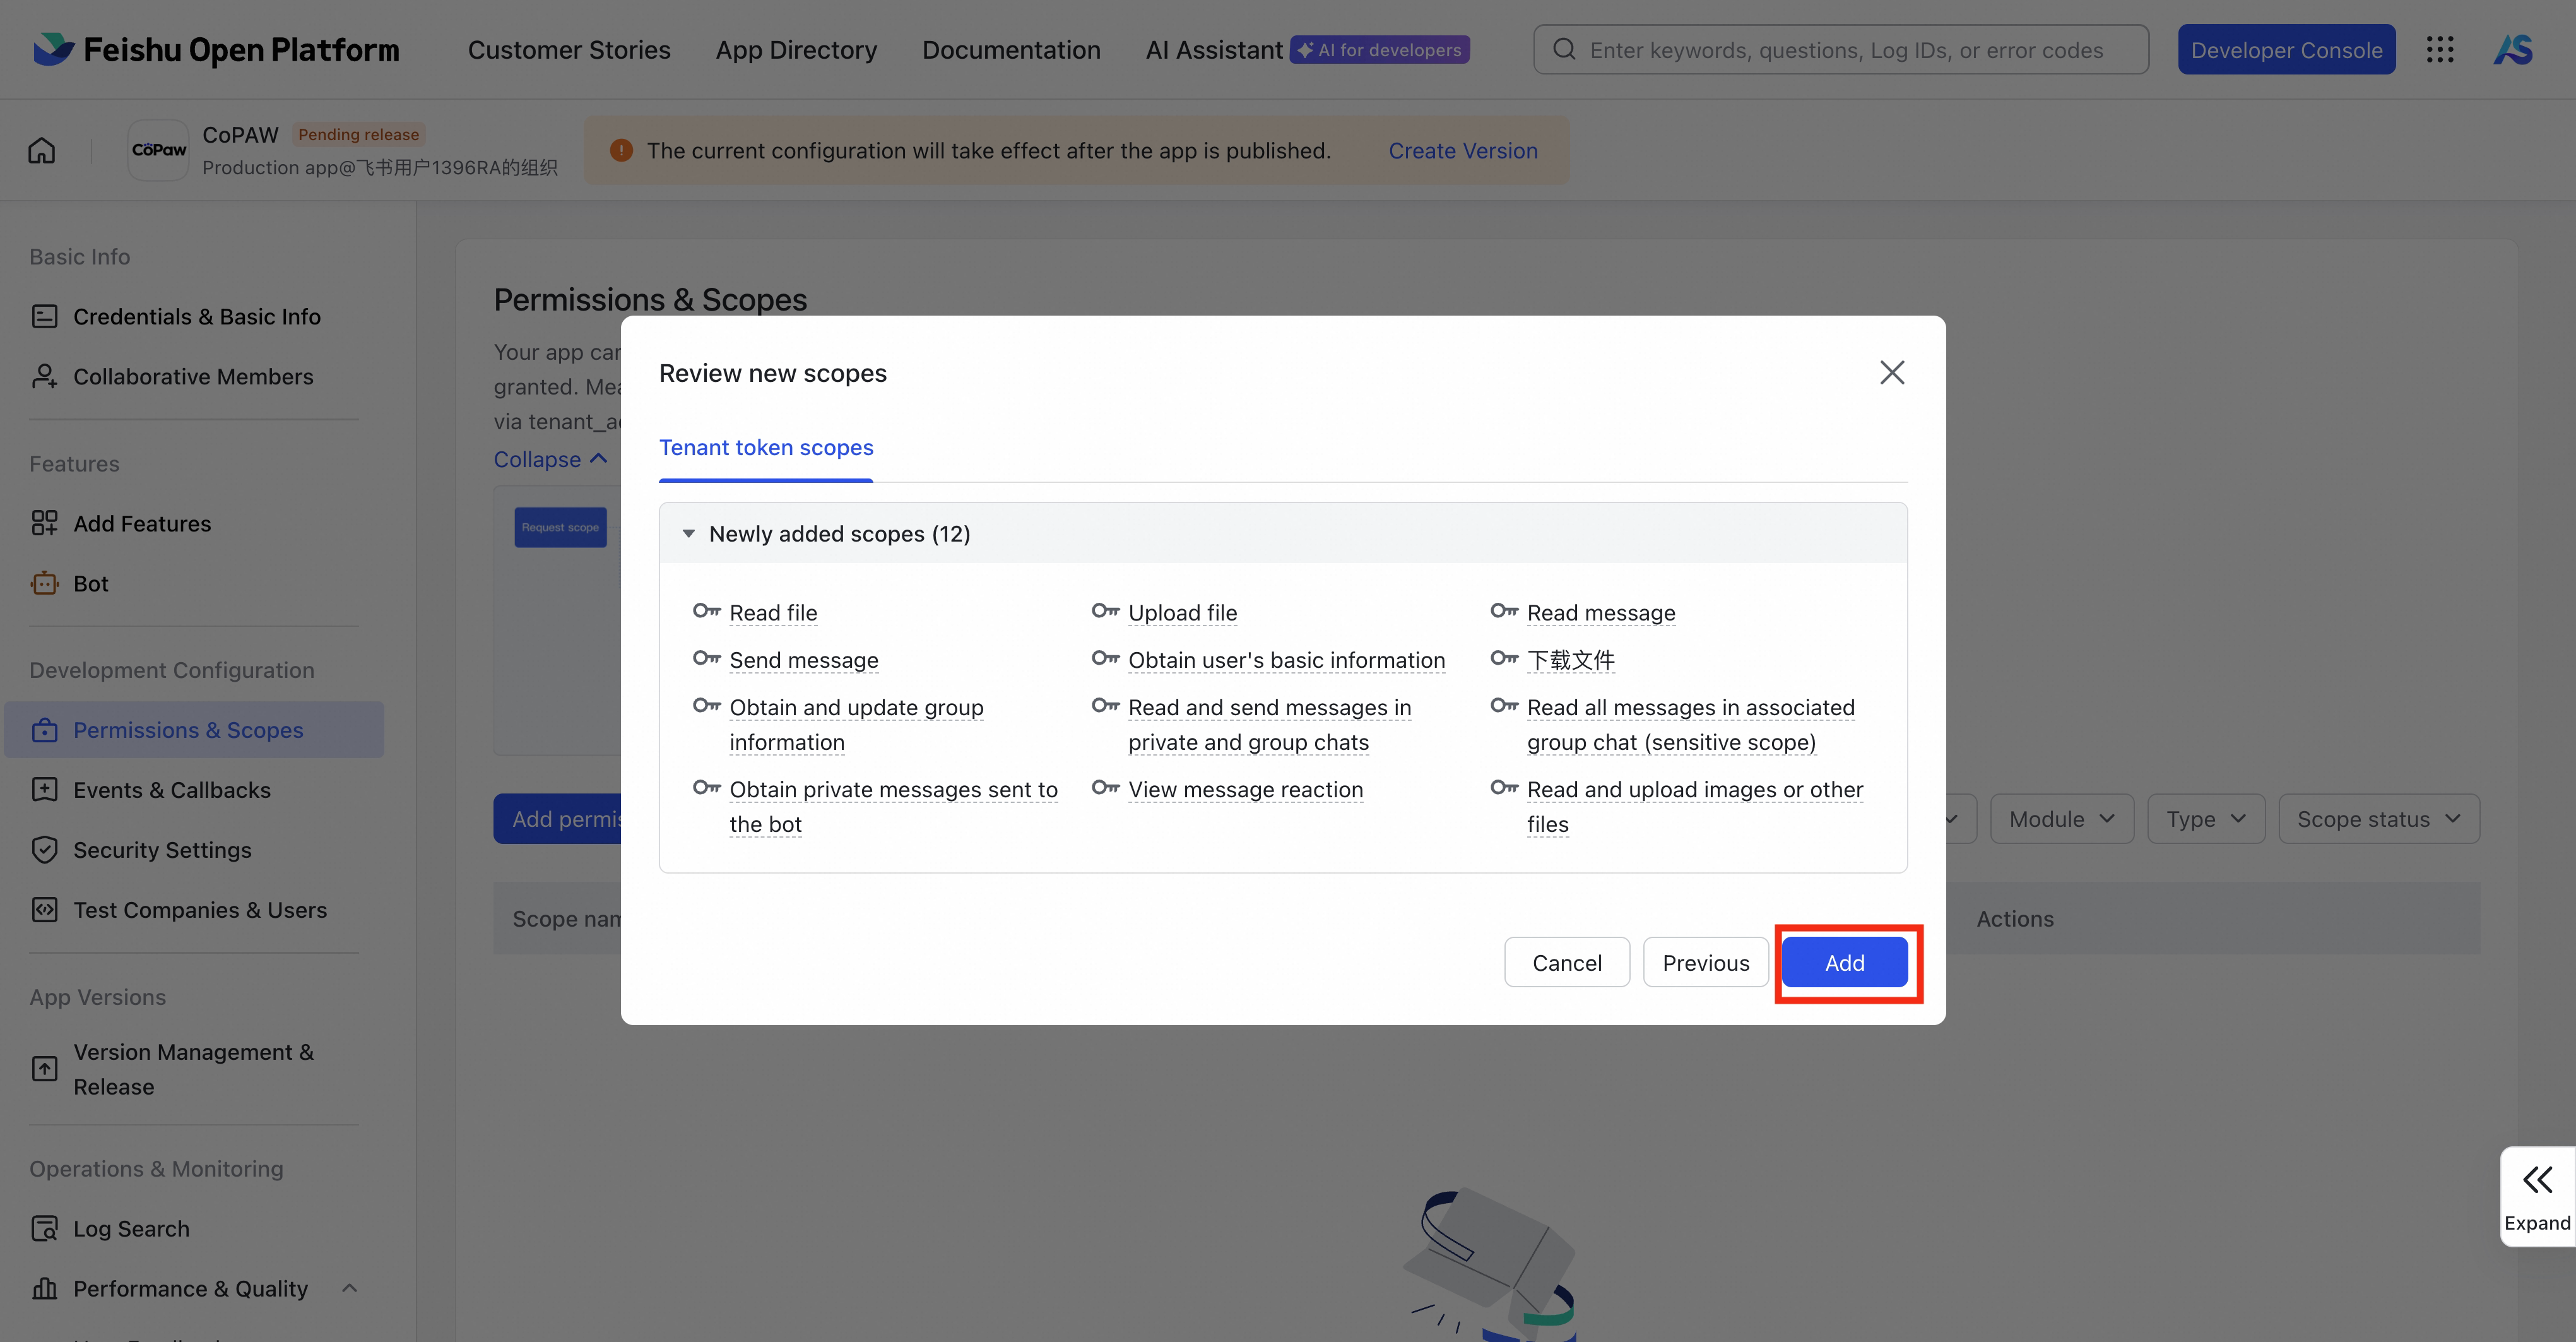
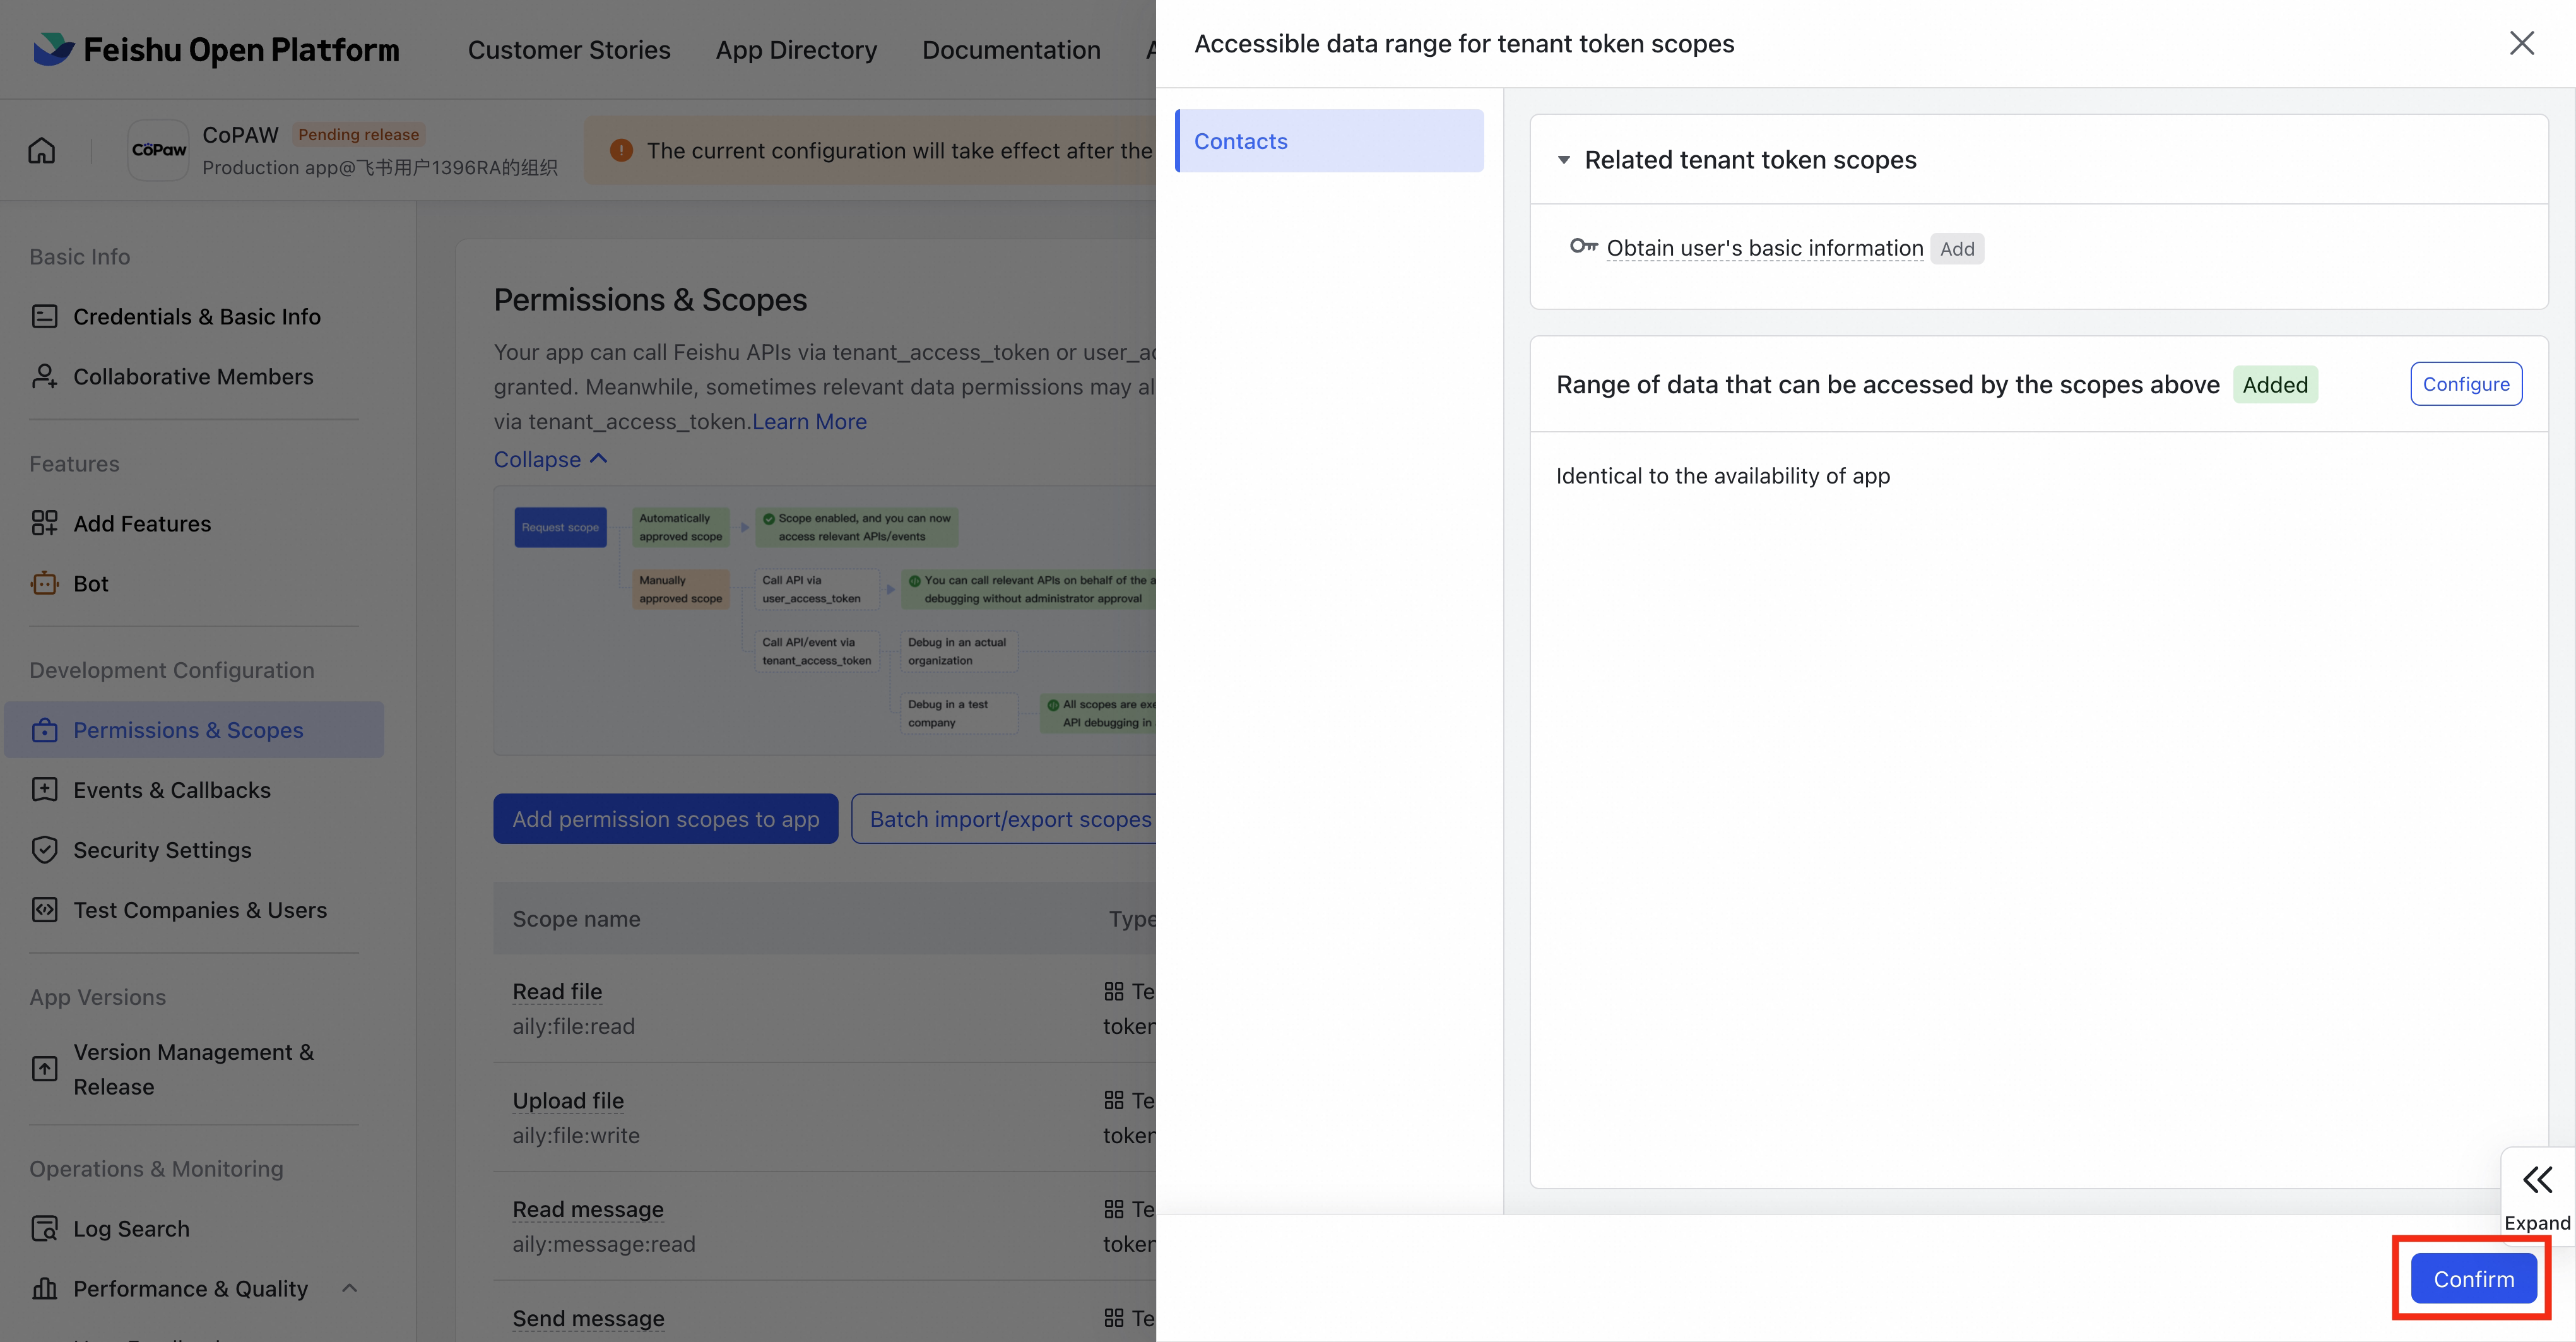
Under Permissions & Scopes, select Batch import/export scopes and paste the following JSON:
{
  "scopes": {
    "tenant": [
      "aily:file:read",
      "aily:file:write",
      "aily:message:read",
      "aily:message:write",
      "corehr:file:download",
      "im:chat",
      "im:message",
      "im:message.group_msg",
      "im:message.p2p_msg:readonly",
      "im:message.reactions:read",
      "im:resource",
      "contact:user.base:readonly"
    ],
    "user": []
  }
}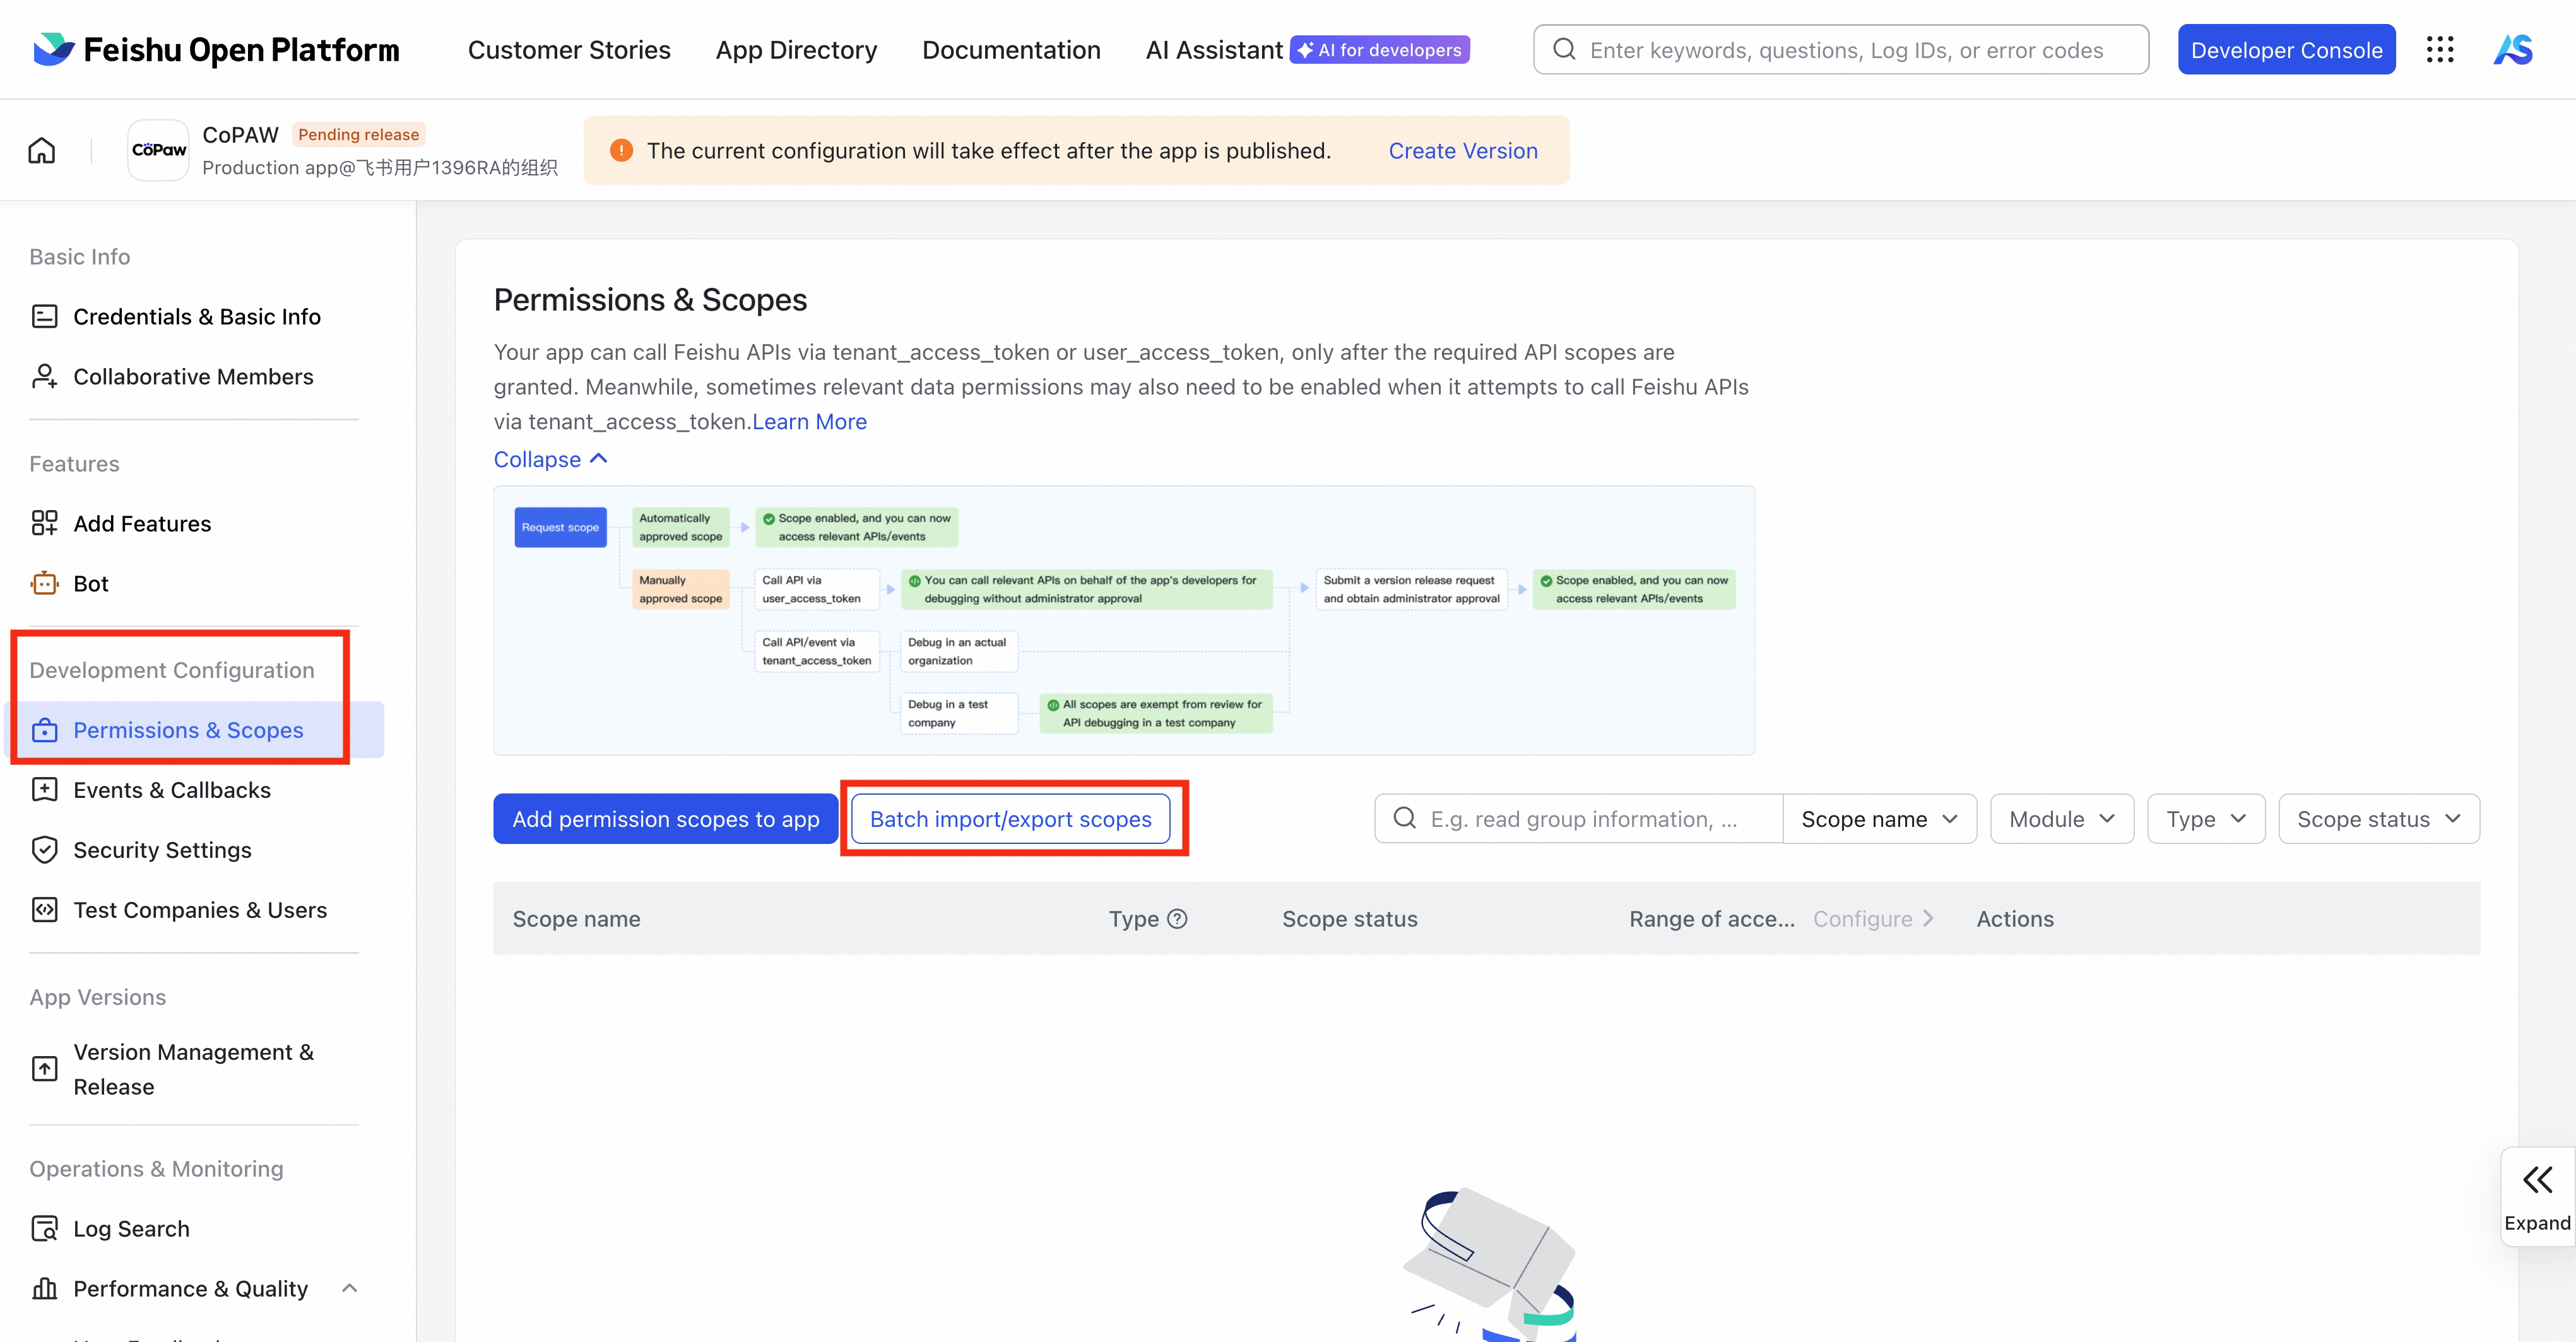
-
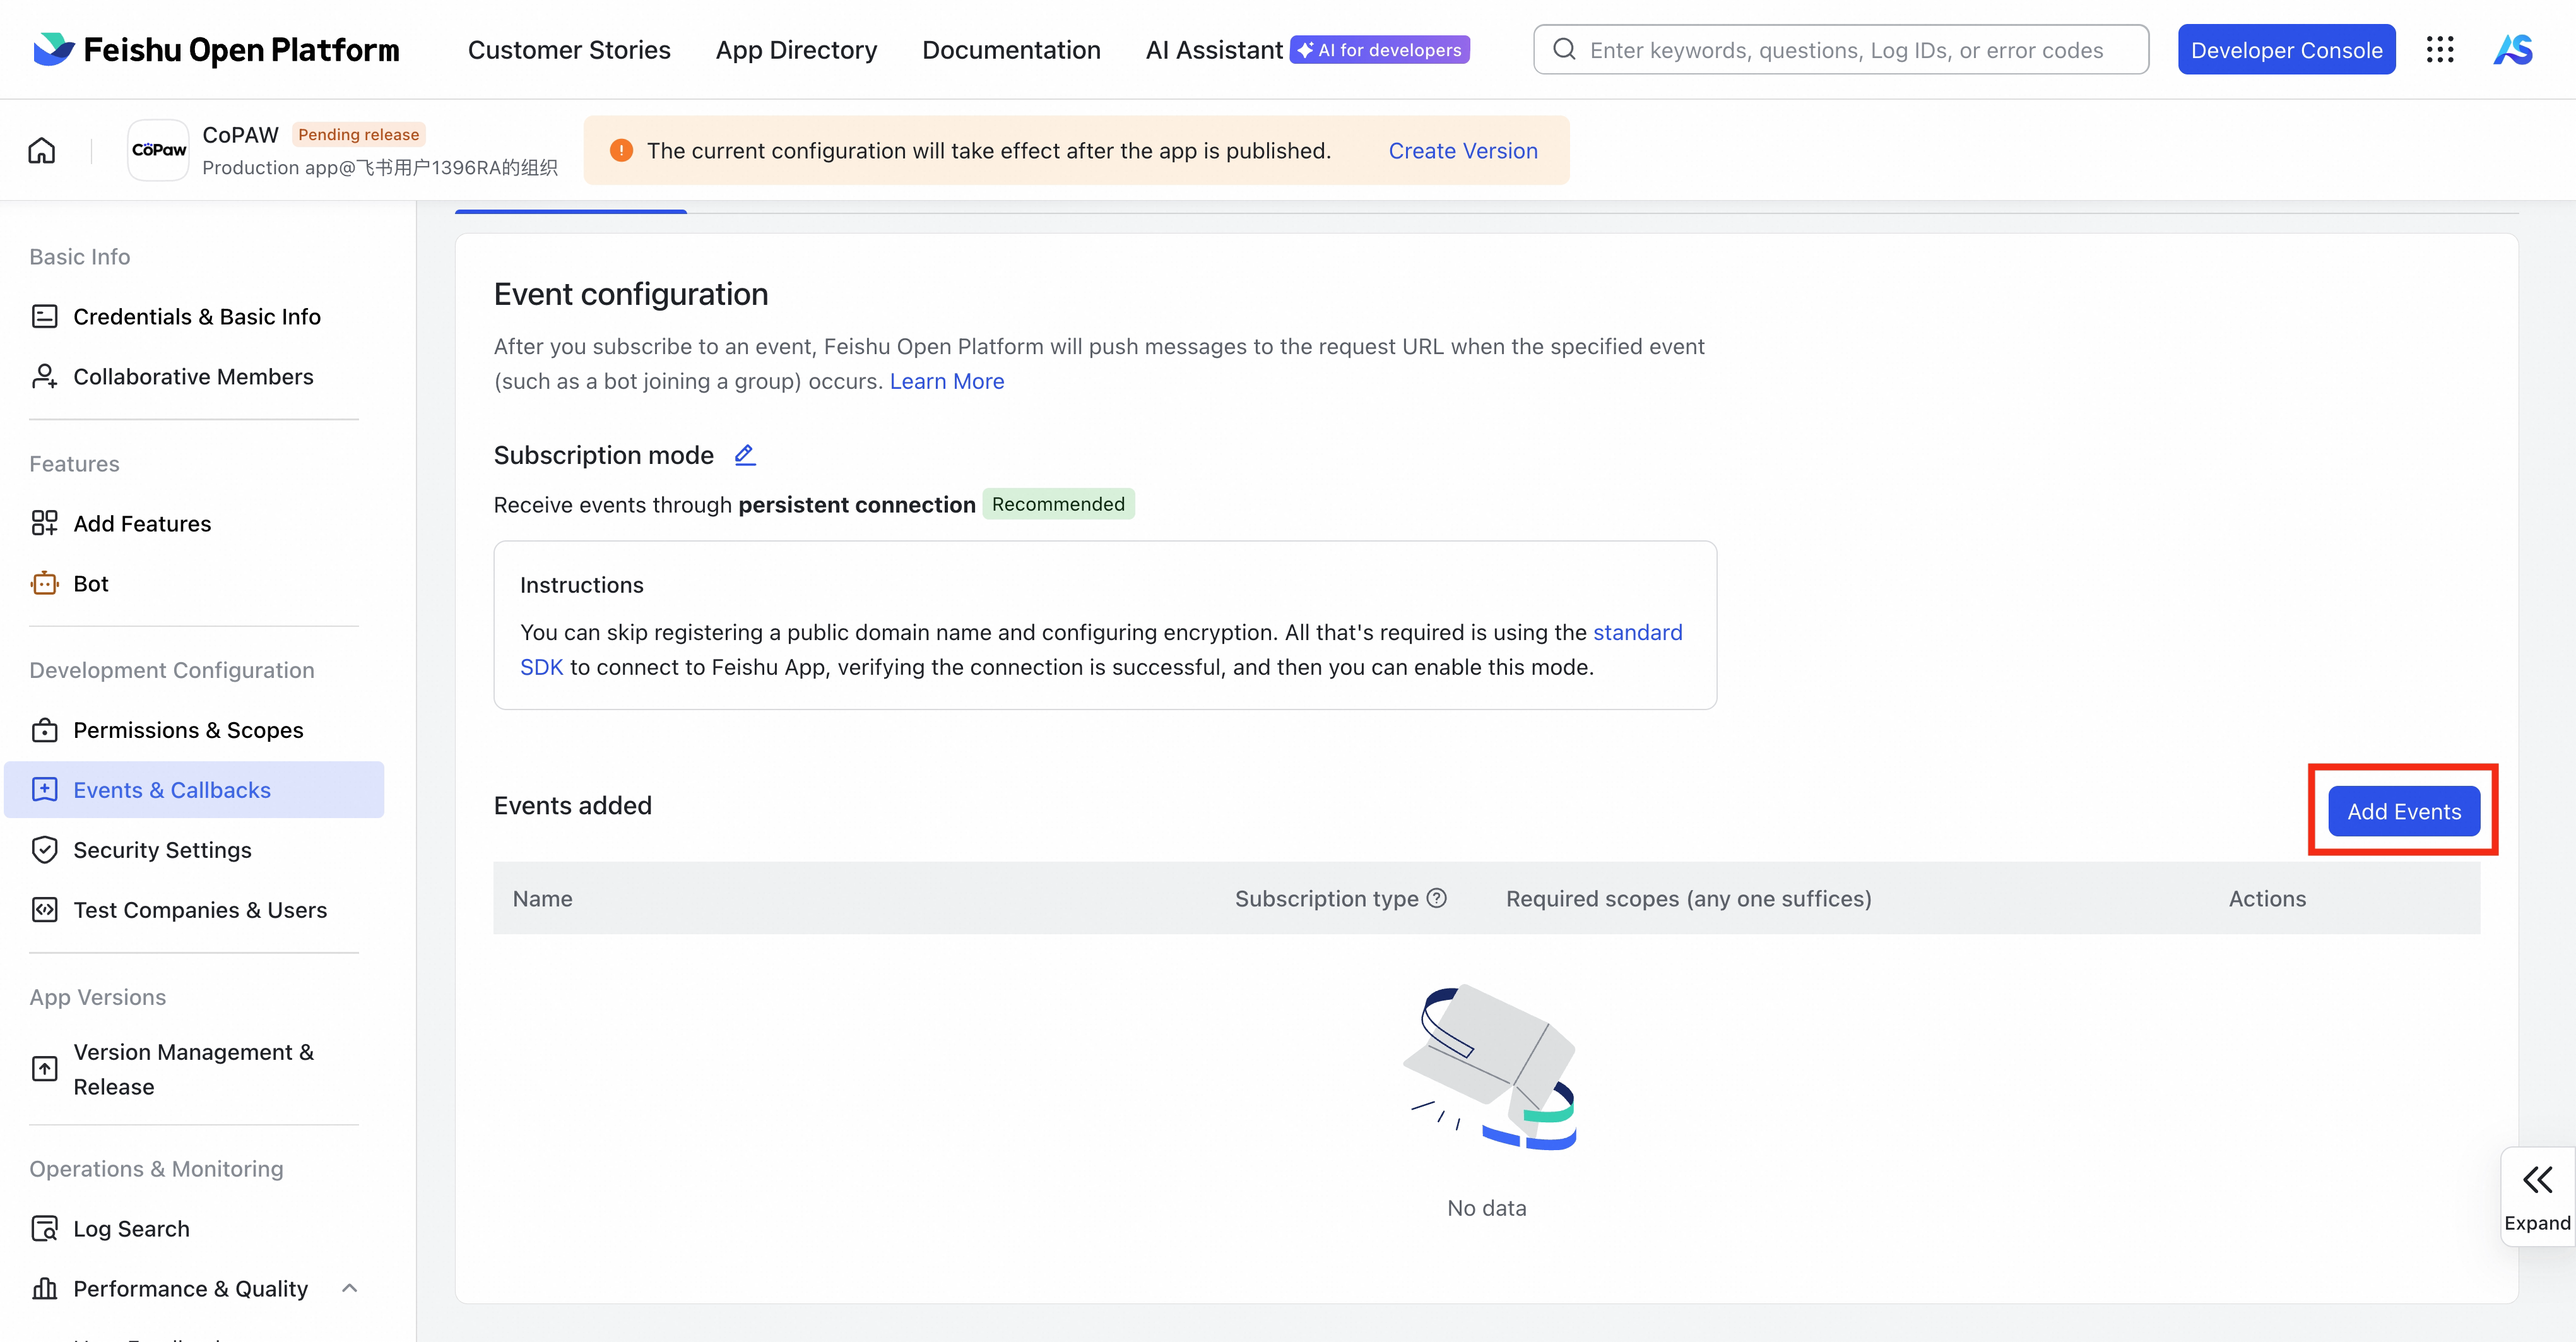
Under Events & Callbacks, click Event configuration, and choose Receive events through persistent connection as the subscription mode (no public IP needed)
Note: Follow this order: Configure App ID/Secret → start
copaw app→ then configure the long connection in the Feishu console. If errors persist, try stopping the copaw service and restartingcopaw app.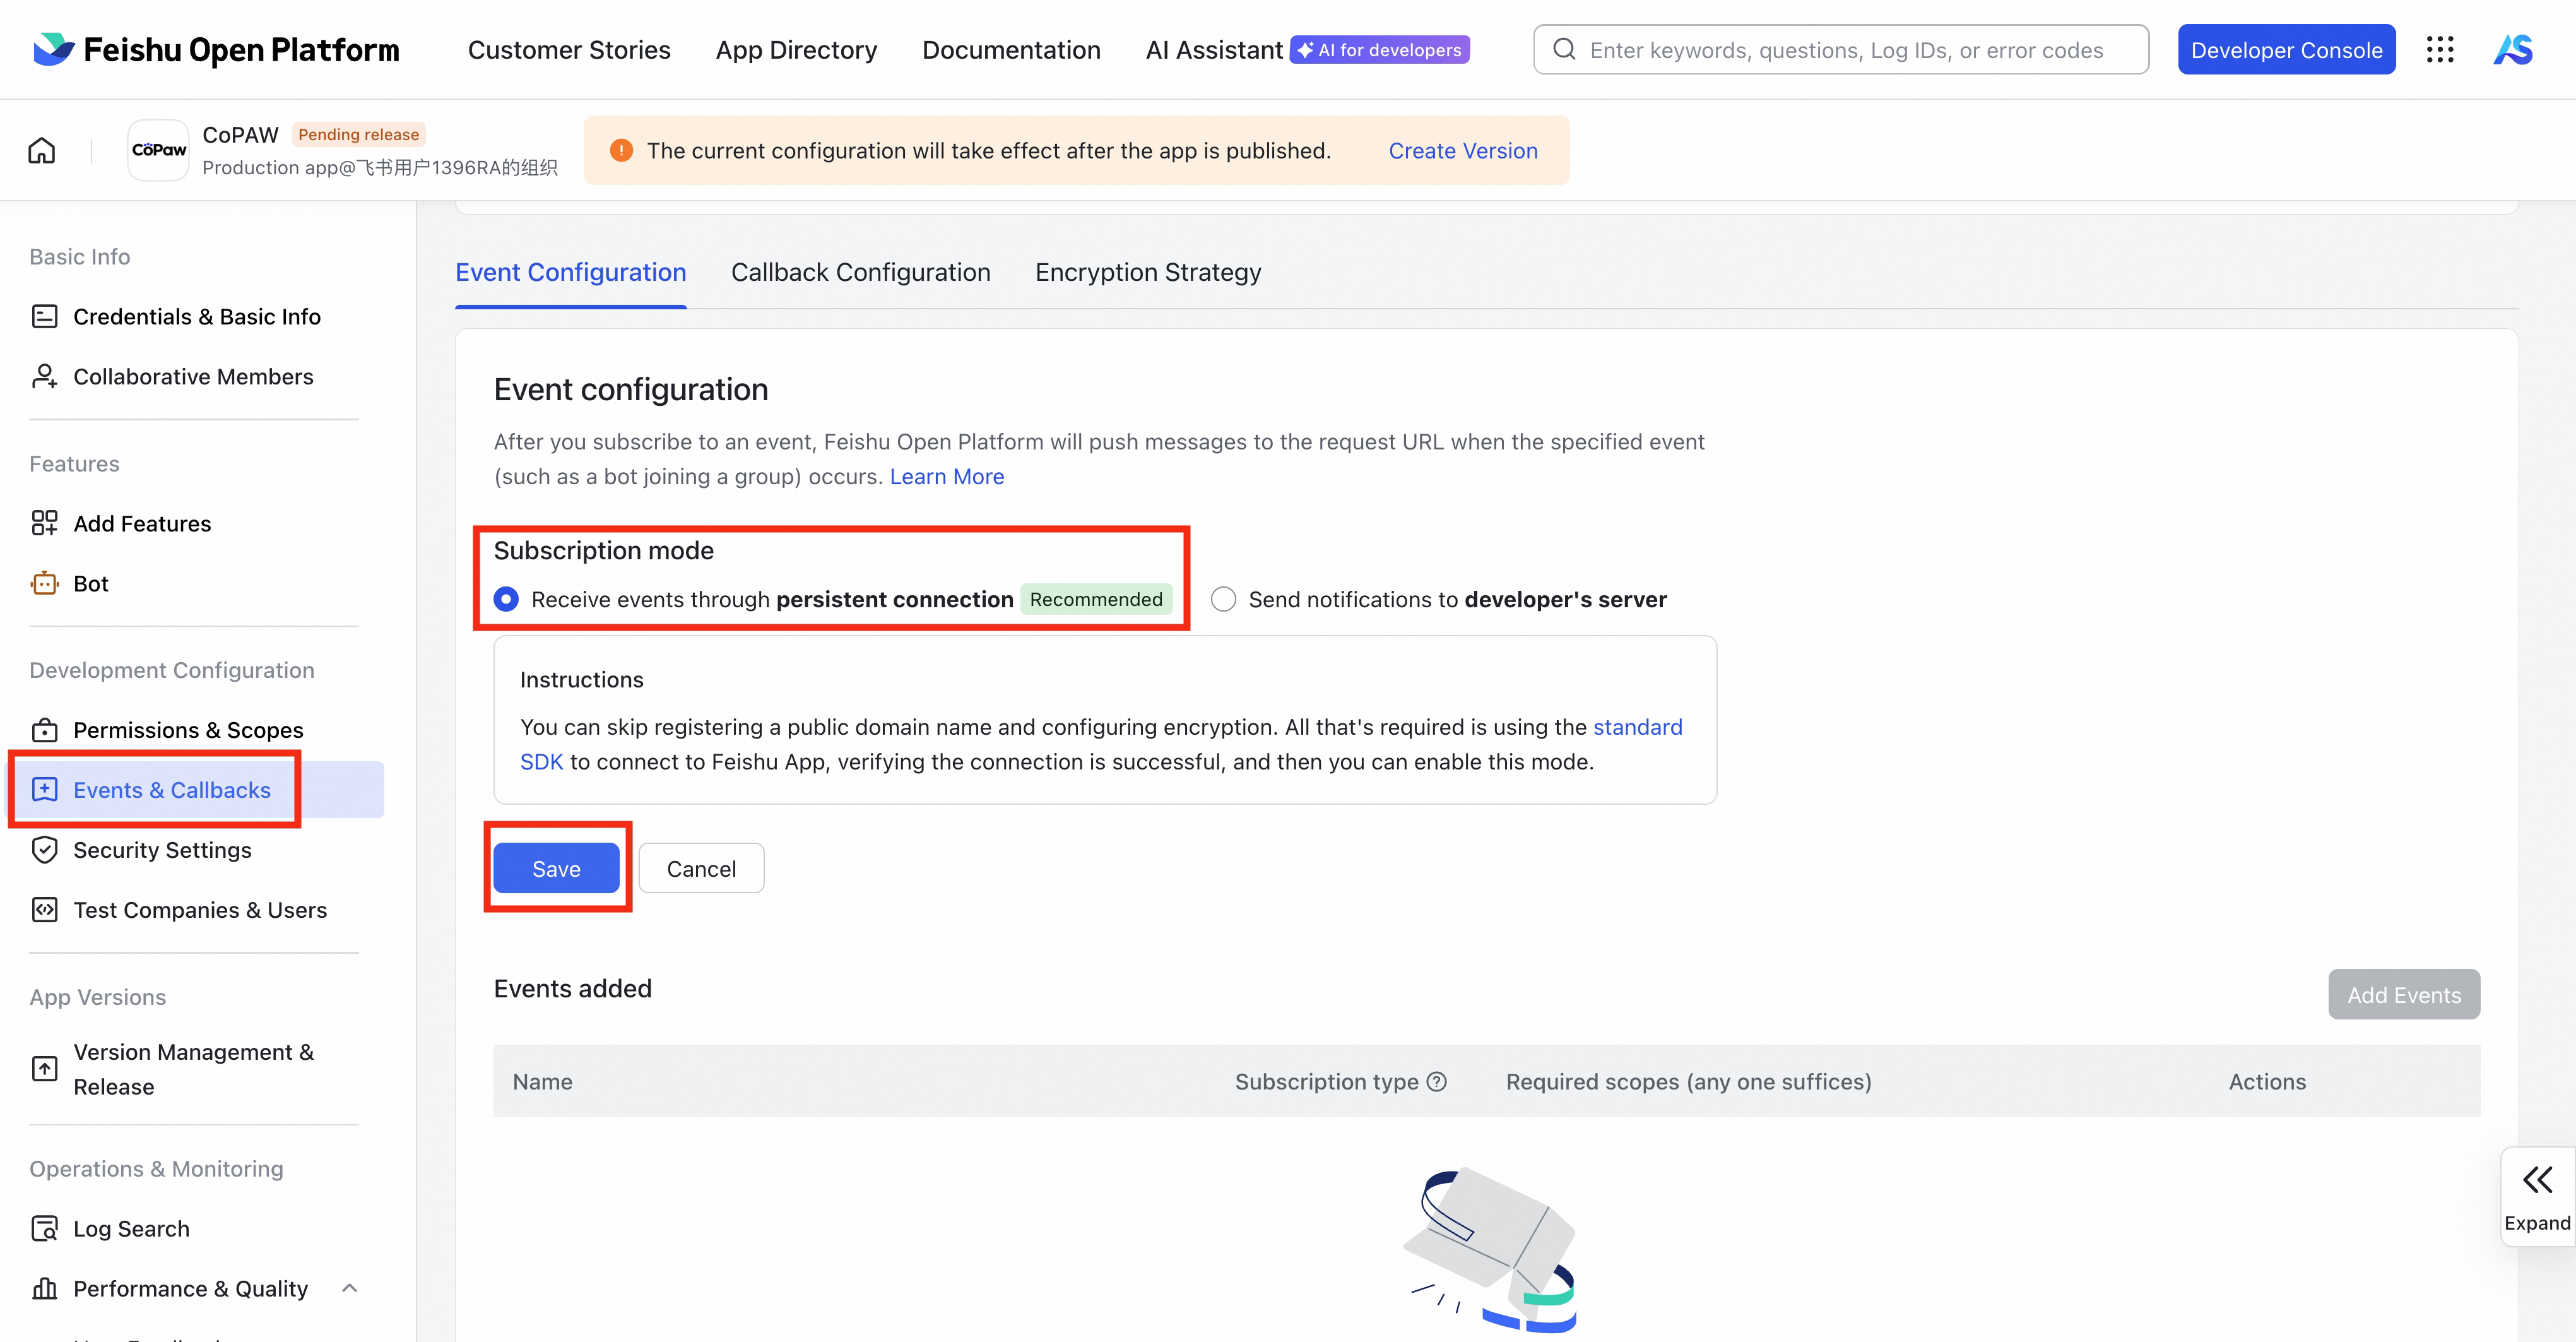
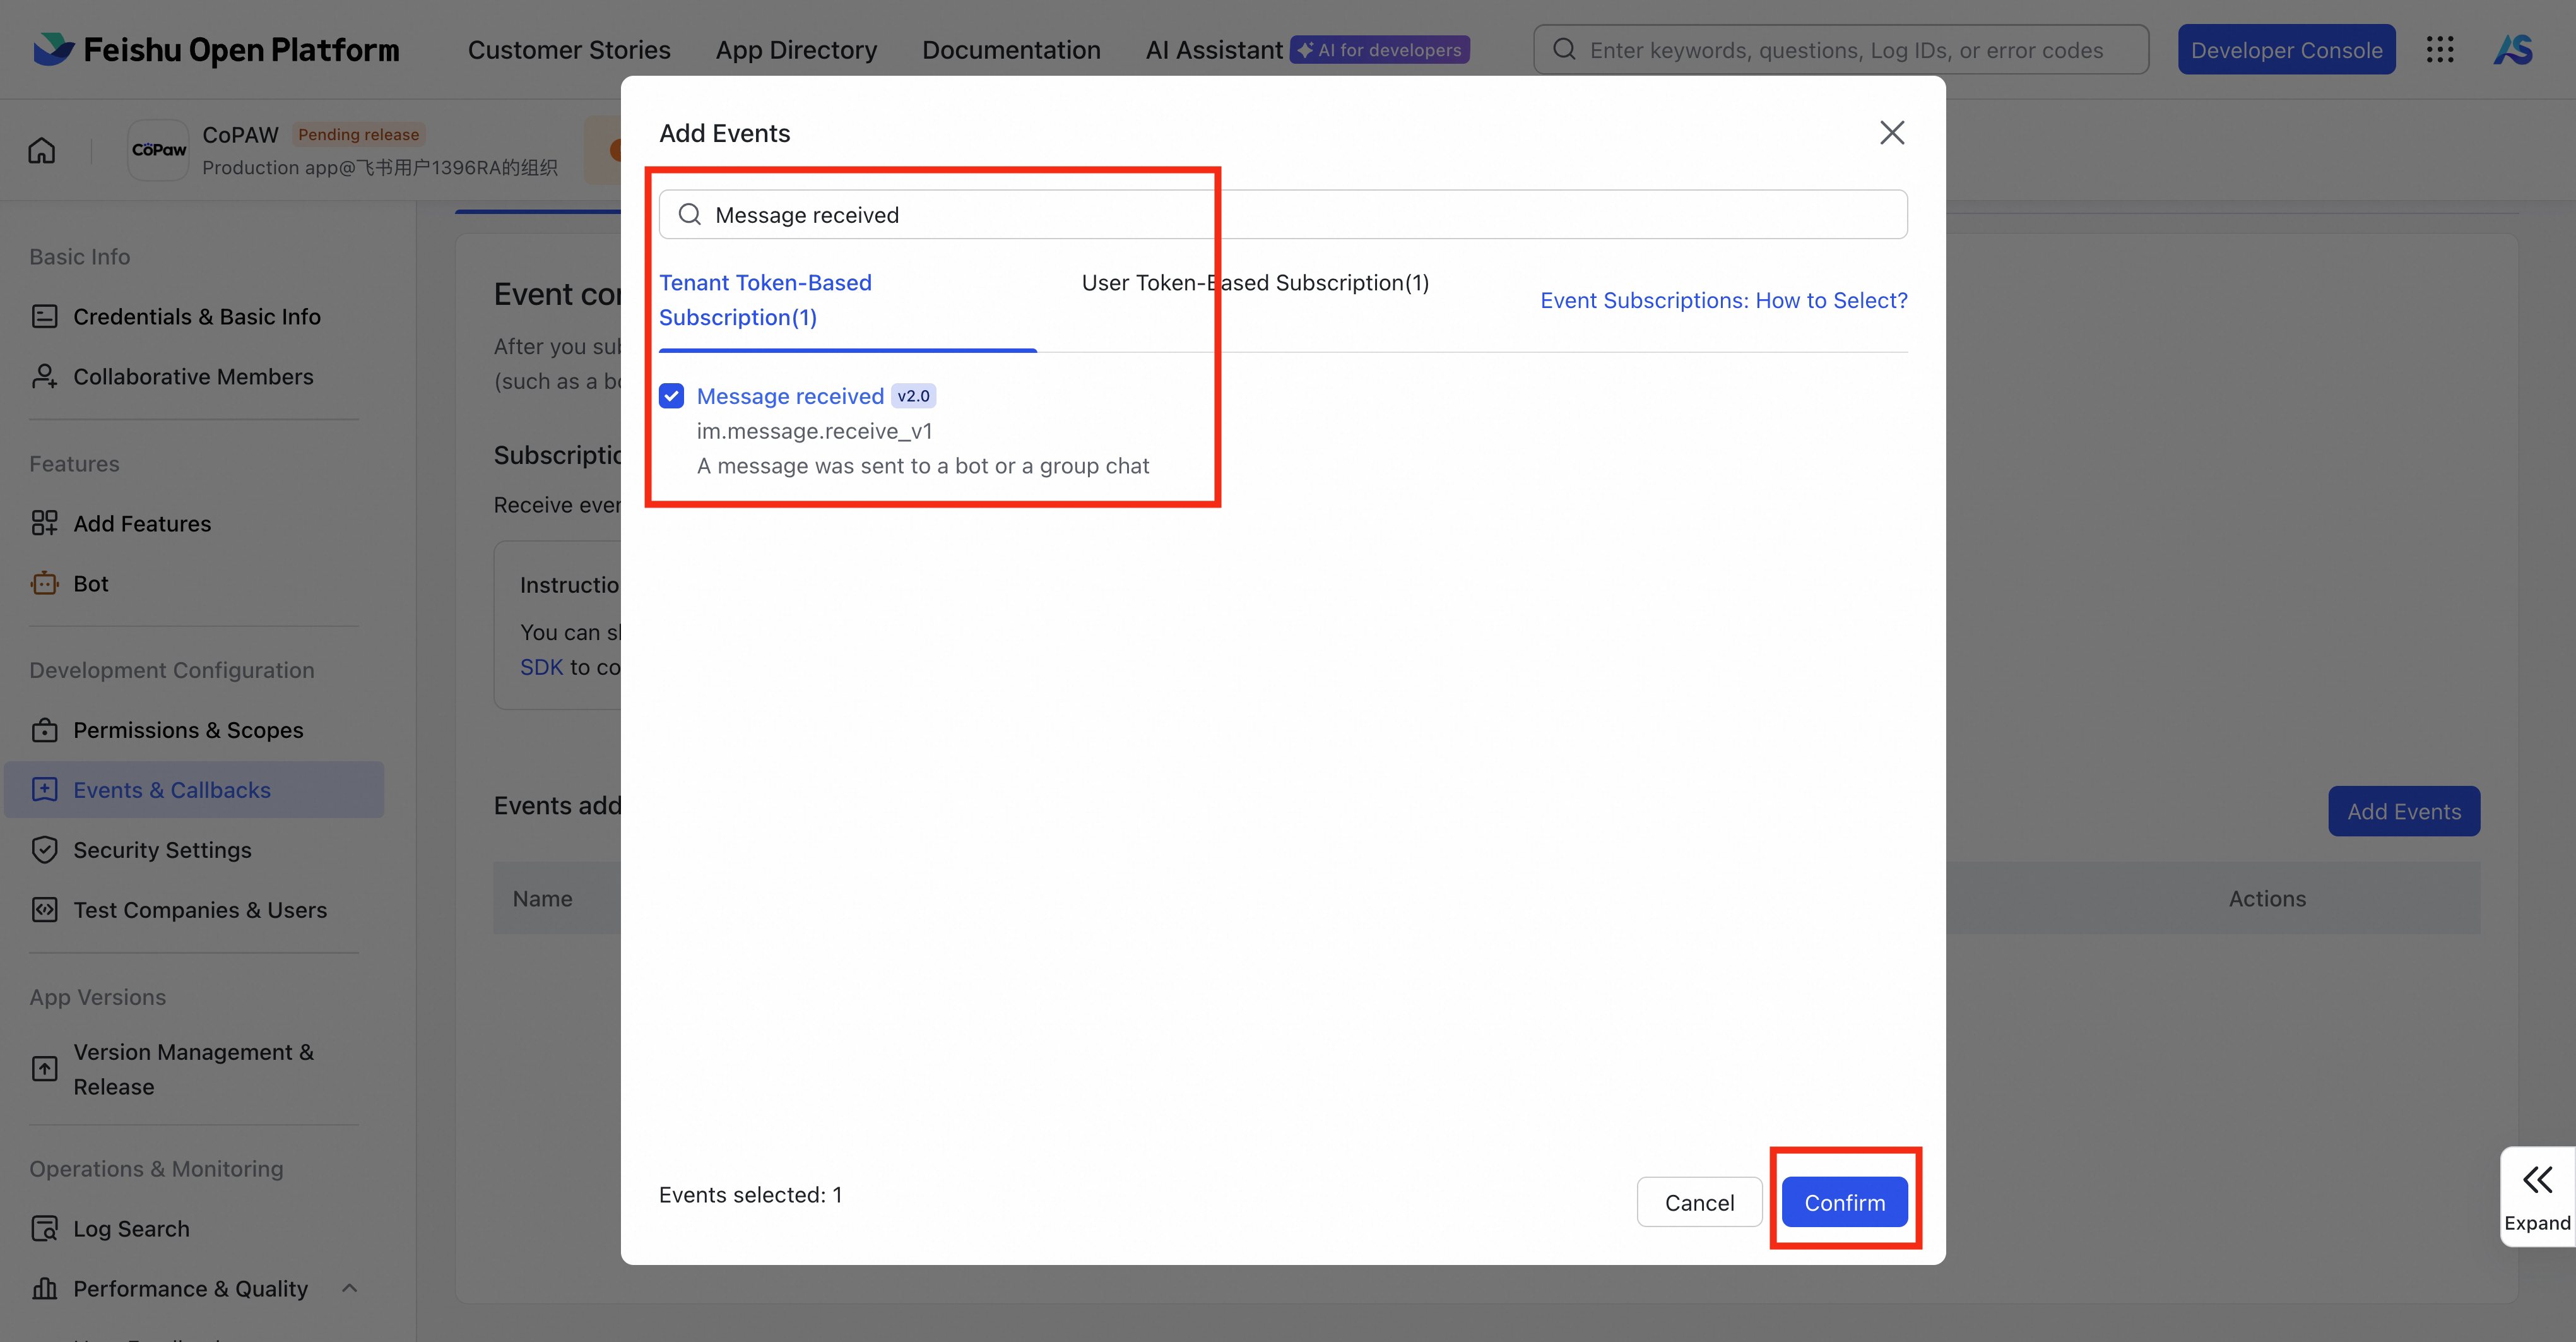
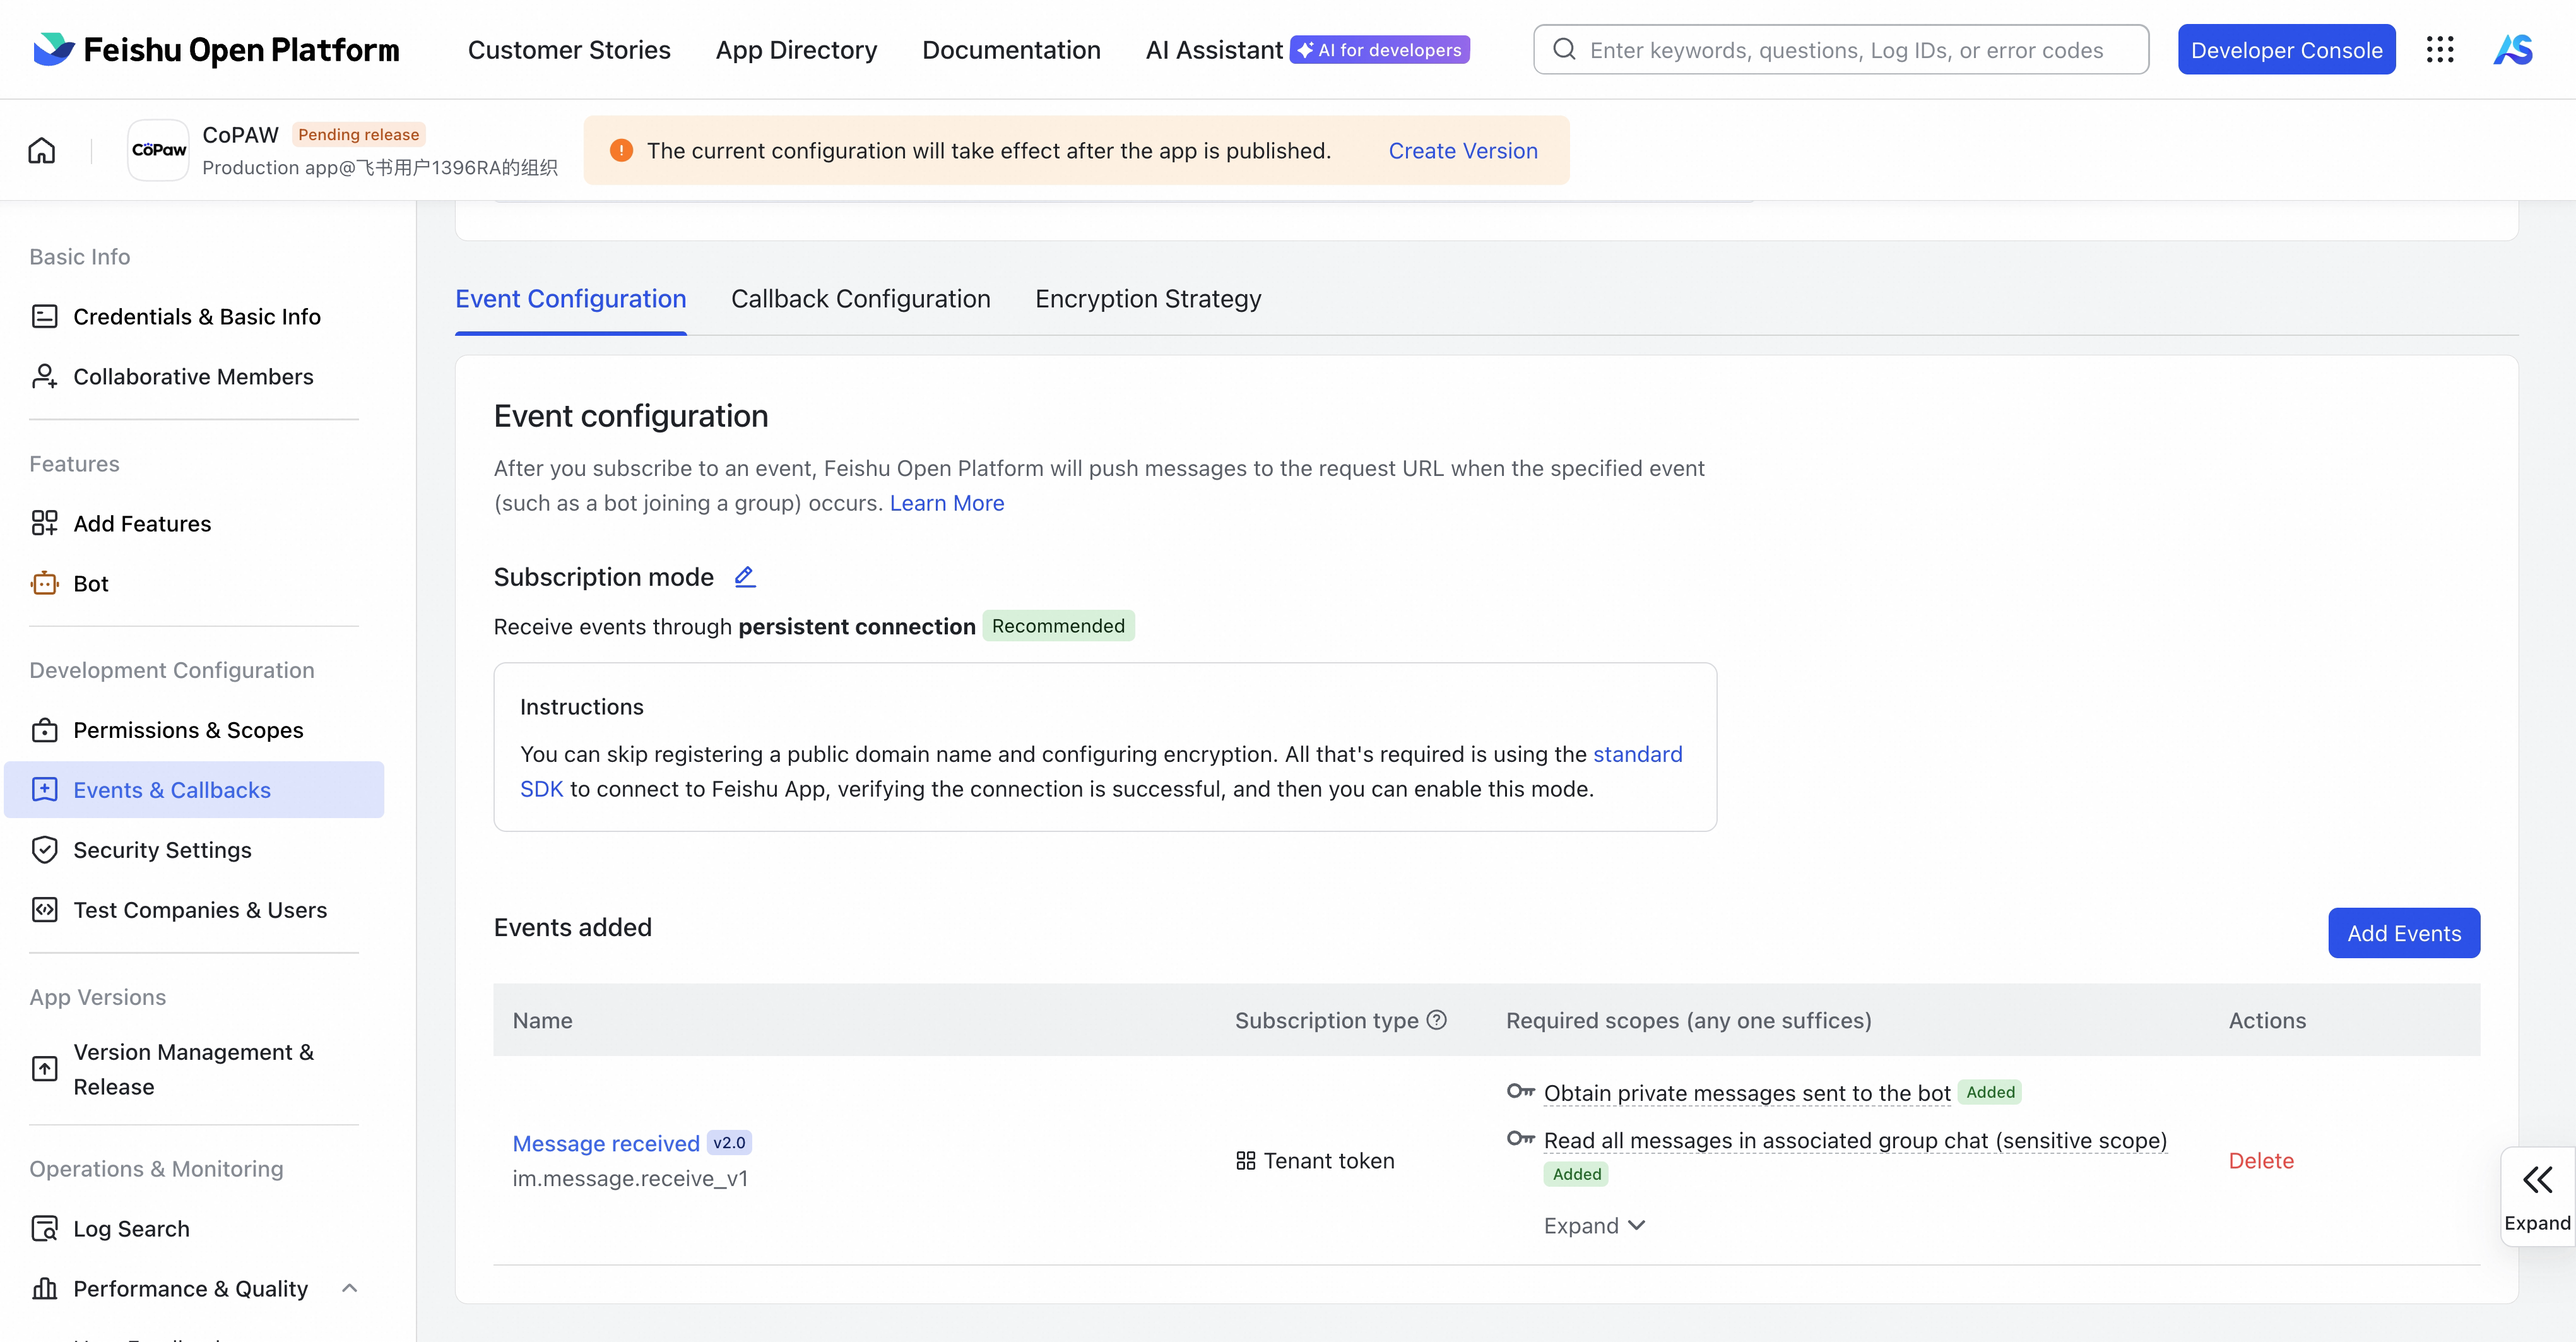
-
Select Add Events, search for Message received, and subscribe to Message received v2.0
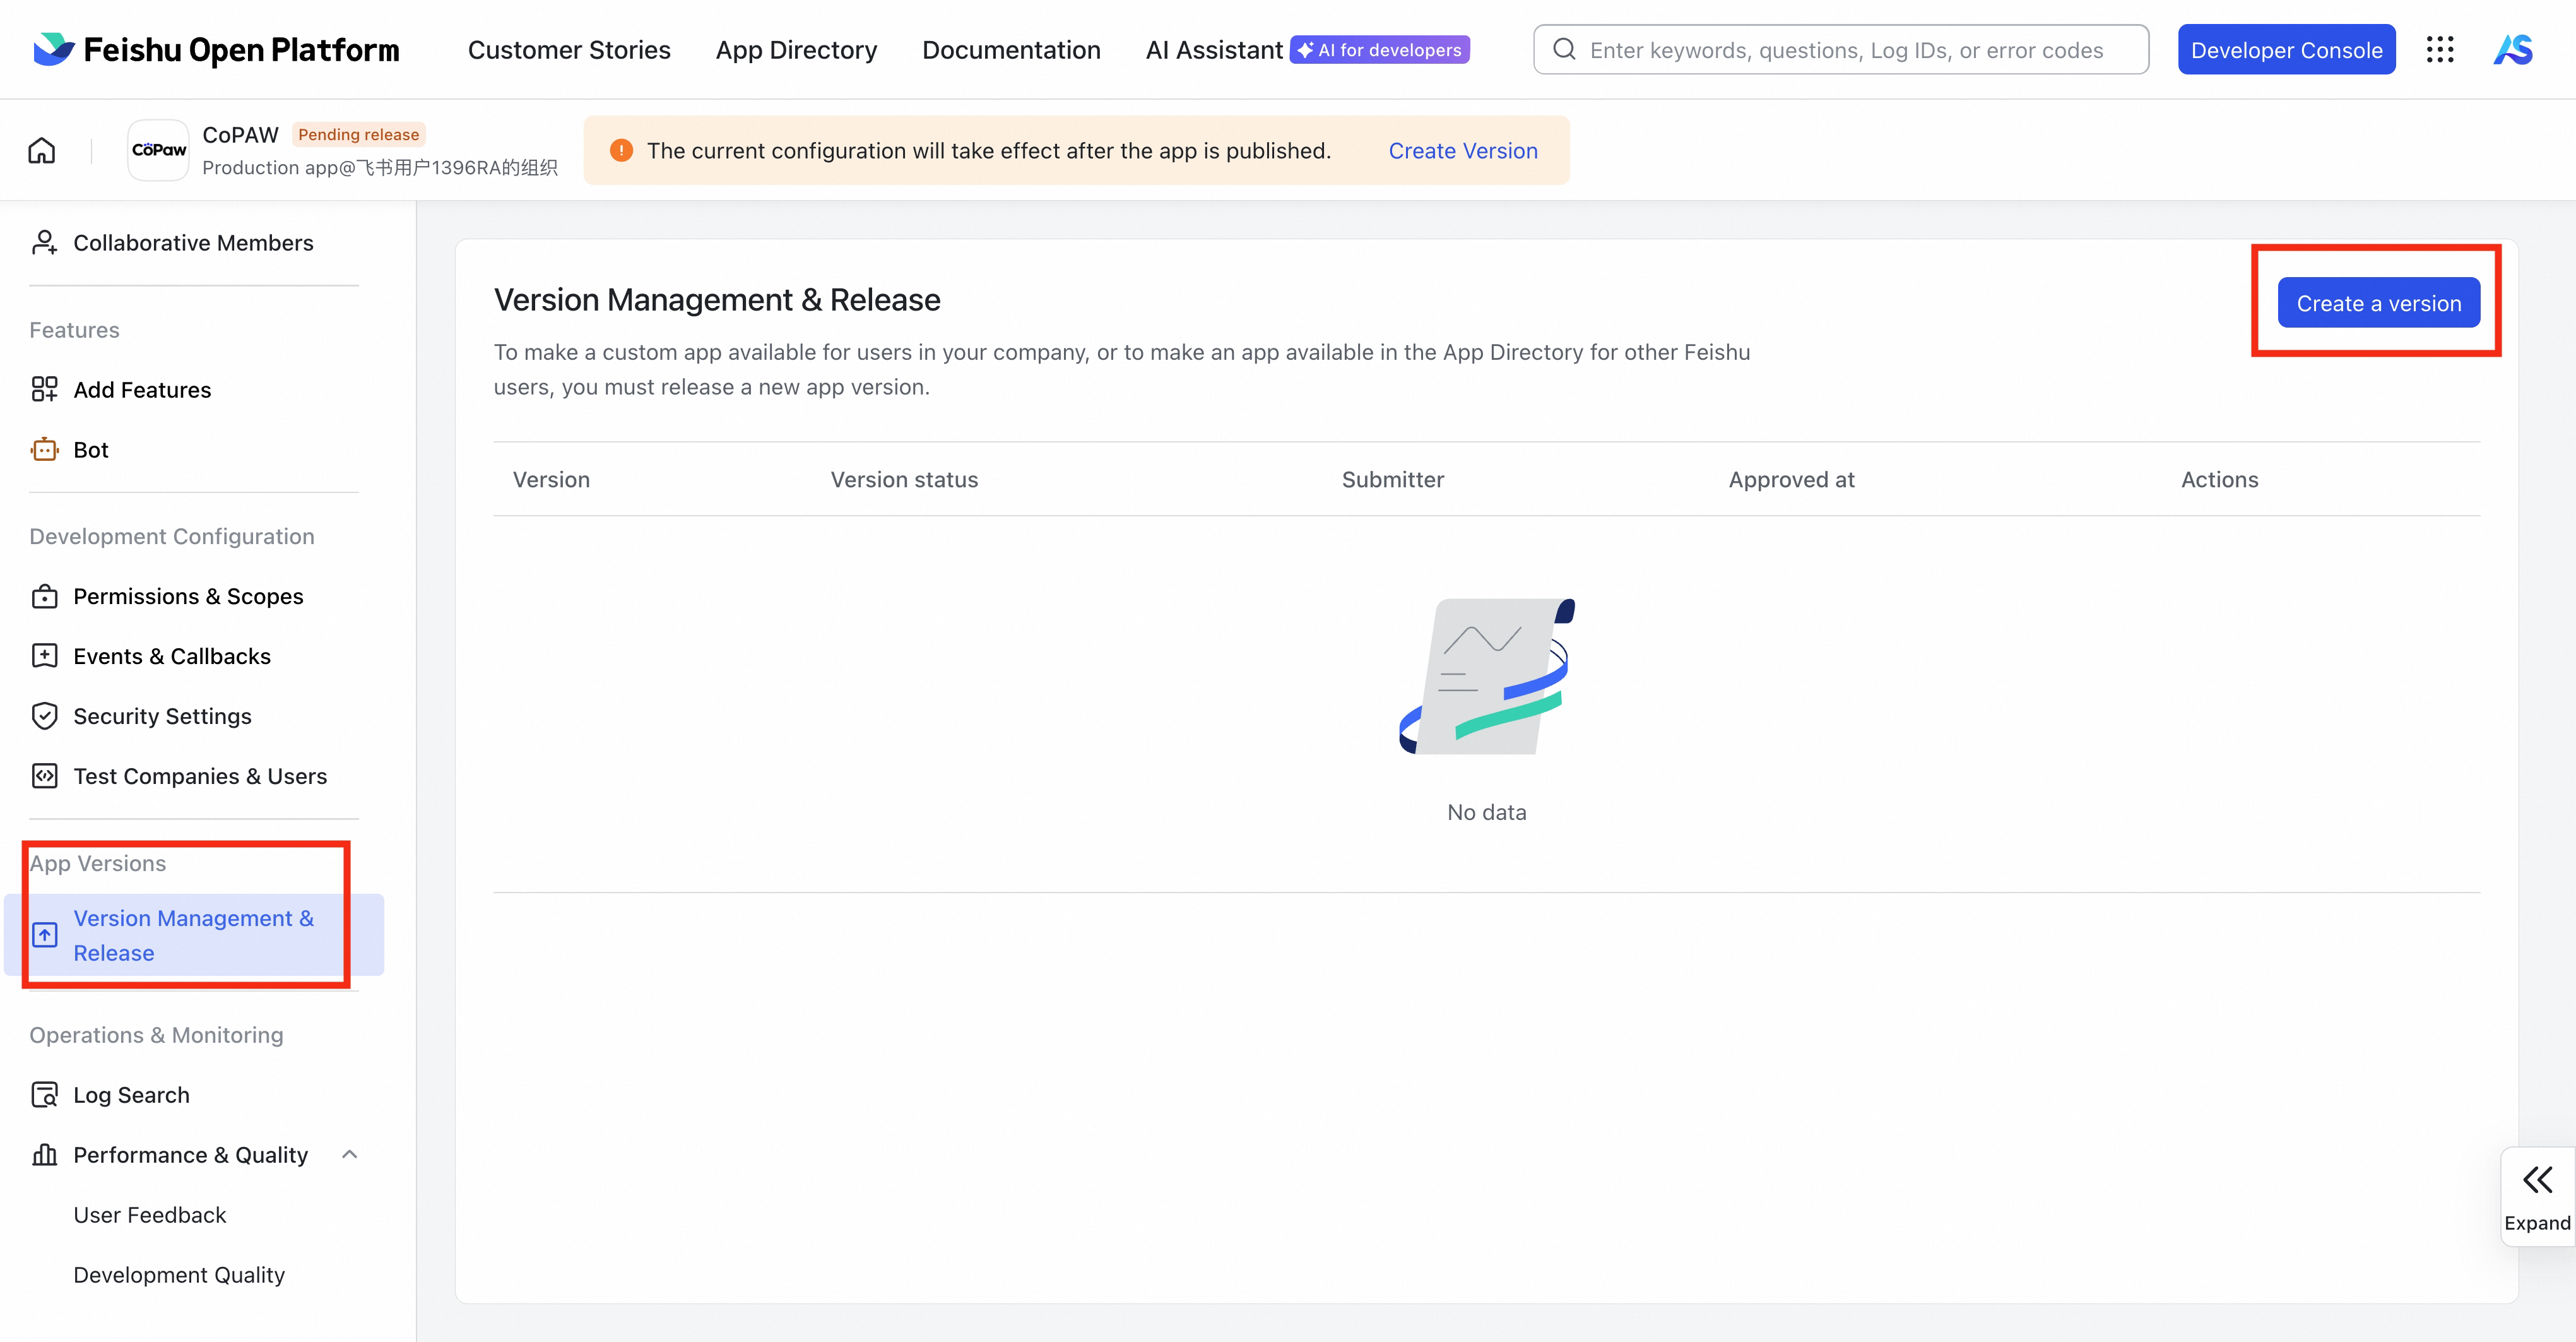
-
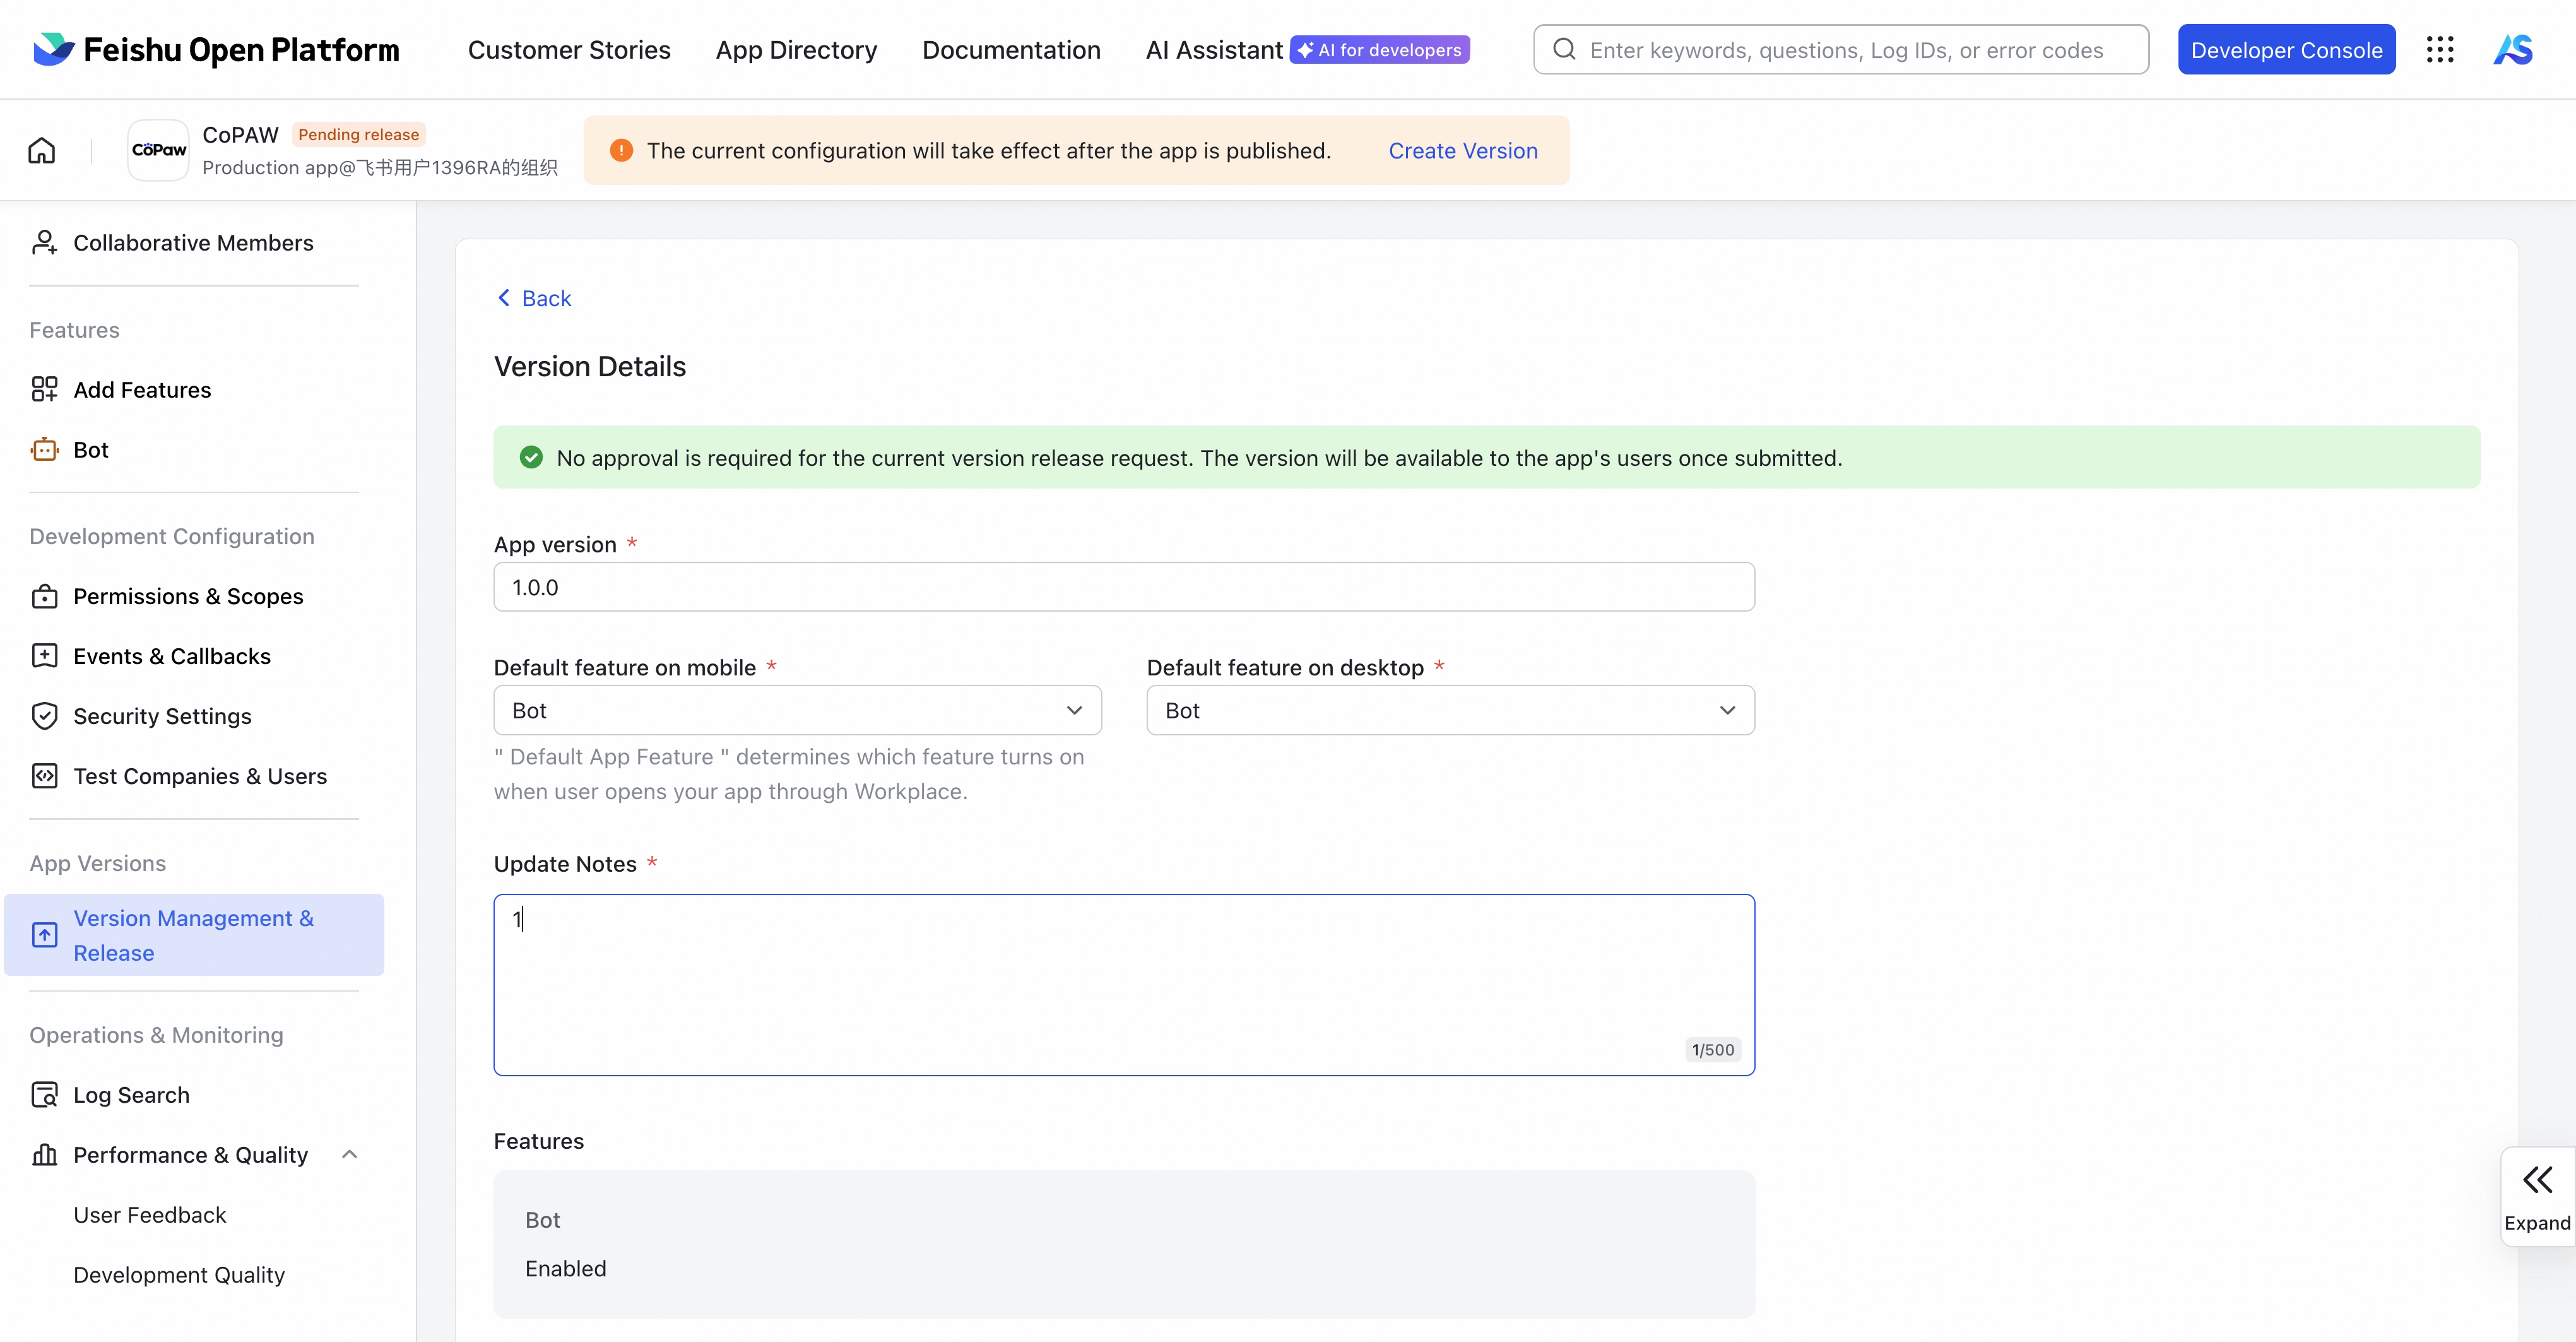
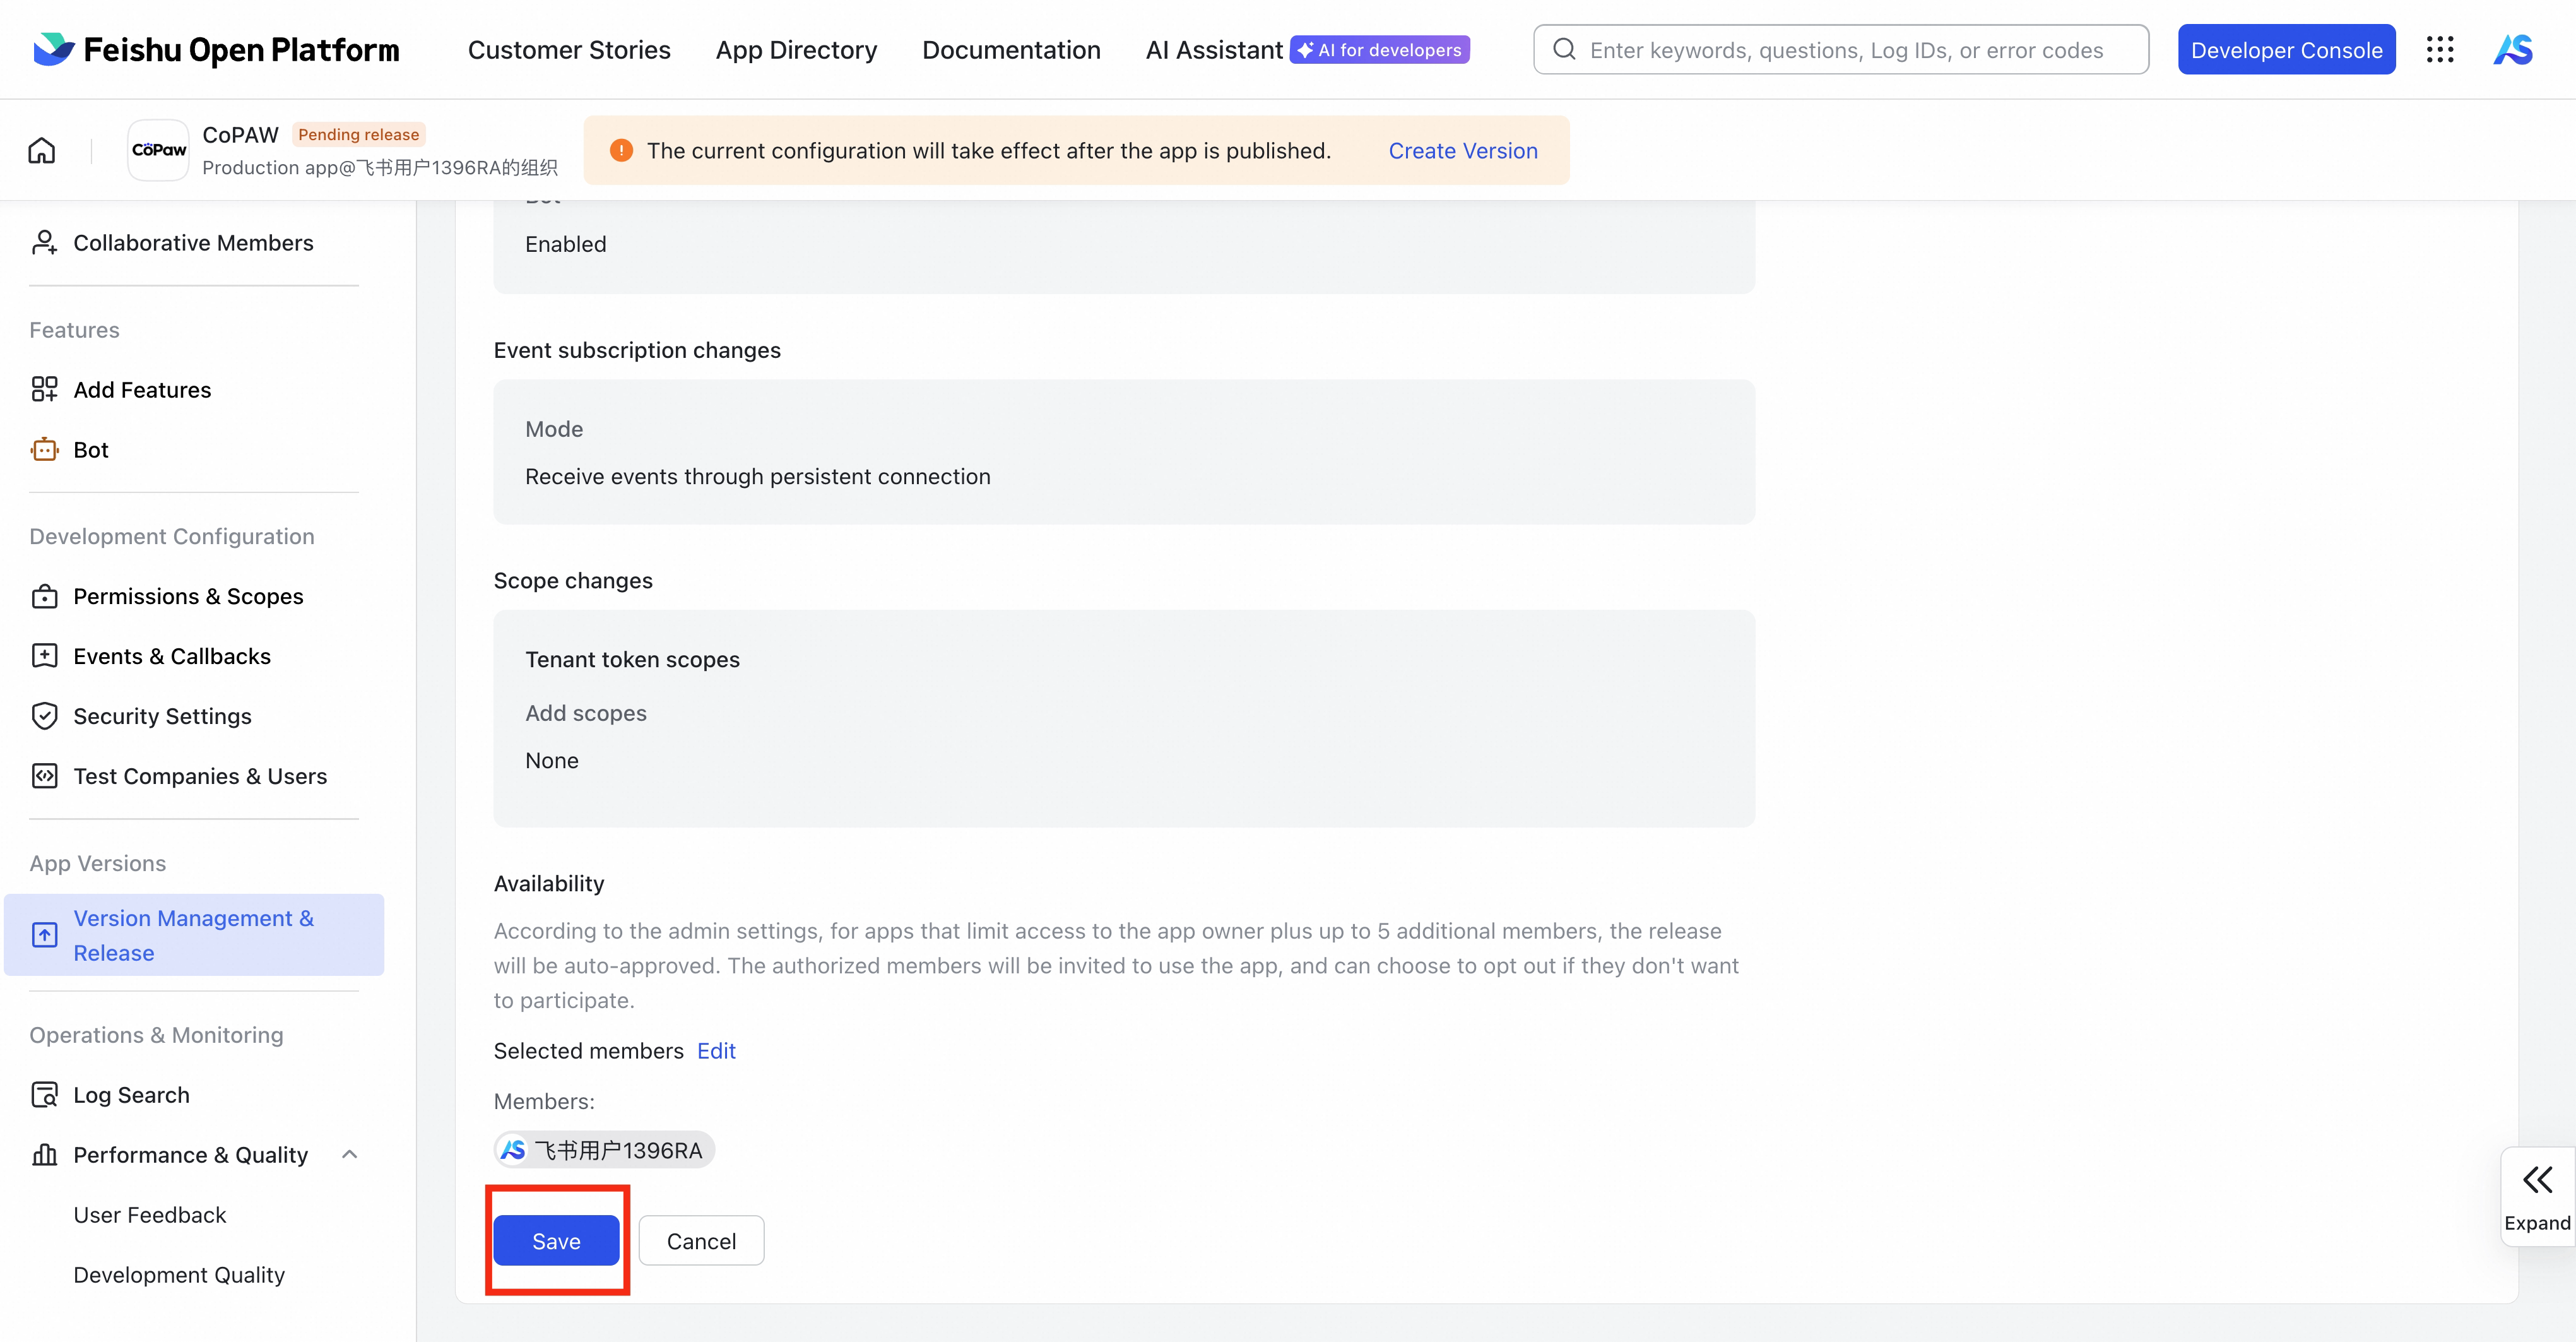
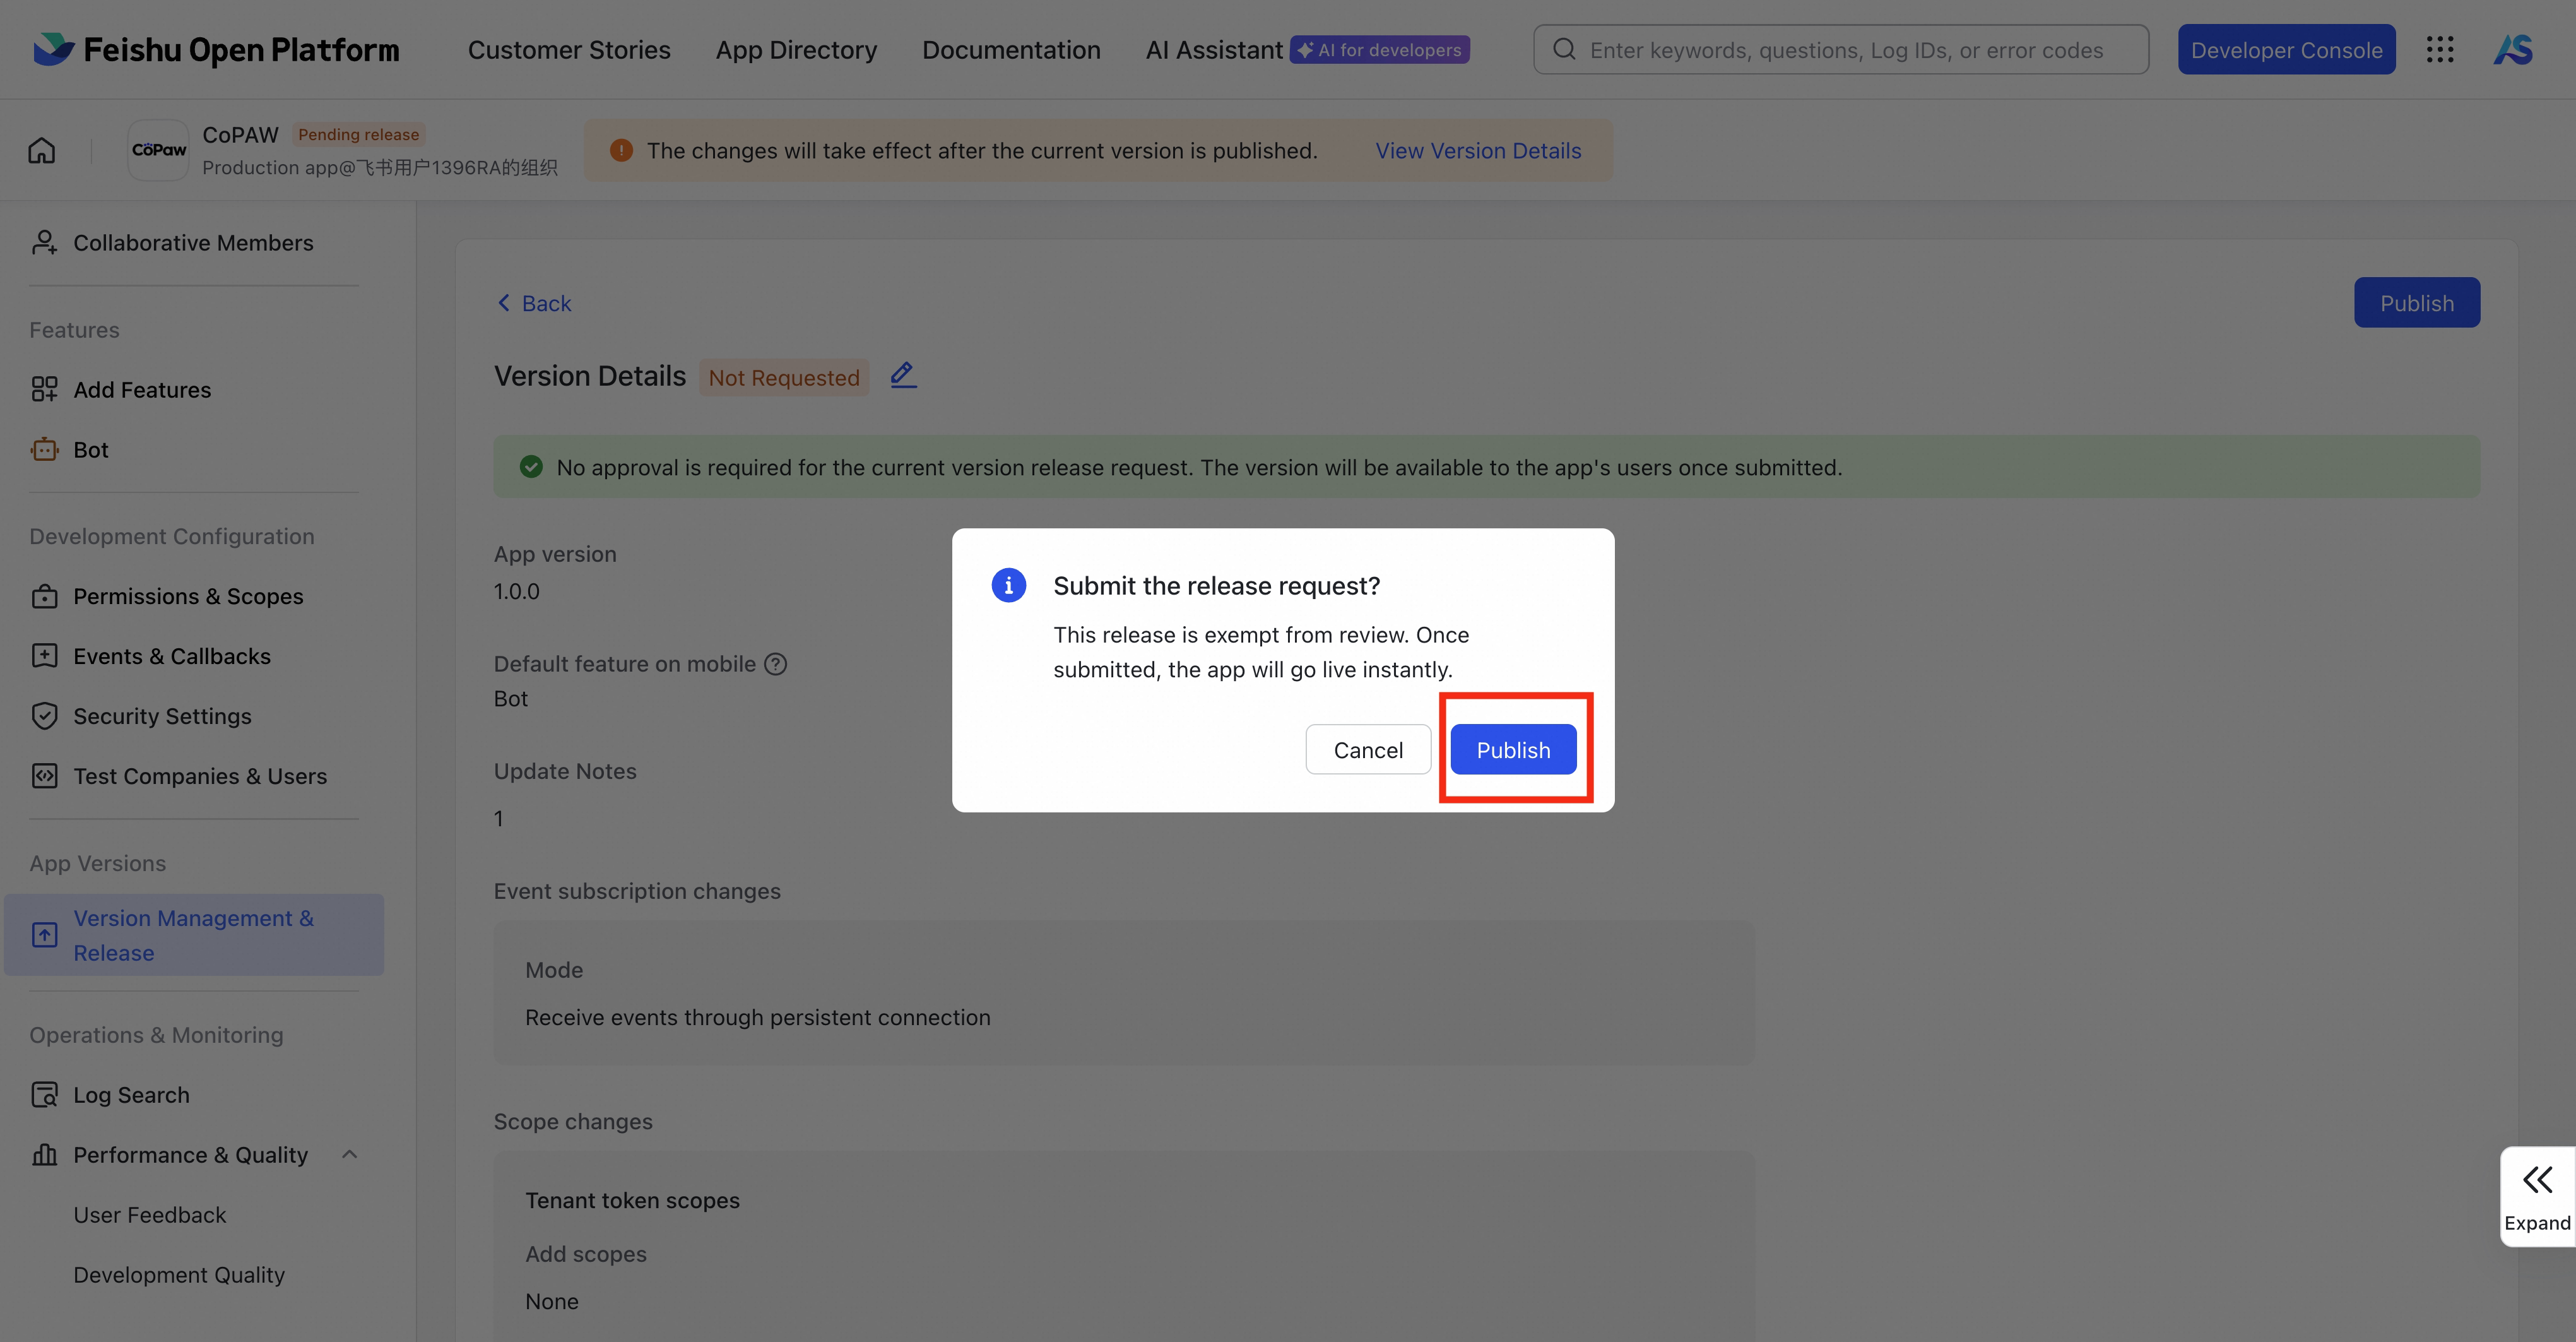
Under App Versions → Version Management & Release, Create a version, fill in basic info, Save and Publish
Fill config.json
Find channels.feishu (default as ~/.copaw/config.json) in config.json. Only App ID and App Secret are required (copy from the Feishu console under Credentials & basic info):
"feishu": {
  "enabled": true,
  "bot_prefix": "[BOT]",
  "app_id": "cli_xxxxx",
  "app_secret": "your App Secret"
}
Other fields (encrypt_key, verification_token, media_dir) are optional; with WebSocket mode you can omit them (defaults apply). Then pip install lark-oapi and run copaw app. If your environment uses a SOCKS proxy, also install python-socks (for example, pip install python-socks), otherwise you may see: python-socks is required to use a SOCKS proxy.
Note: You can also fill in App ID and App Secret in the Console UI, but you must restart the copaw service before continuing with the long-connection configuration.
Recommended bot permissions
The JSON in step 6 grants the following permissions (app identity) for messaging and files:
| Permission name | Permission ID | Type | Notes |
|---|---|---|---|
| Get file | aily:file:read | App | - |
| Upload file | aily:file:write | App | - |
| Get message | aily:message:read | App | - |
| Send message | aily:message:write | App | - |
| Download file | corehr:file:download | App | - |
| Get/update group info | im:chat | App | - |
| Get/send chat and group messages | im:message | App | - |
| Get all group messages (sensitive) | im:message.group_msg | App | - |
| Read user-to-bot DMs | im:message.p2p_msg:readonly | App | - |
| View message reactions | im:message.reactions:read | App | - |
| Get/upload image and file resources | im:resource | App | - |
| Read contact as app | contact:user.base:readonly | App | See below |
User display name (recommended): To show user nicknames in sessions and logs (e.g. "张三#1d1a" instead of "unknown#1d1a"), enable the contact read permission Read contact as app (
contact:user.base:readonly). Without it, Feishu only returns identity fields (e.g. open_id) and not the user's name, so CoPAW cannot resolve nicknames. After enabling, publish or update the app version so the permission takes effect.
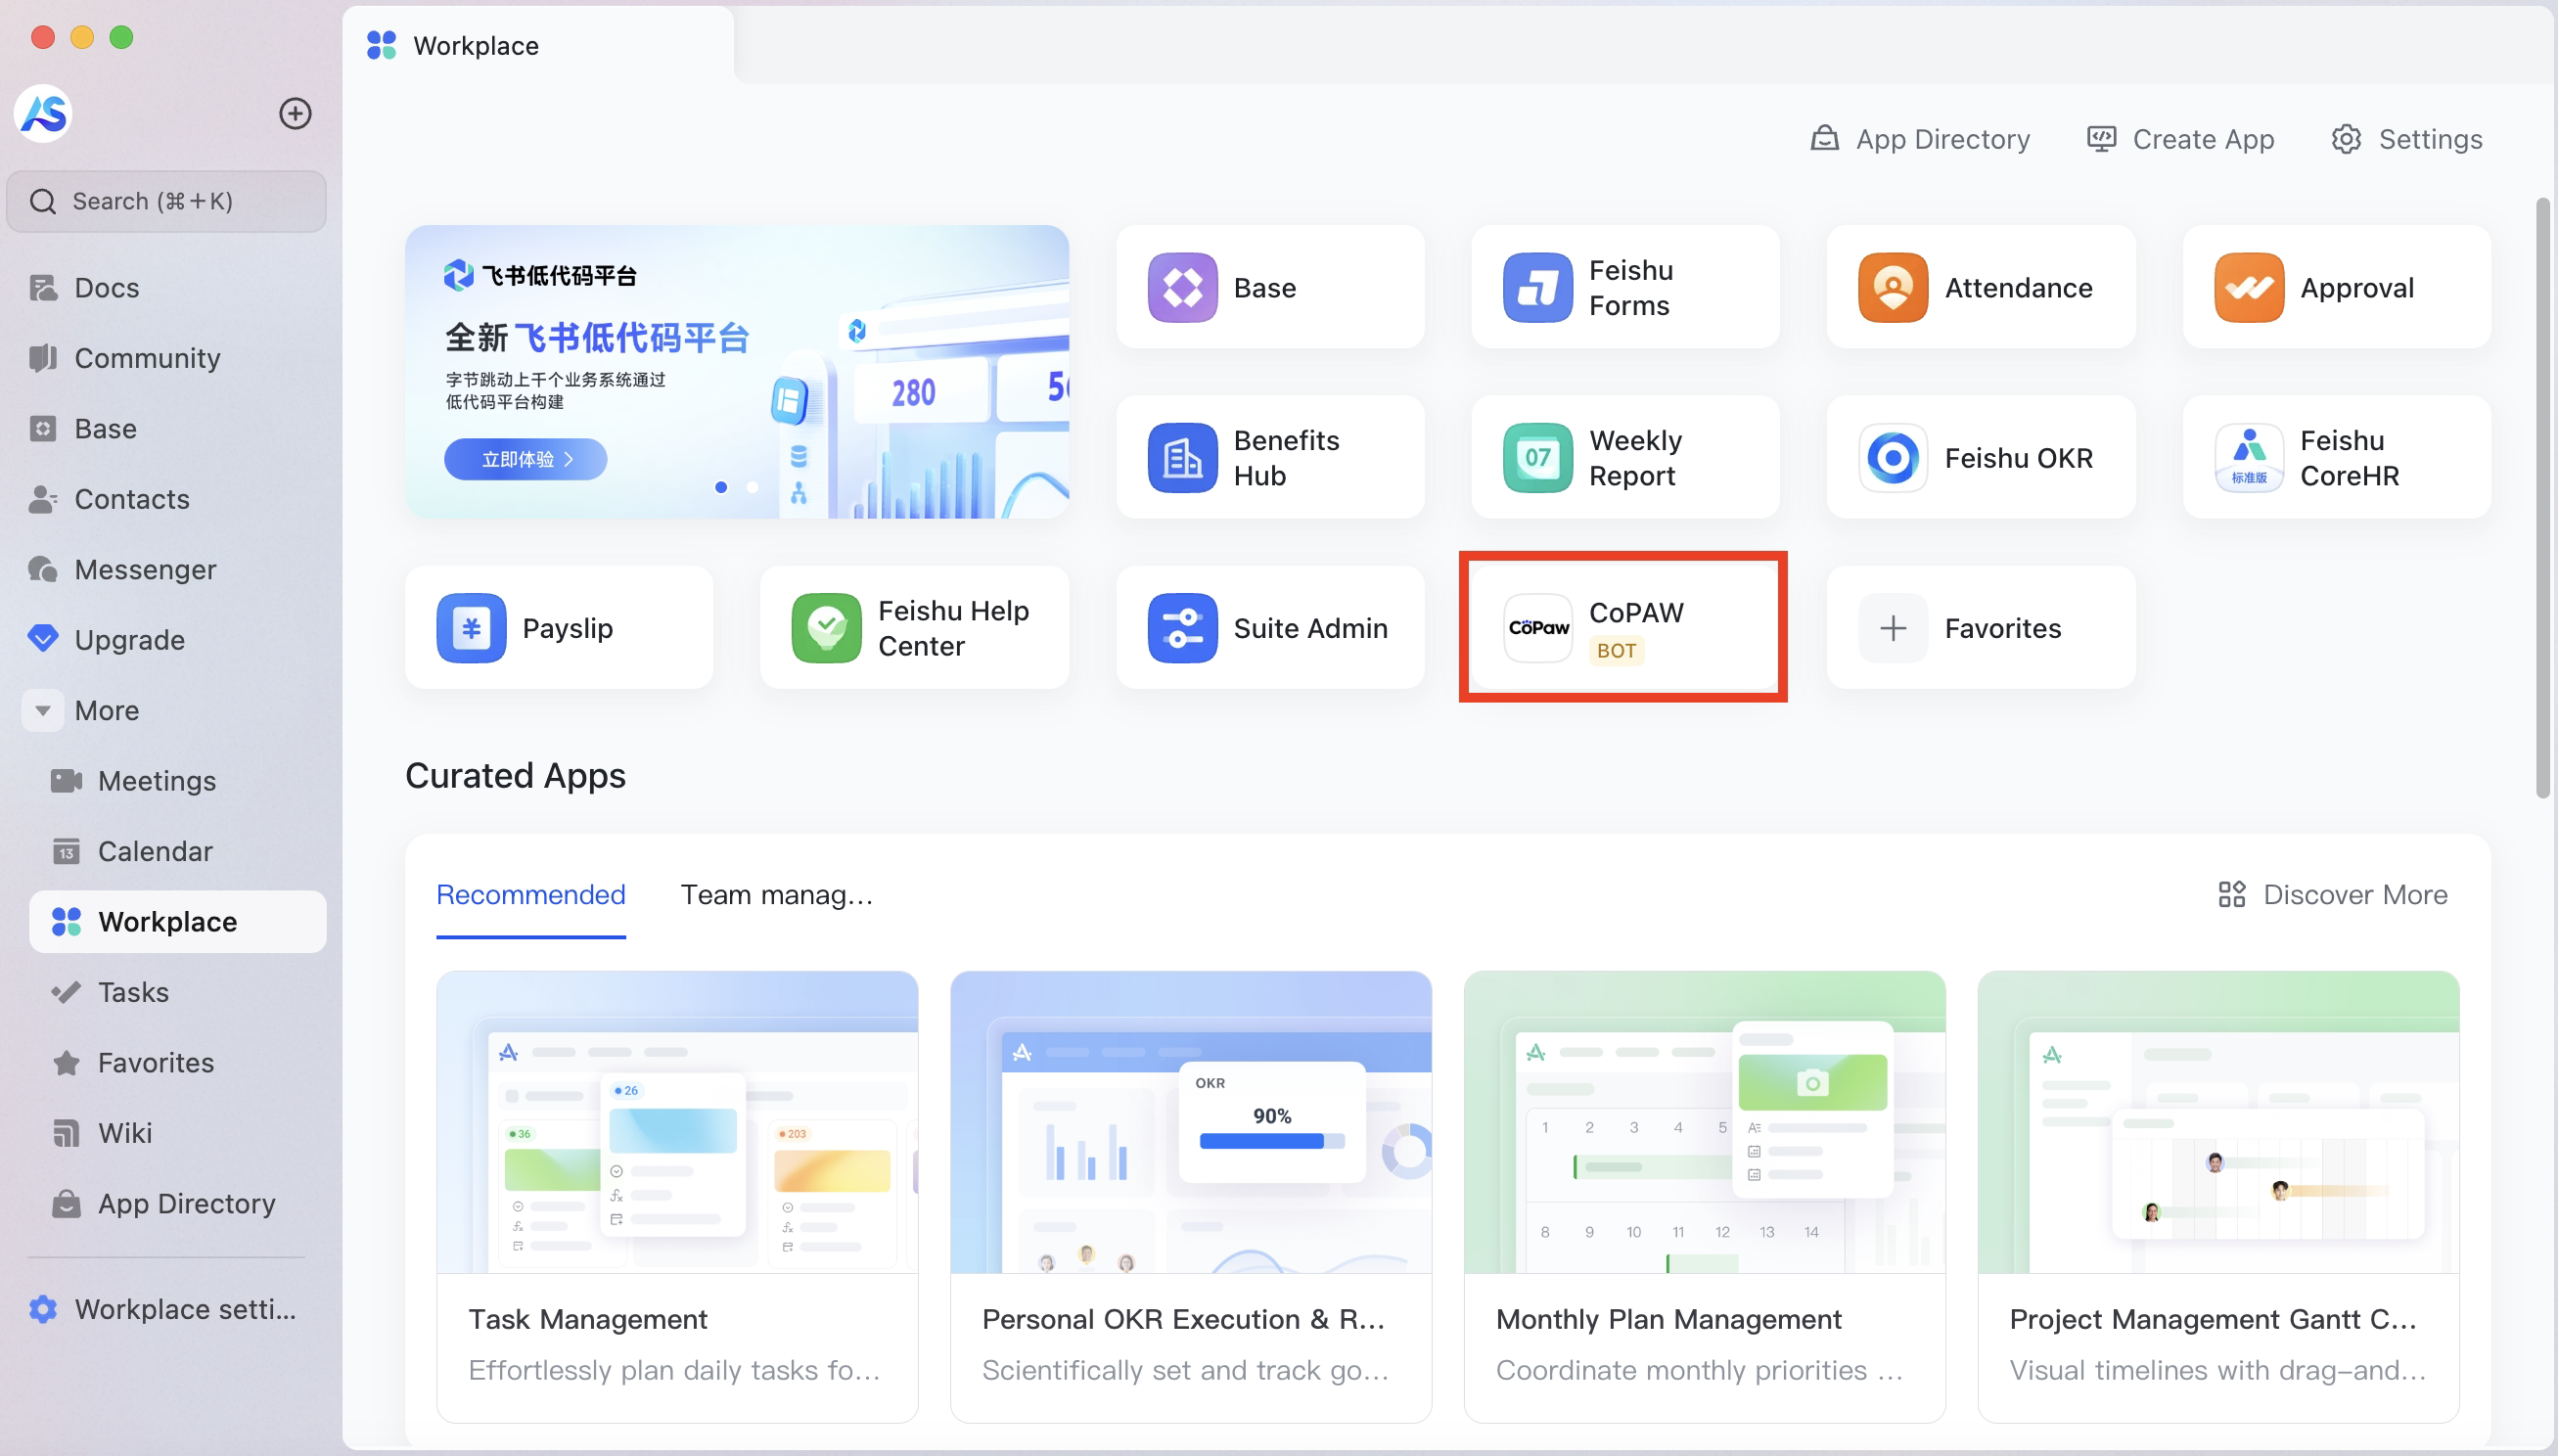
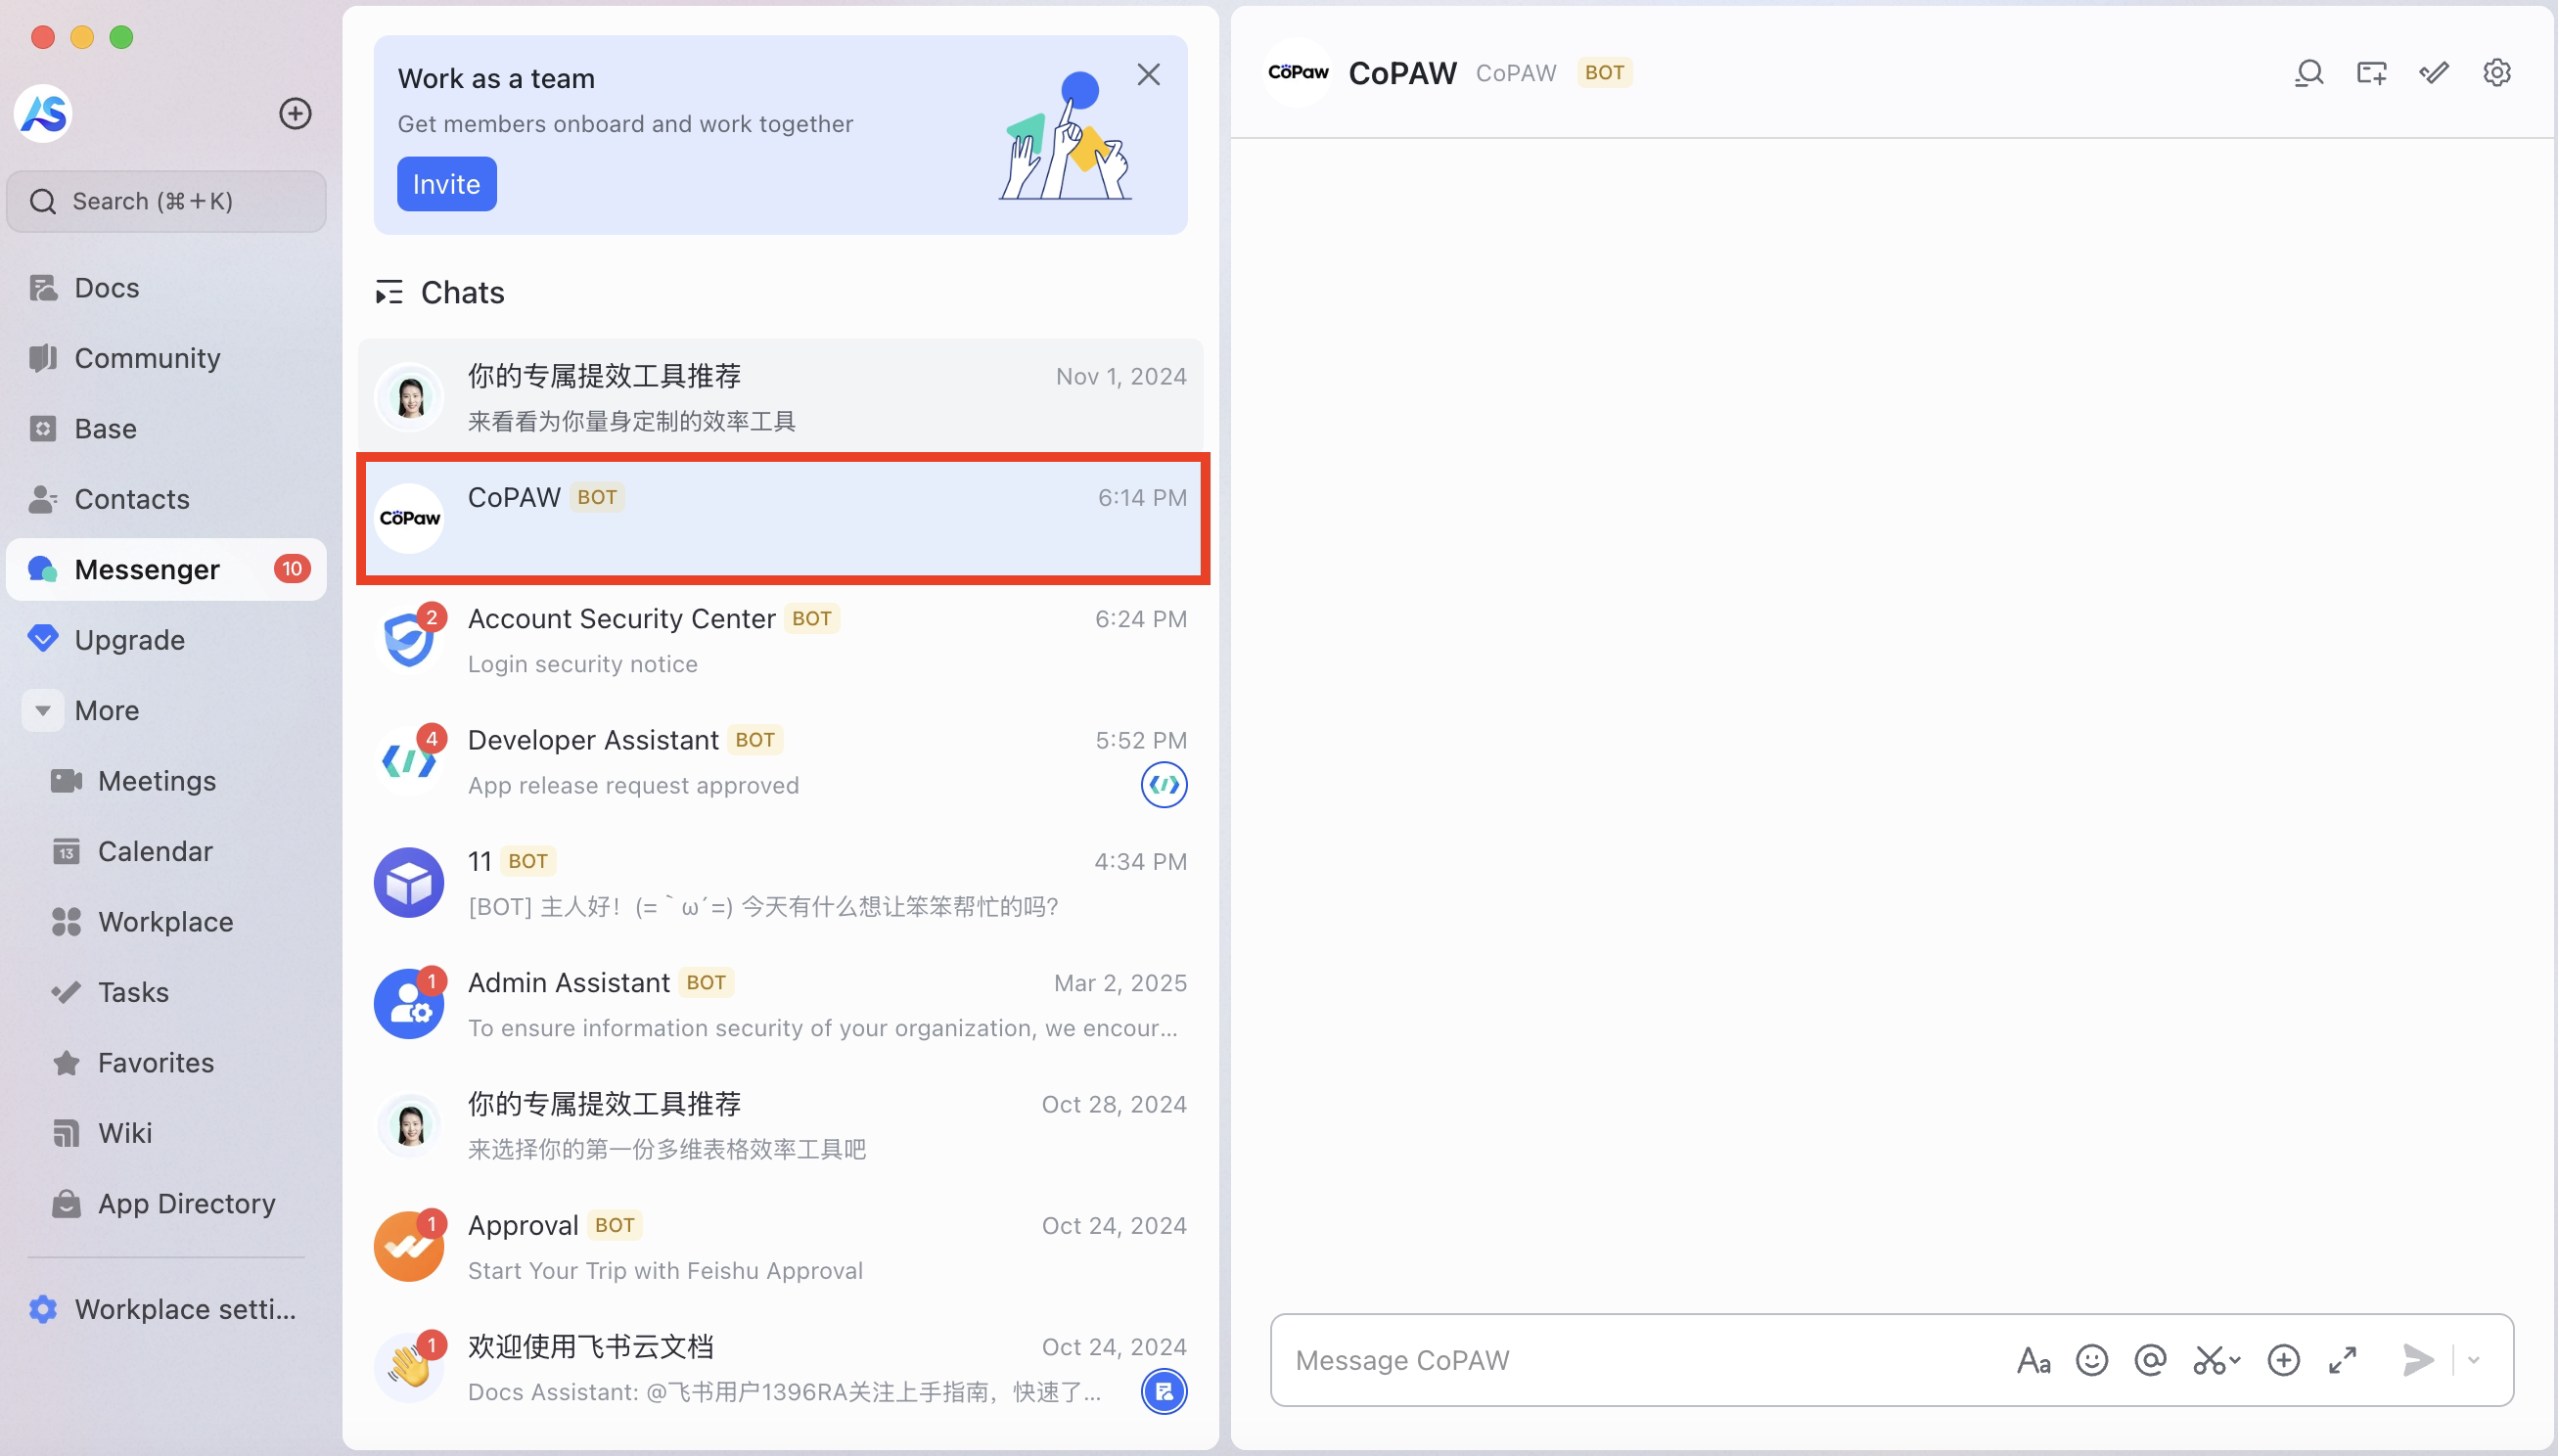
Add the bot to favorites
-
In the Workplace, tap add Favorites
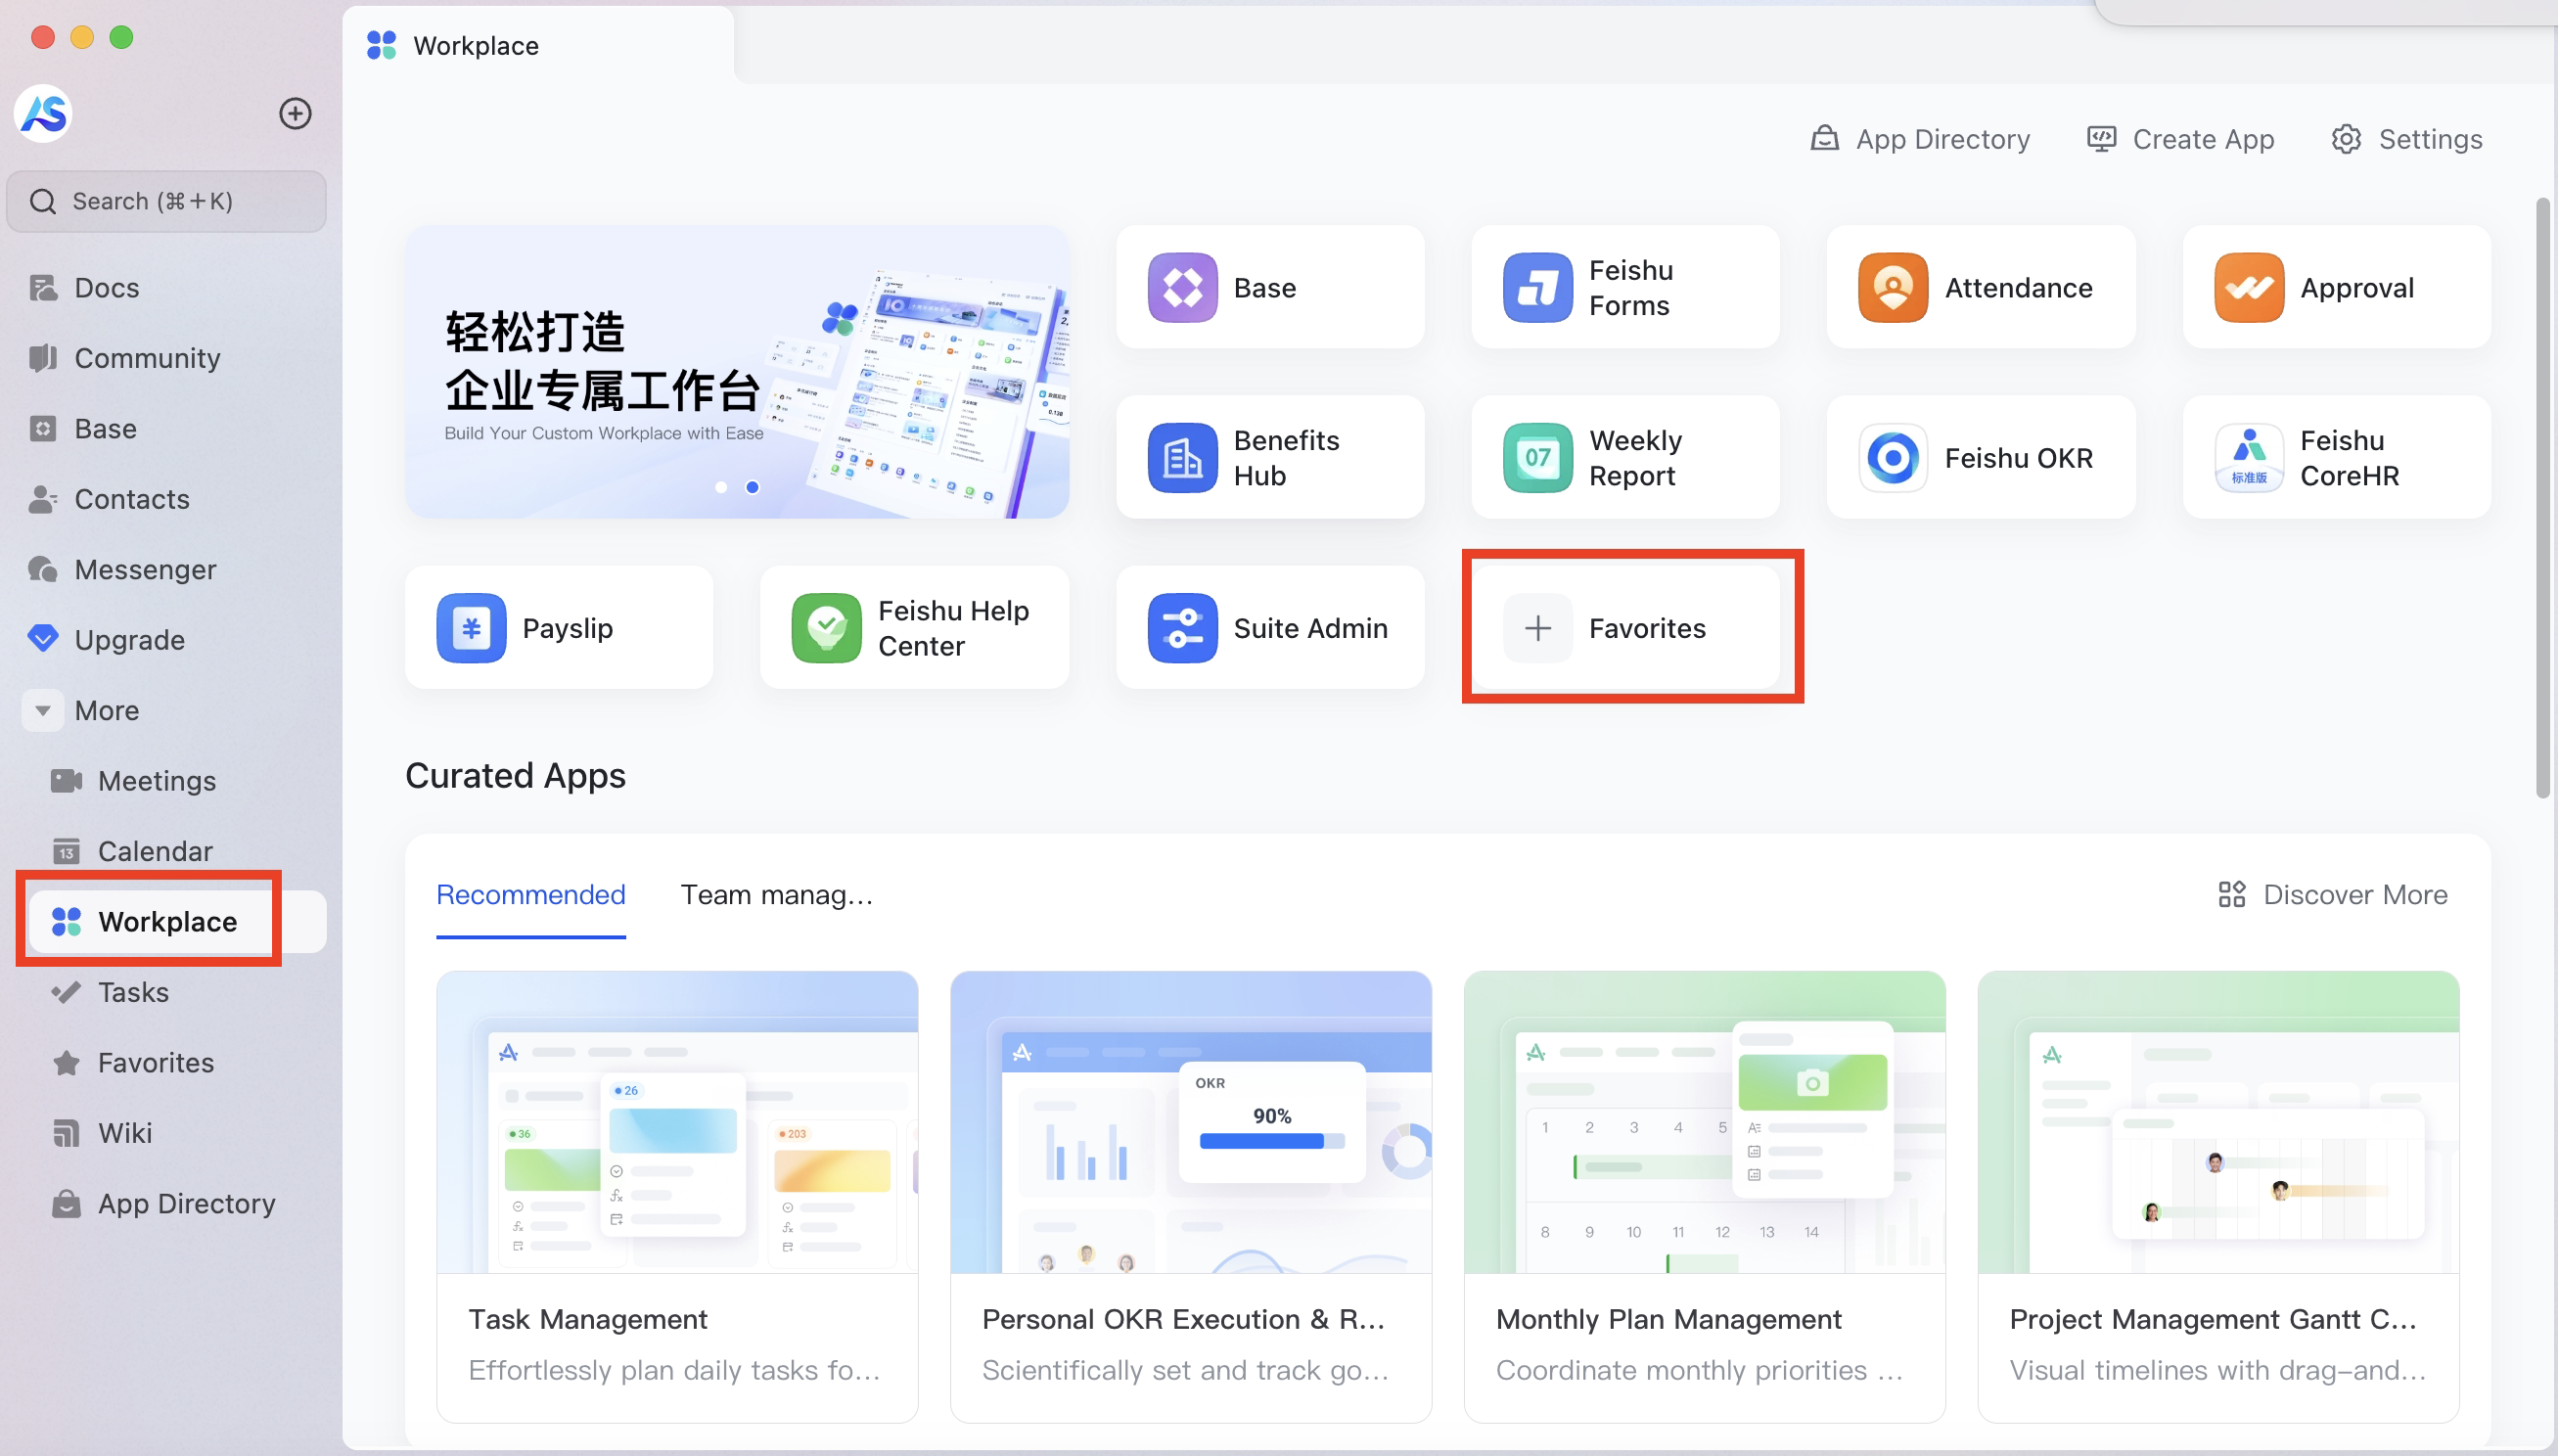
-
Search for the bot name you created and tap Add
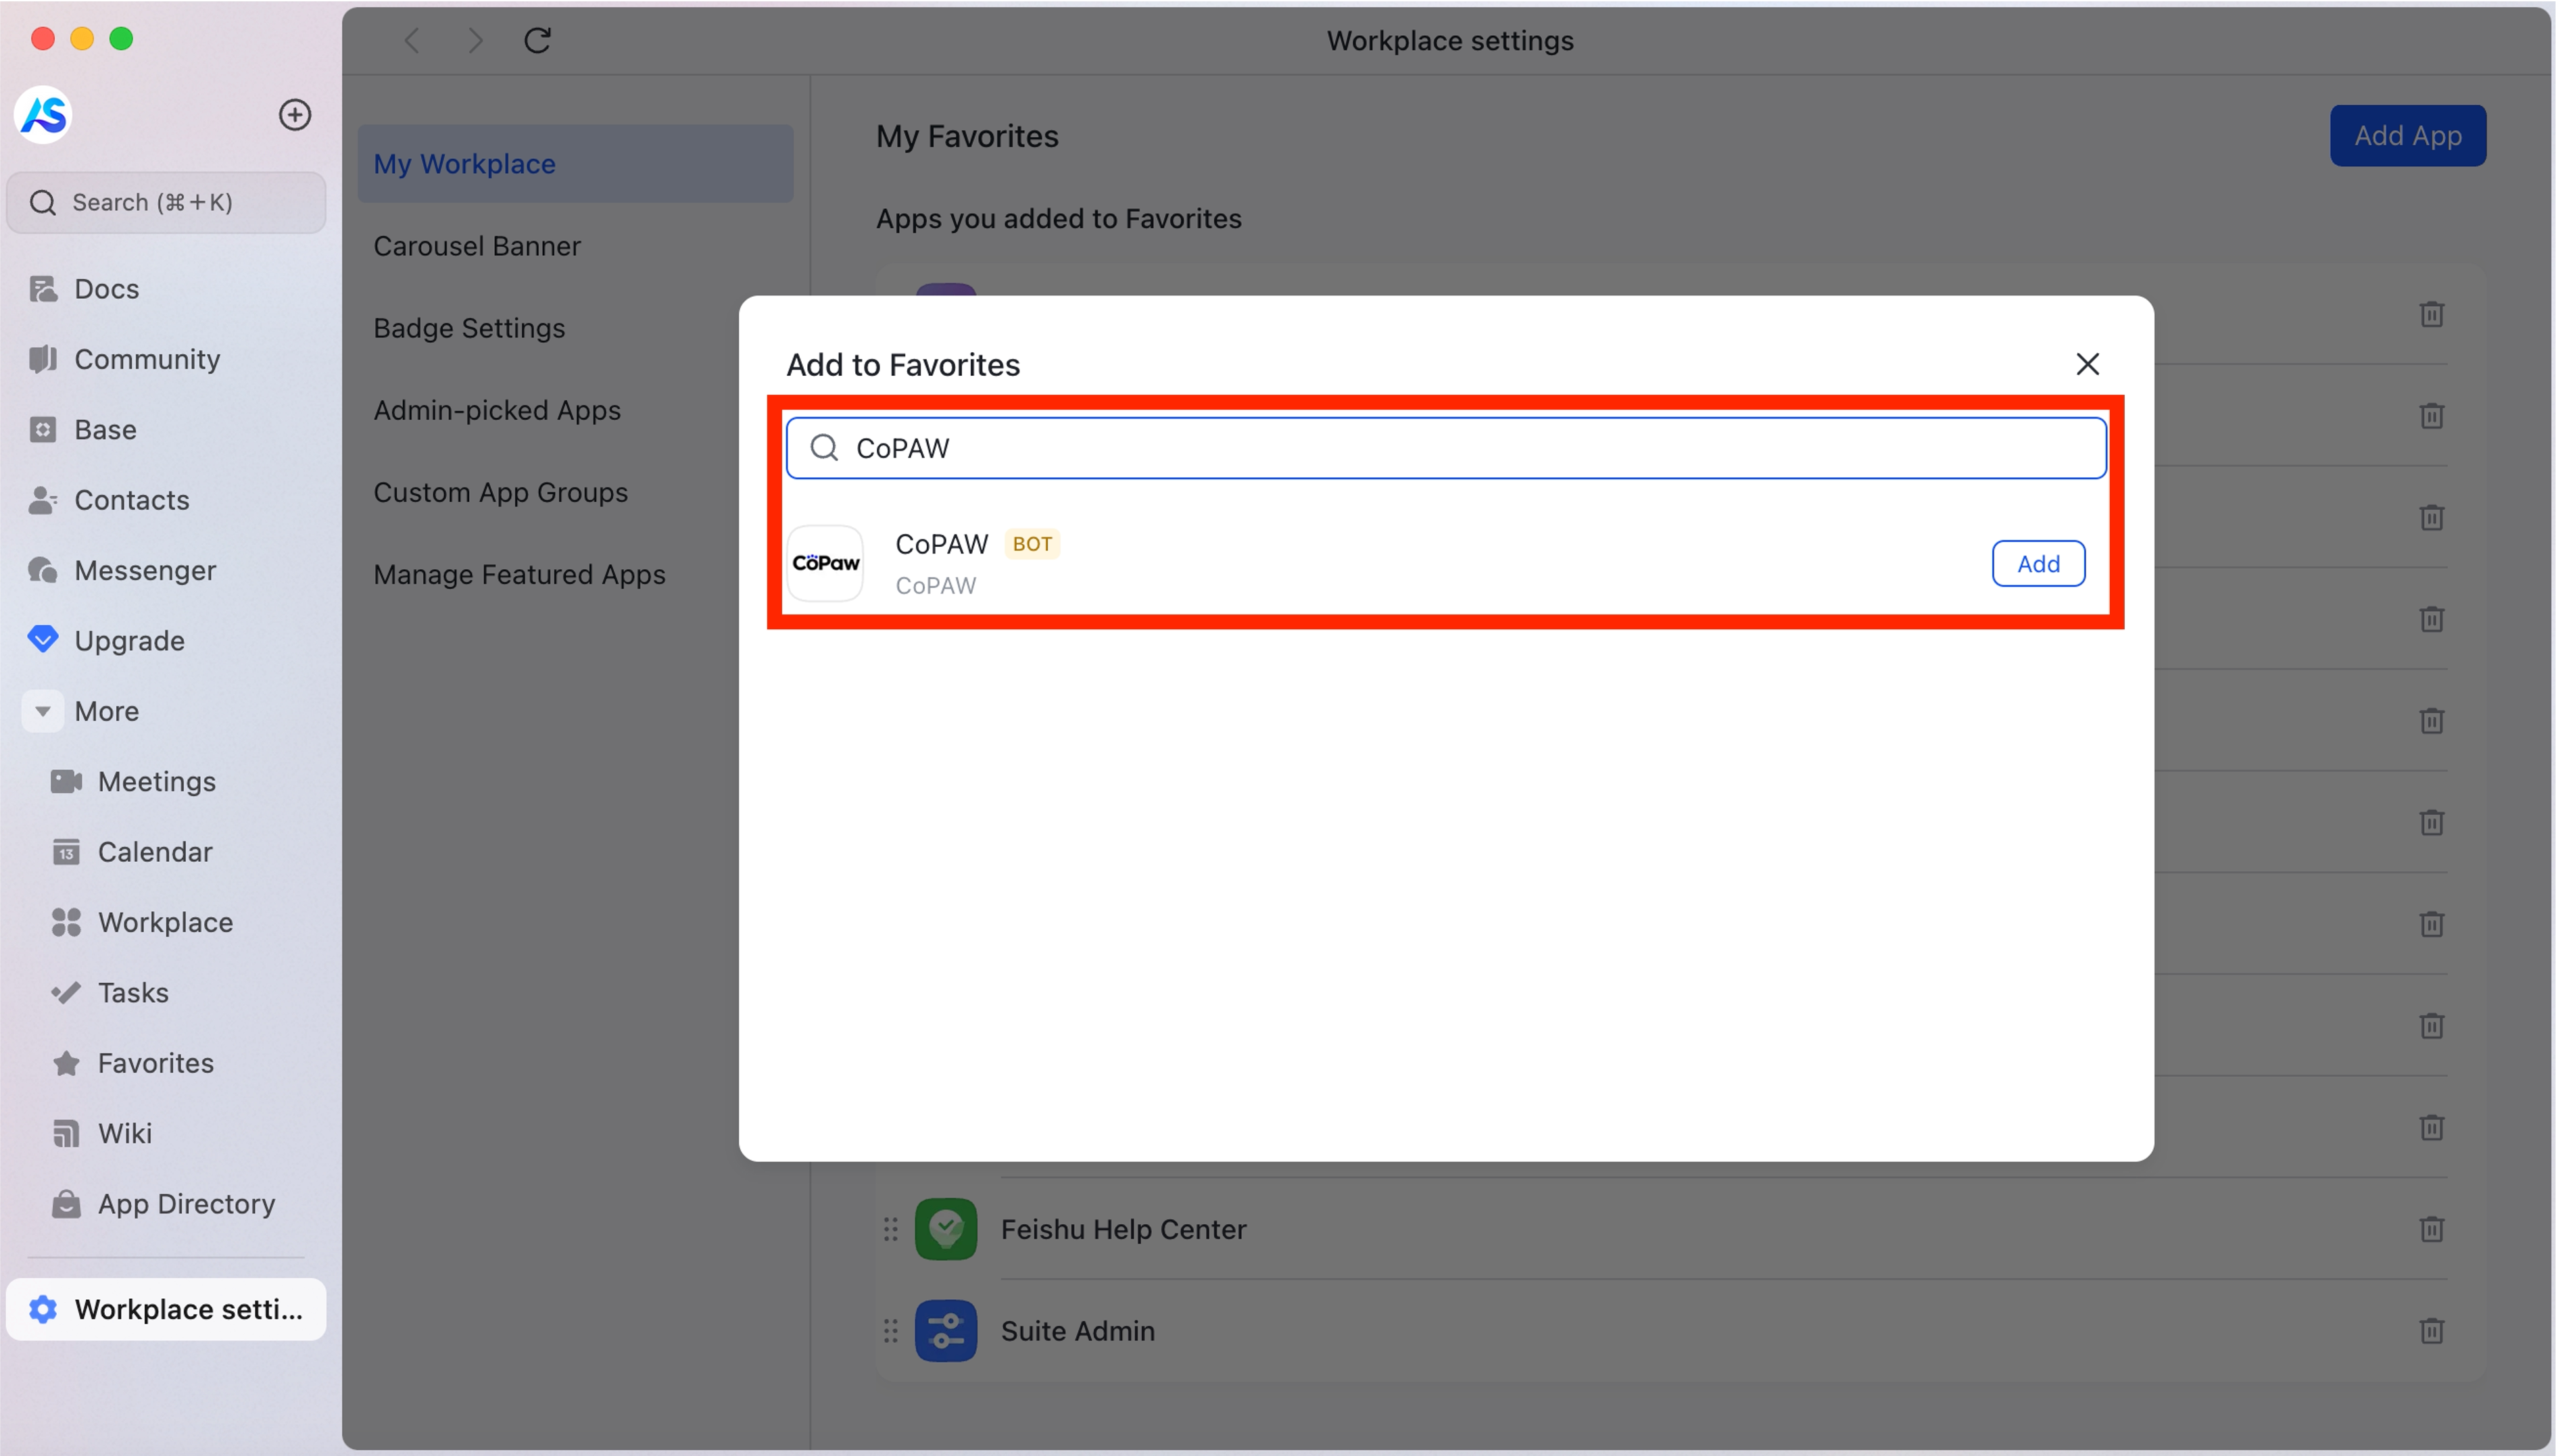
-
The bot will appear in your favorites; tap it to open the chat
iMessage (macOS only)
The iMessage channel is macOS only. It relies on the local Messages app and the iMessage database, so it cannot run on Linux or Windows.
The app polls the local iMessage database for new messages and sends replies on your behalf.
Prerequisites
- Ensure Messages is signed in on this Mac (open the Messages app and sign in with your Apple ID in System Settings).
- Install imsg (used to access the iMessage database):
brew install steipete/tap/imsg - The default iMessage database path is
~/Library/Messages/chat.db. Use this unless you've moved the database. - The app needs Full Disk Access (System Settings → Privacy & Security → Full Disk Access) to read
chat.db. - Everything stays on your machine; no data is sent elsewhere.
Fill config.json
"imessage": {
  "enabled": true,
  "bot_prefix": "[BOT]",
  "db_path": "~/Library/Messages/chat.db",
  "poll_sec": 1.0
}- db_path — Path to the iMessage database
- poll_sec — Poll interval in seconds (1 is fine)
Discord
Get a Bot Token
-
Open the Discord Developer Portal
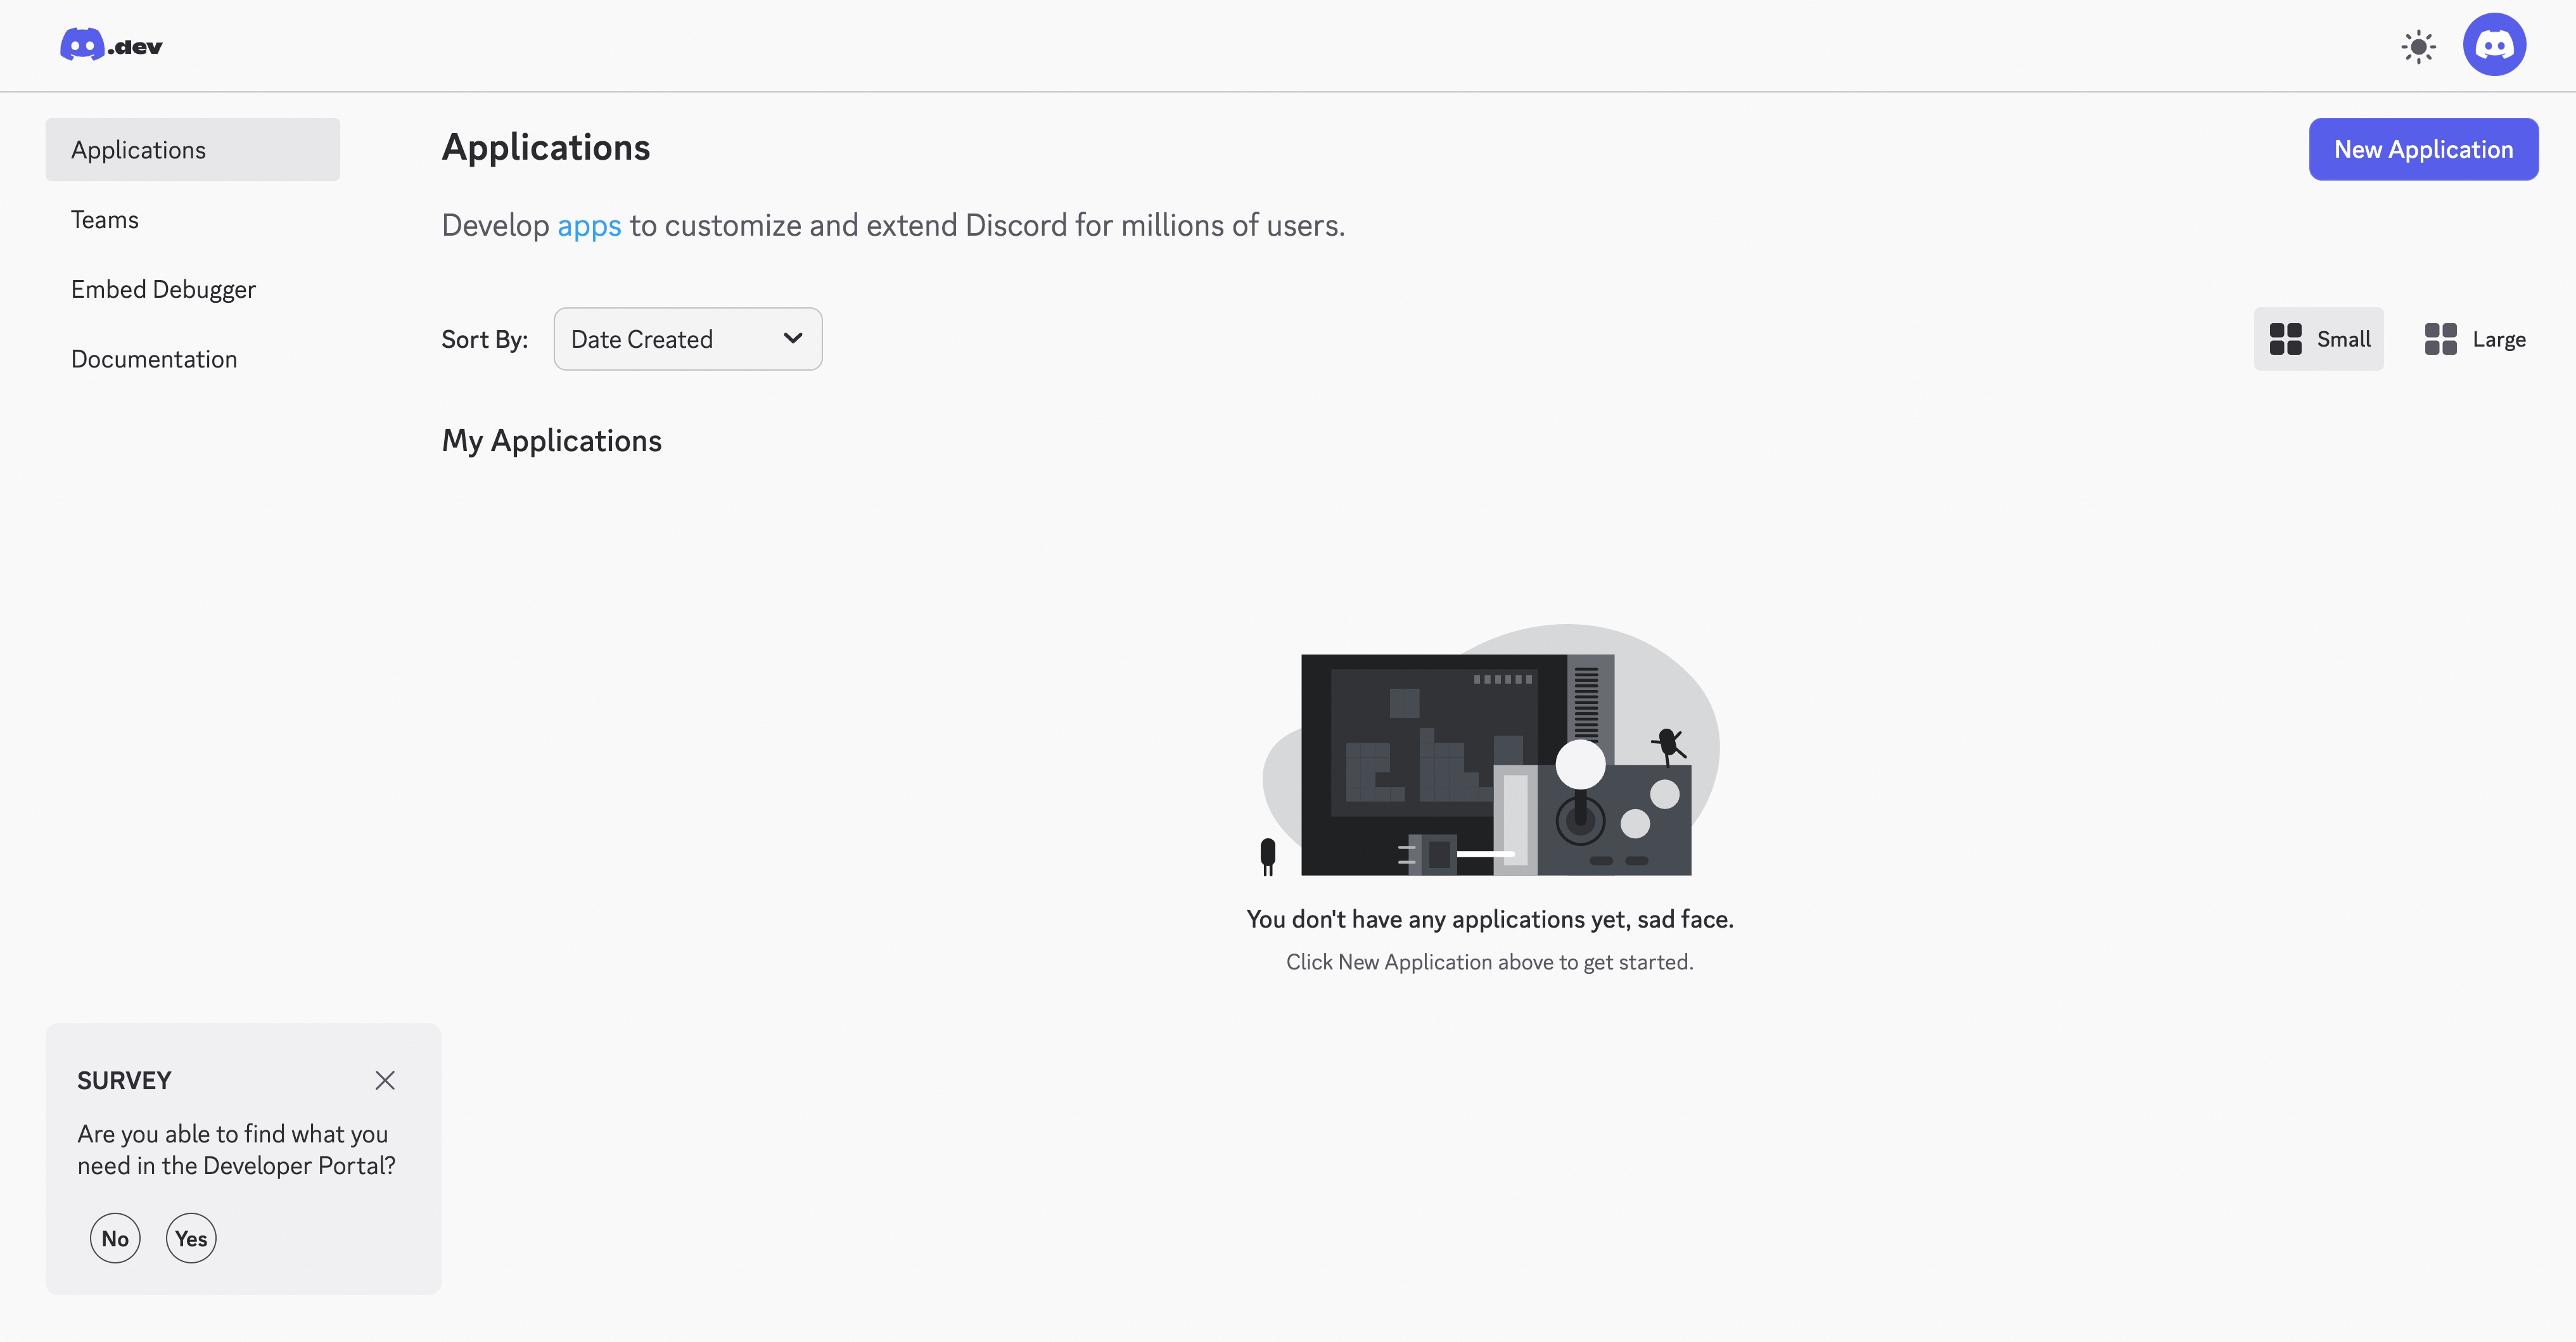
-
Create a new application (or select an existing one)
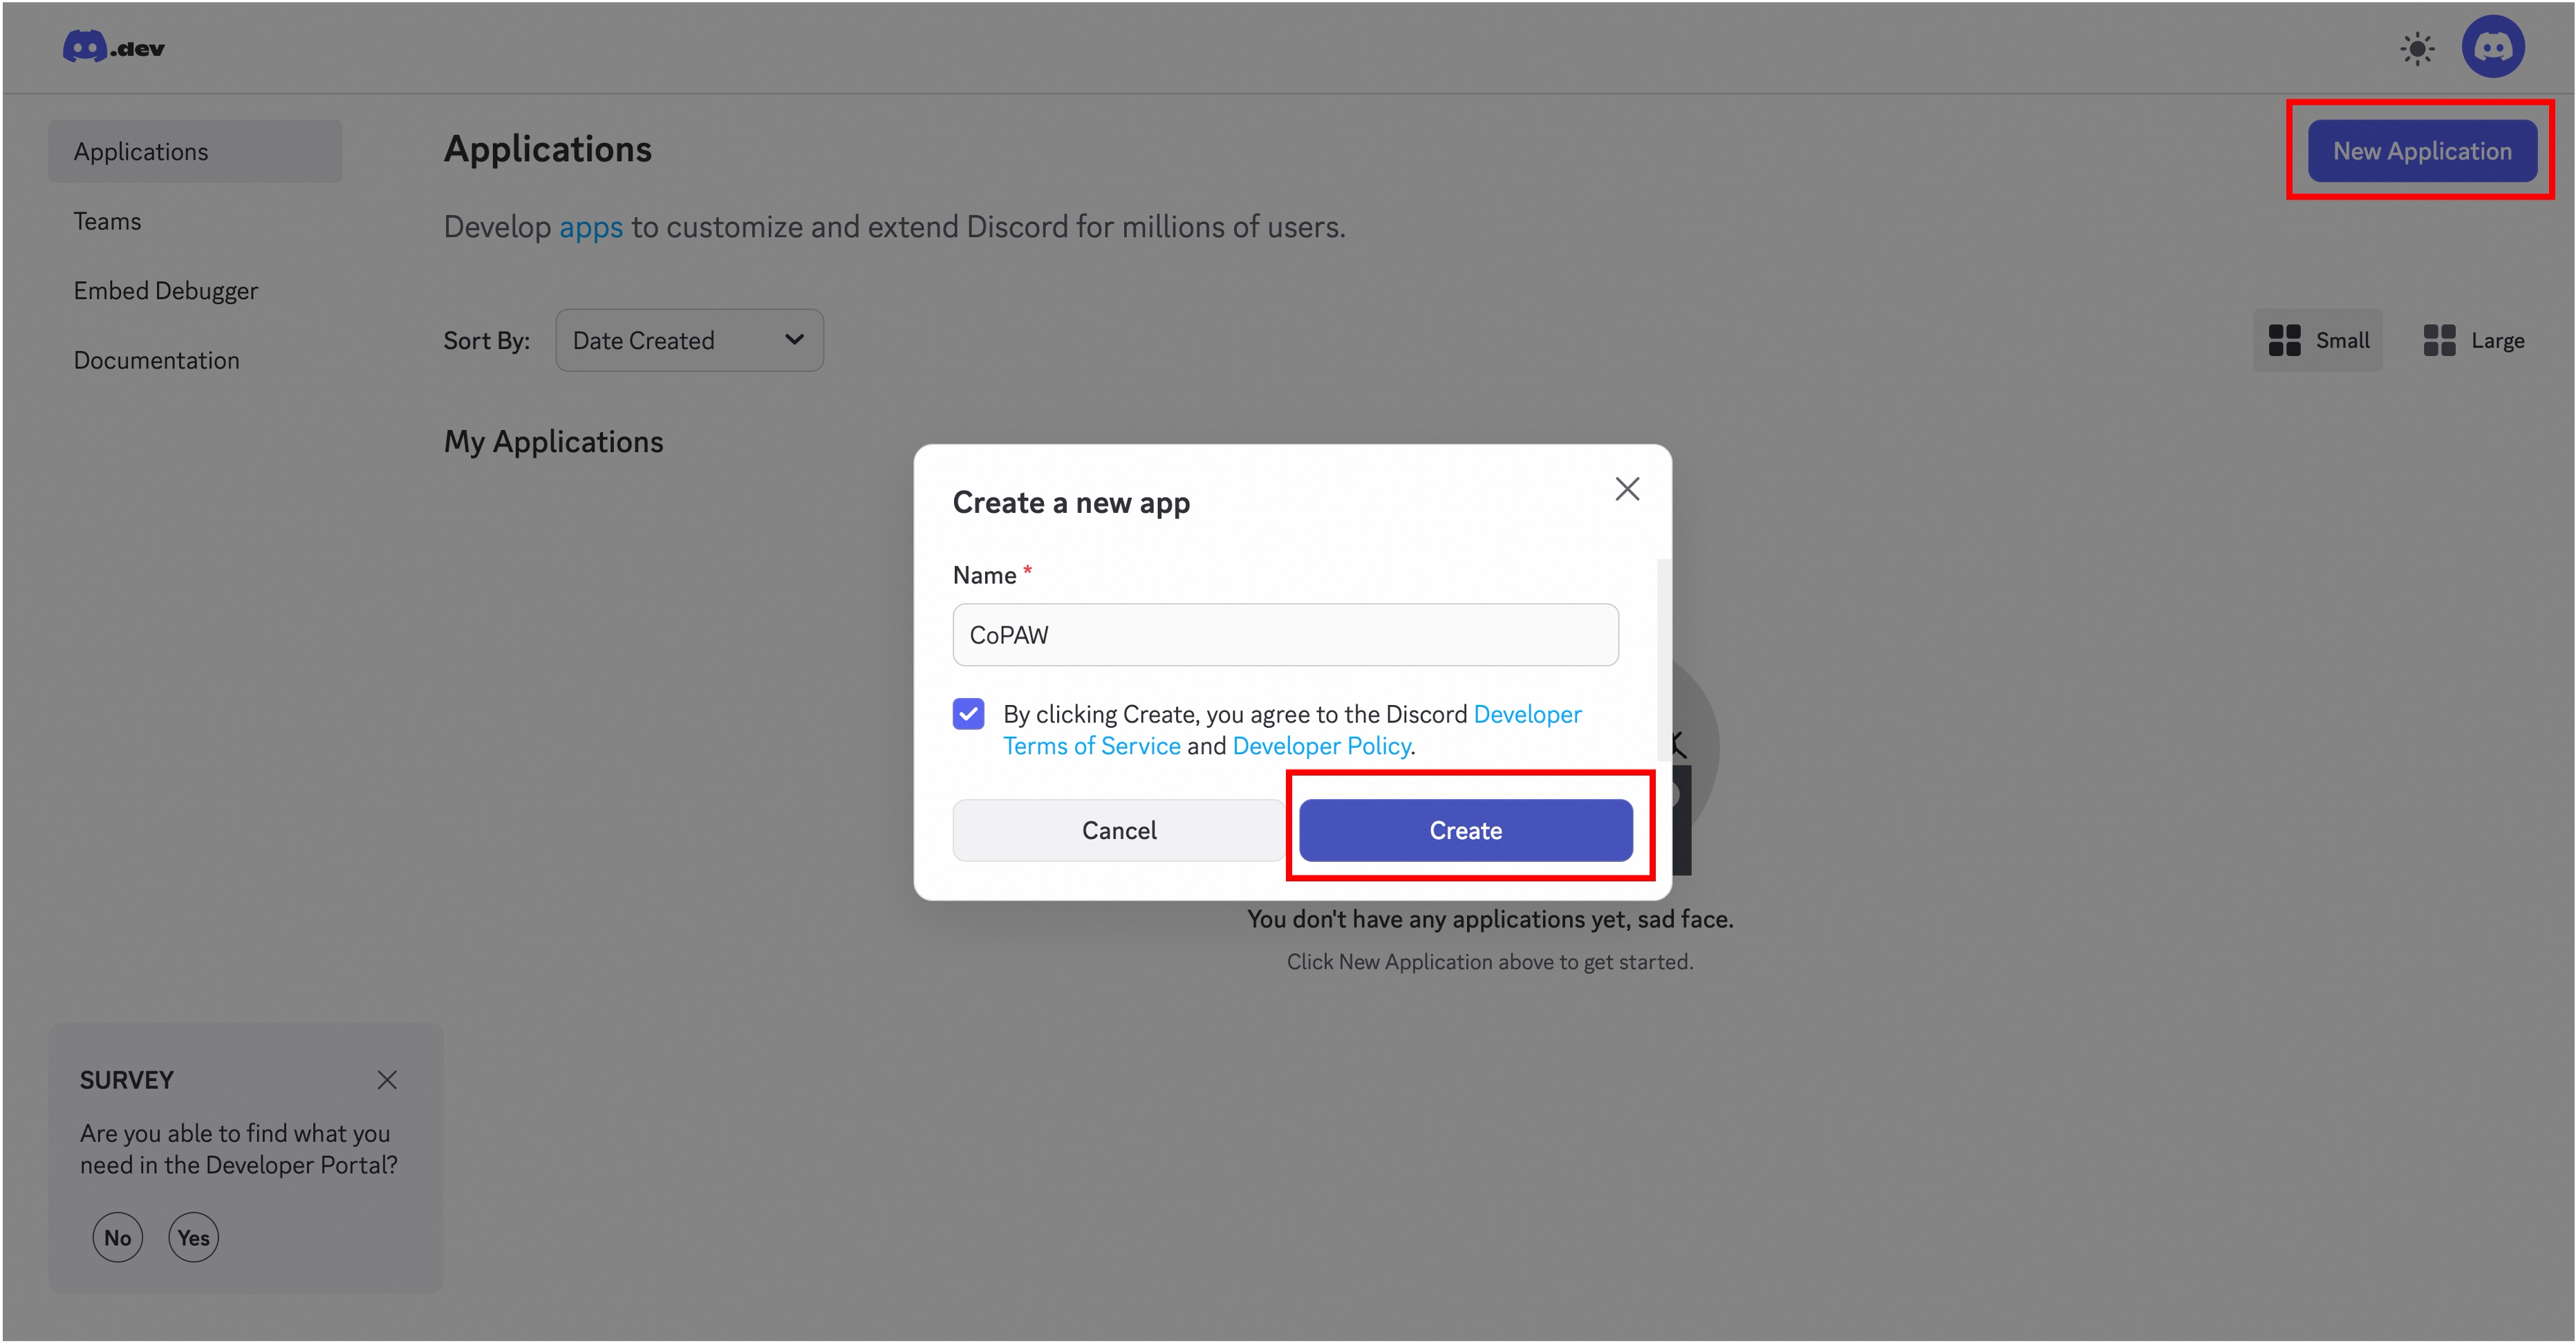
-
Go to Bot in the left sidebar, create a bot, and copy the Token
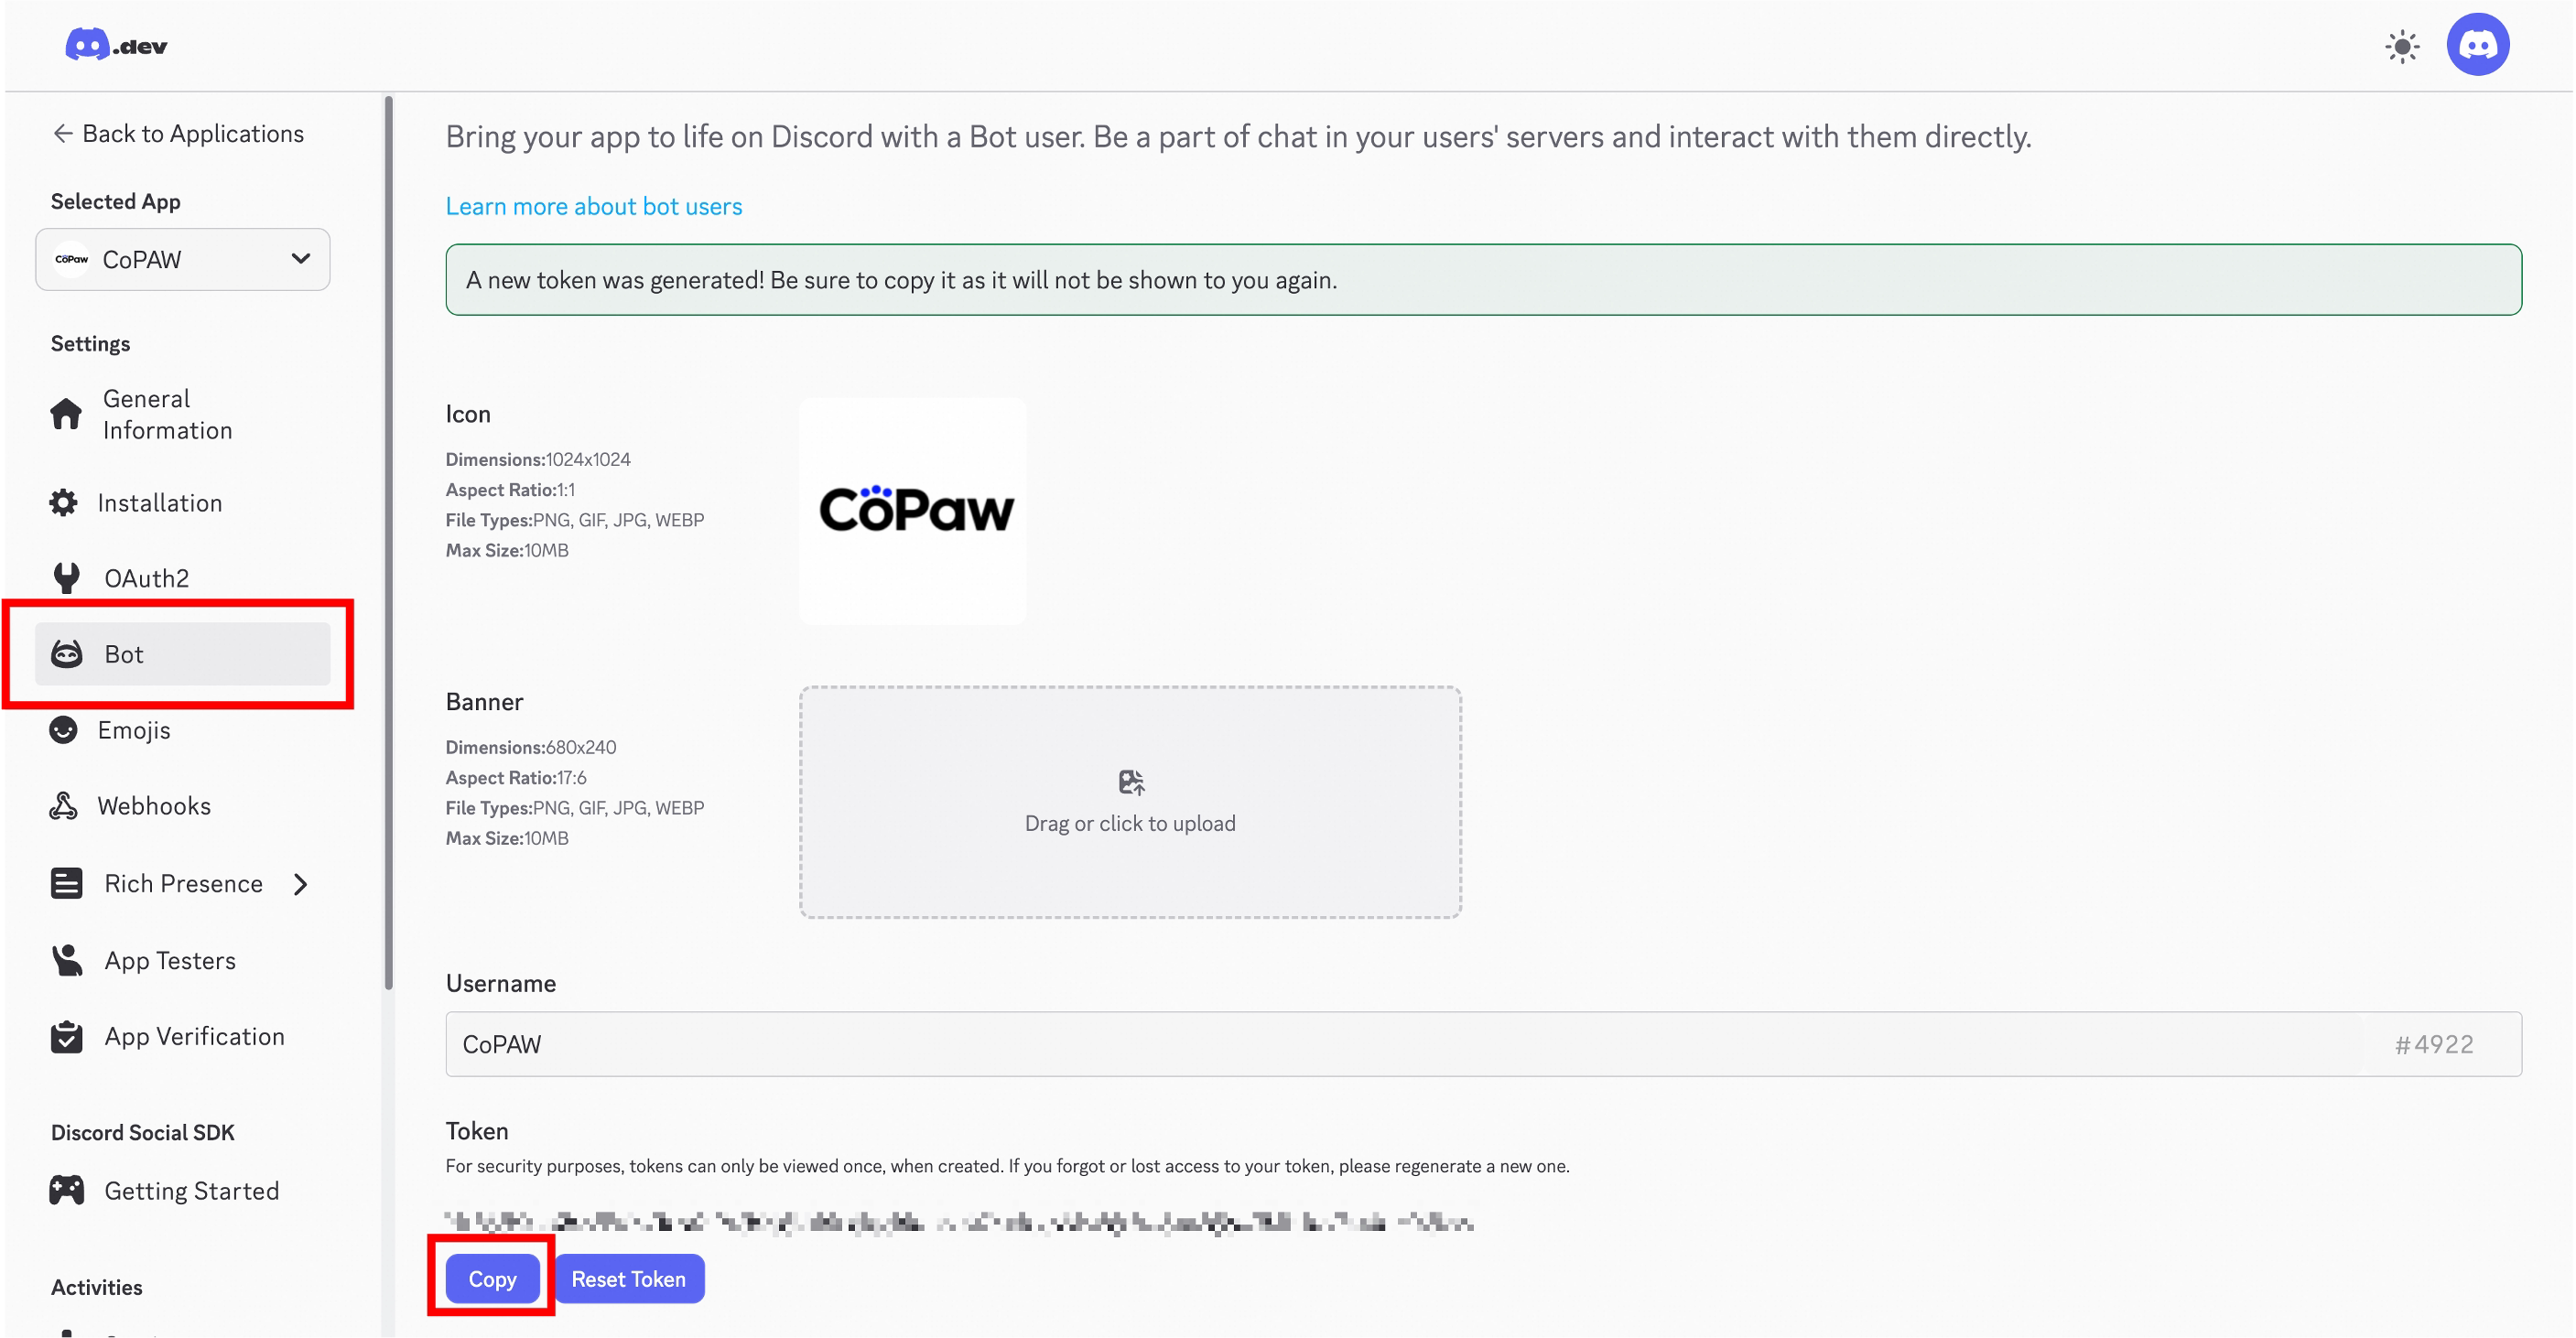
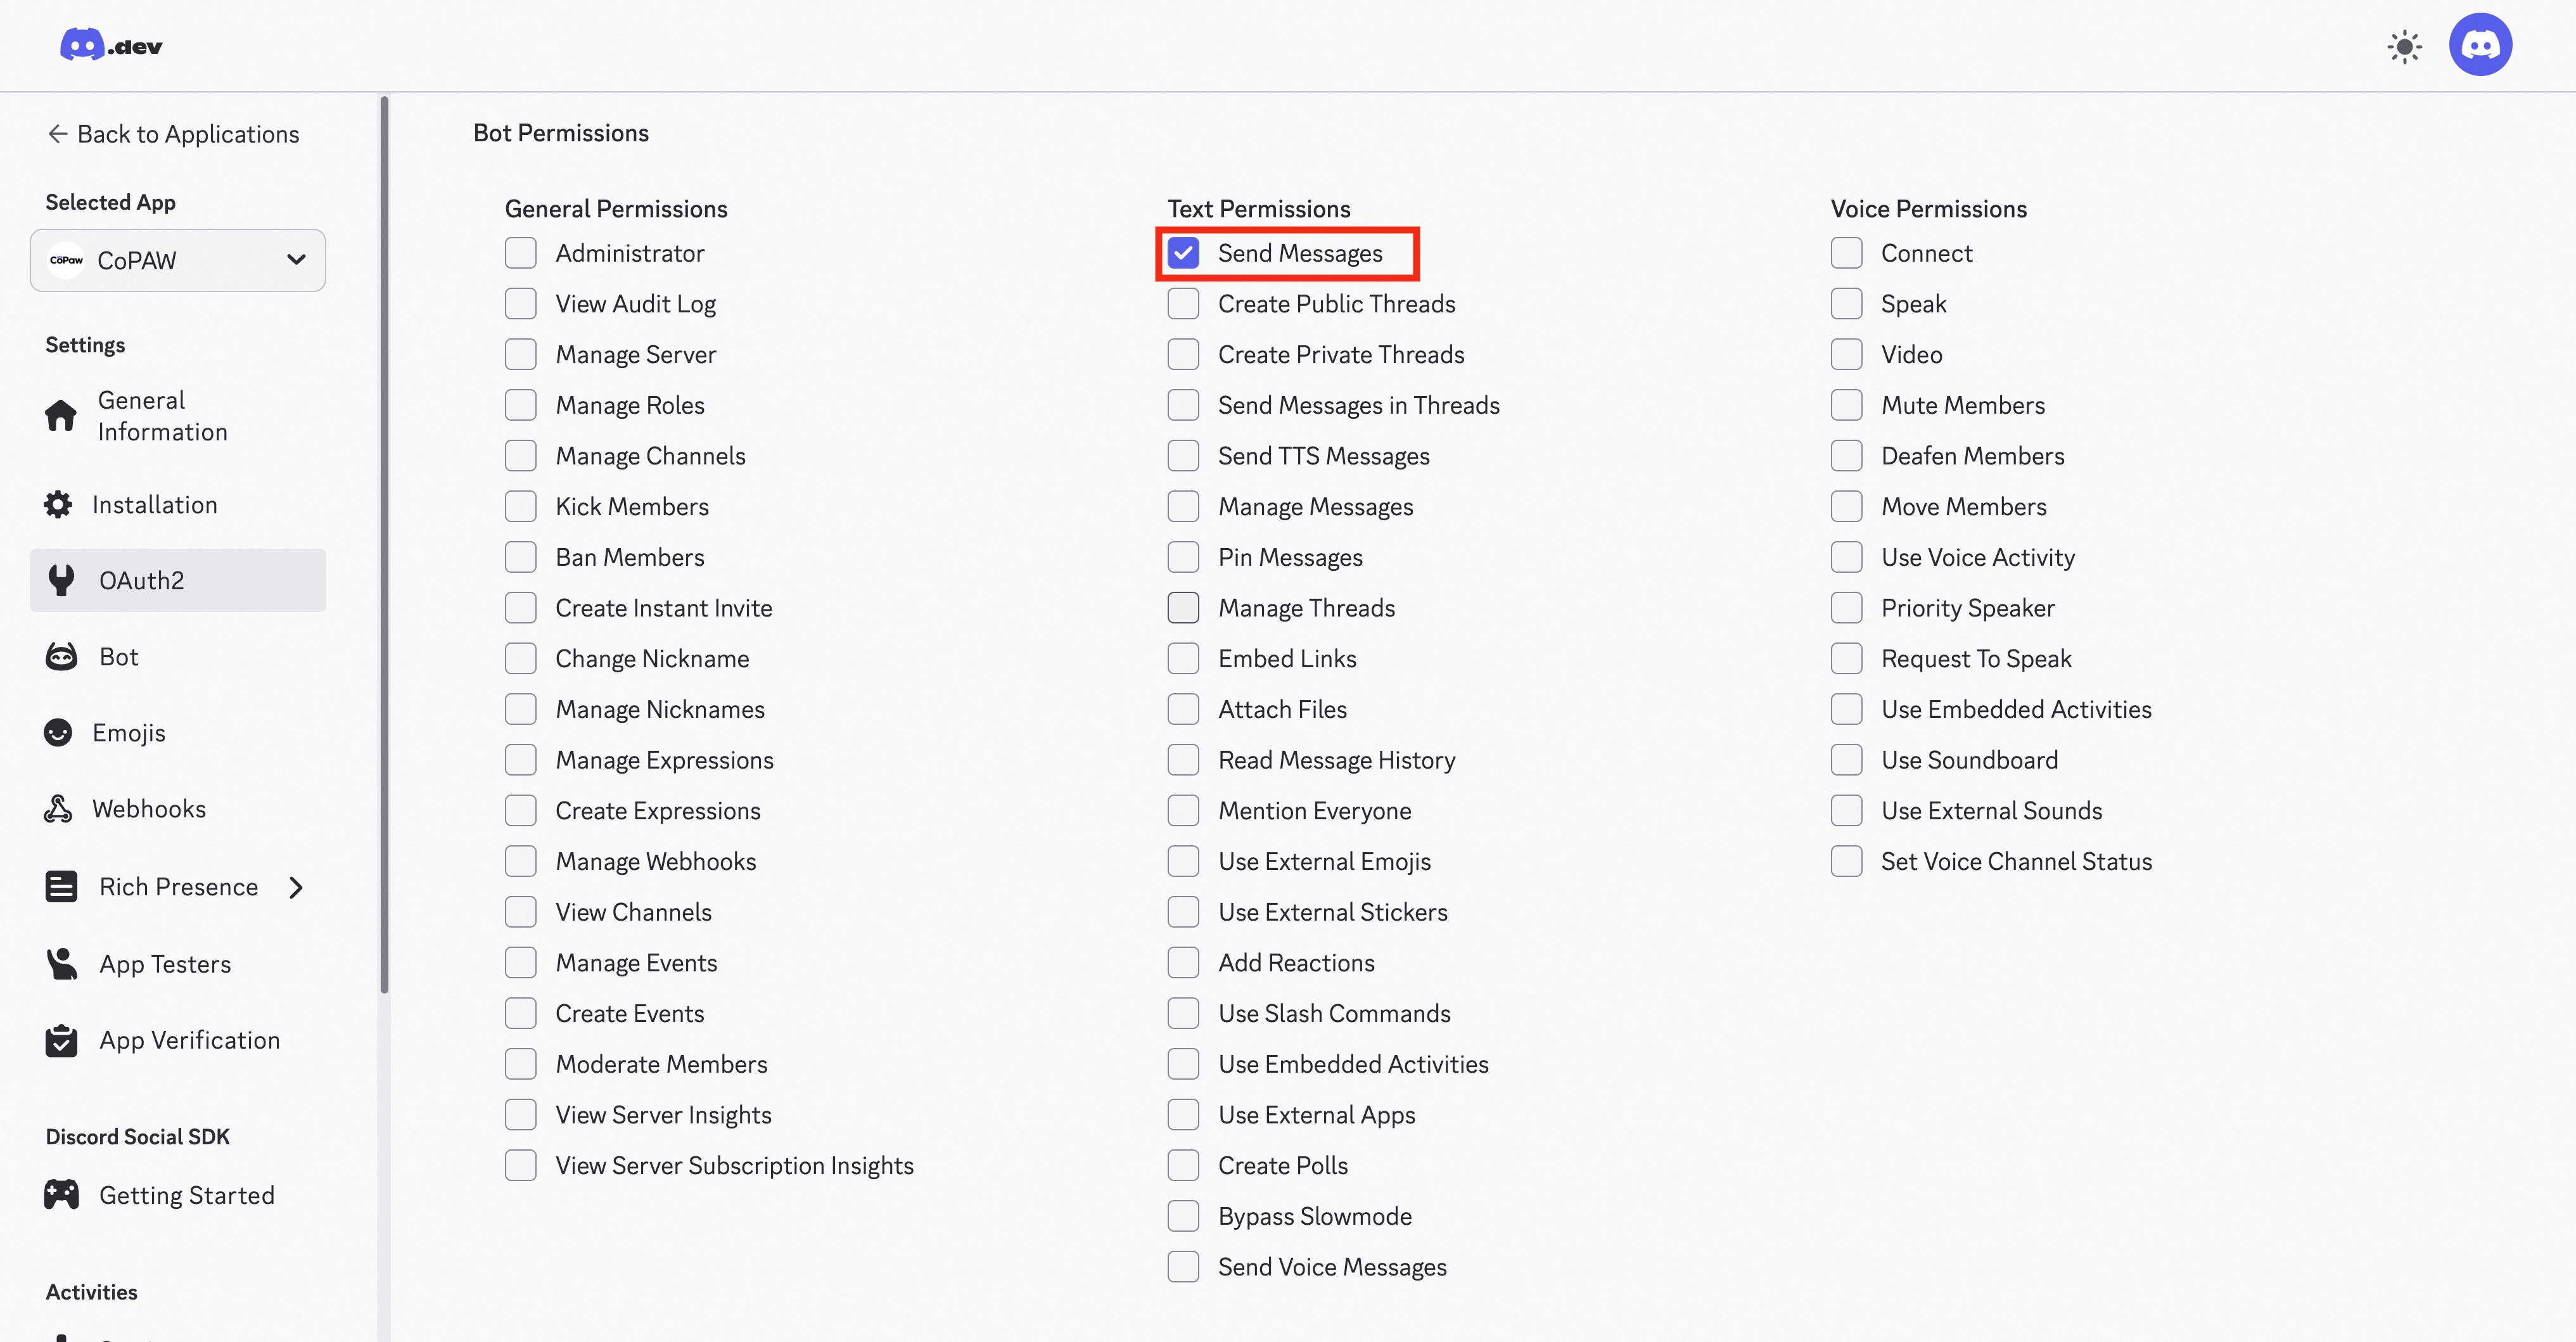
-
Scroll down, enable Message Content Intent and Send Messages for the bot, then save

-
In OAuth2 → URL Generator, enable
bot, grant Send Messages, and generate the invite link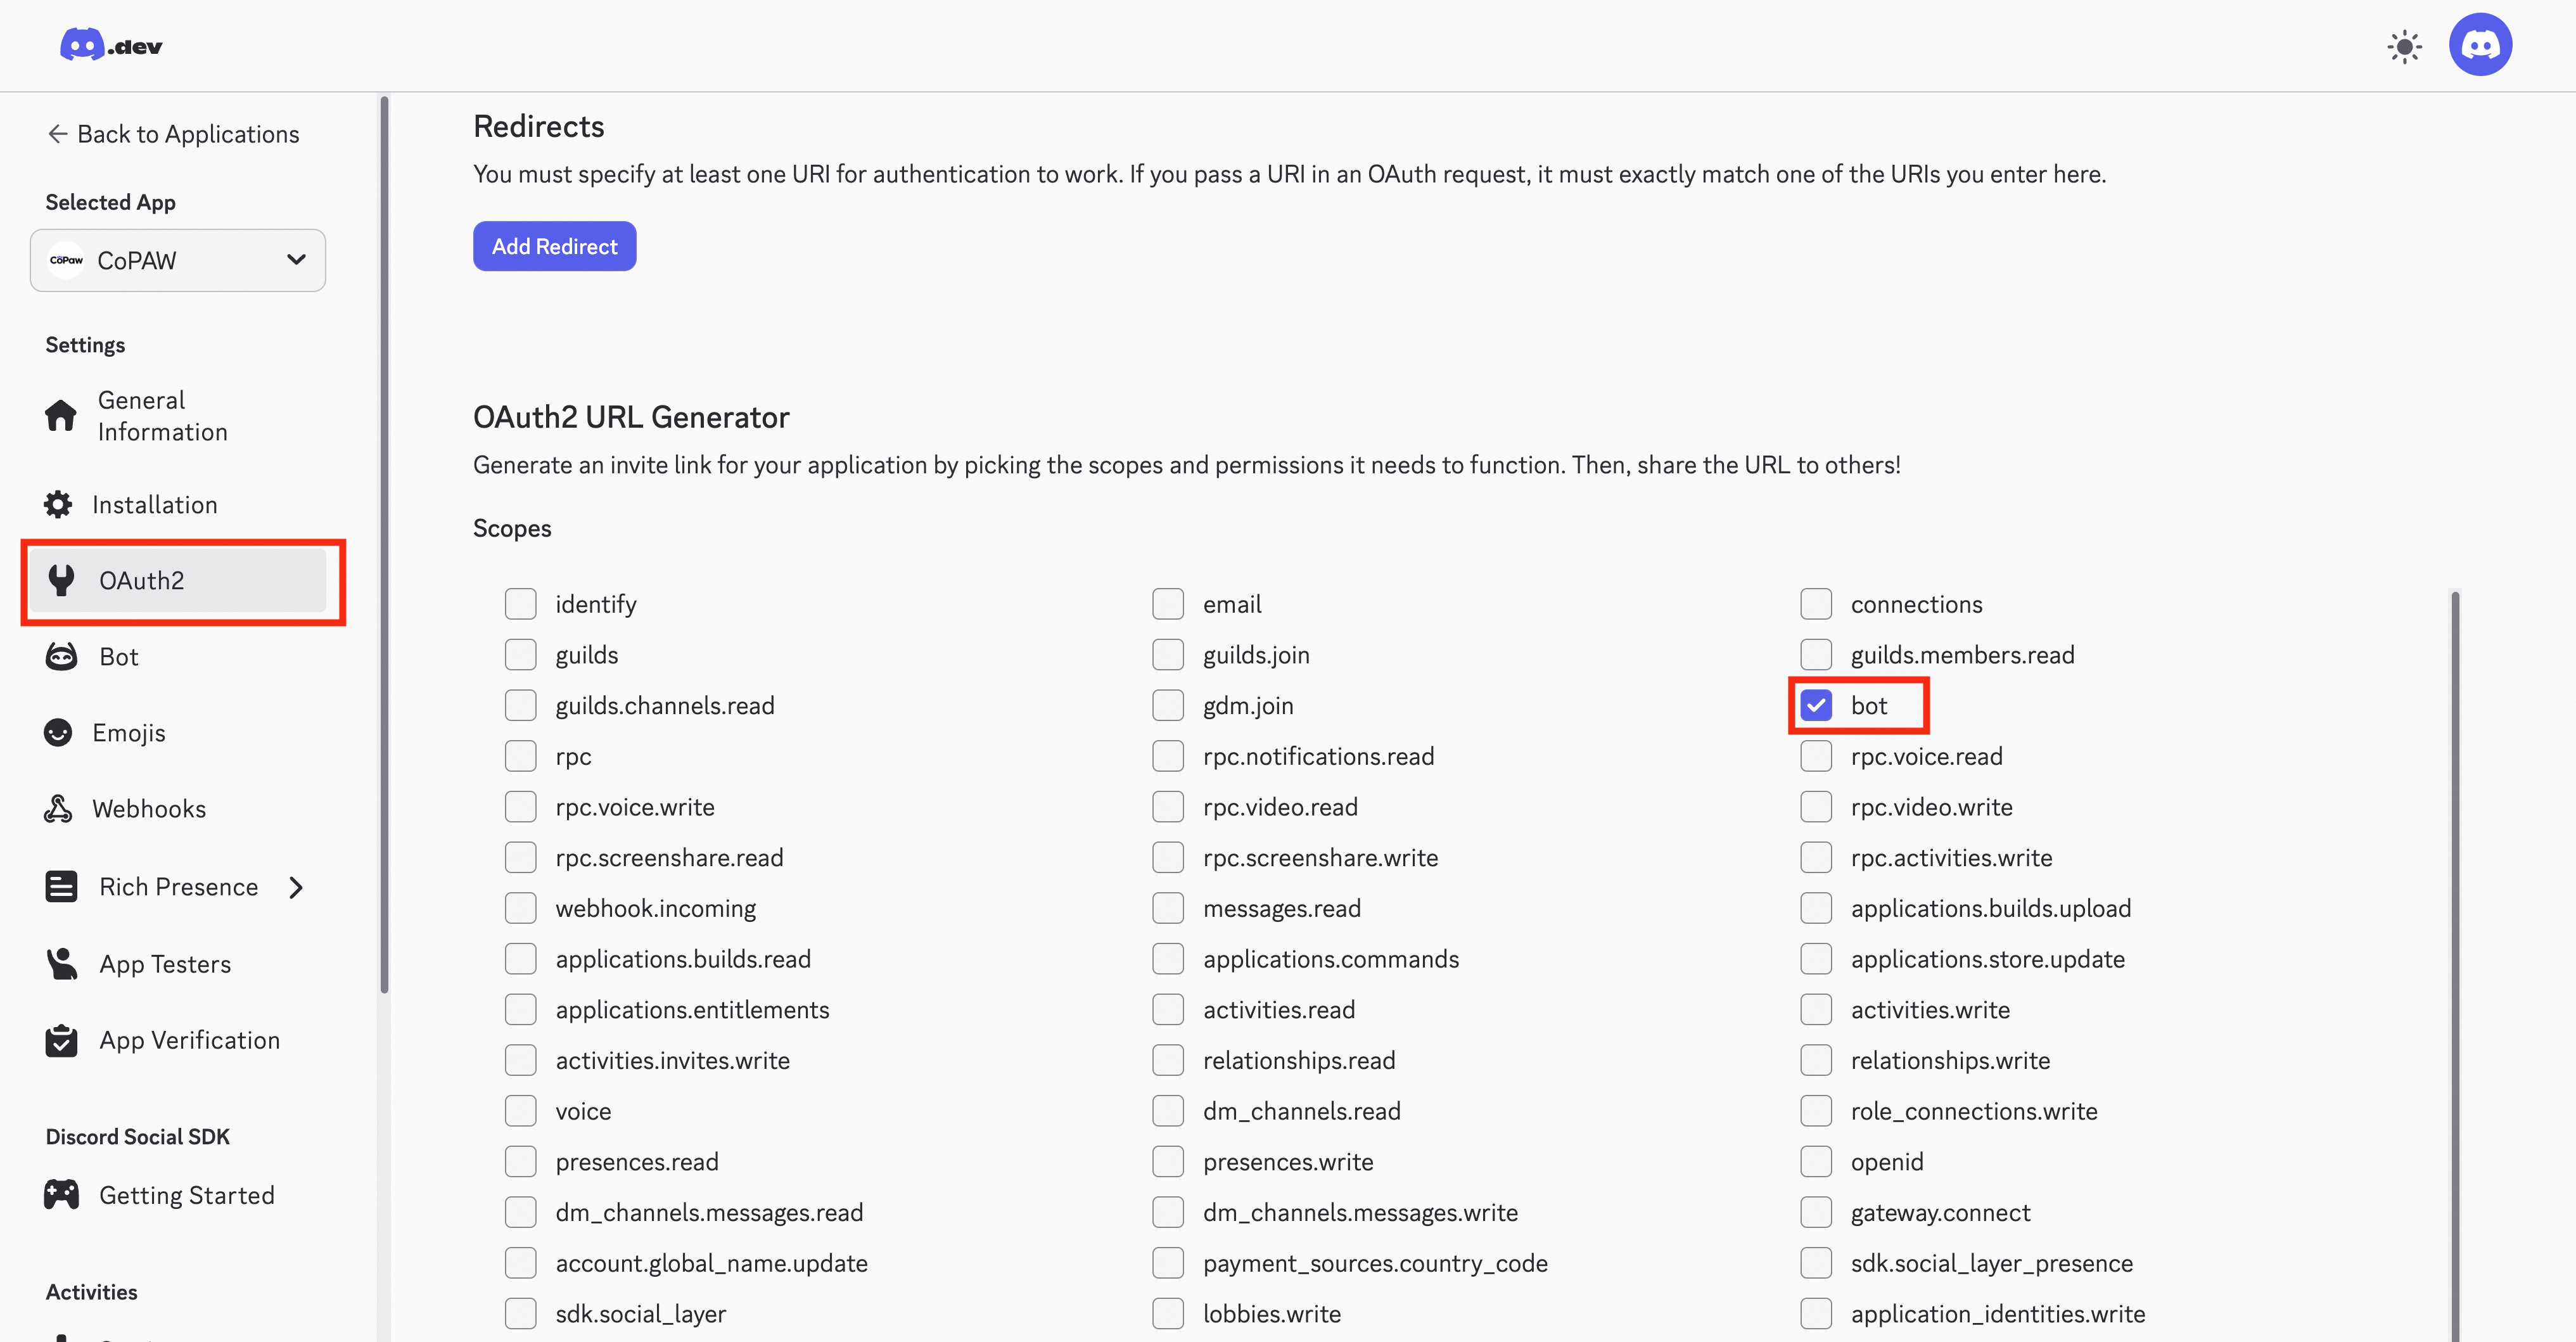
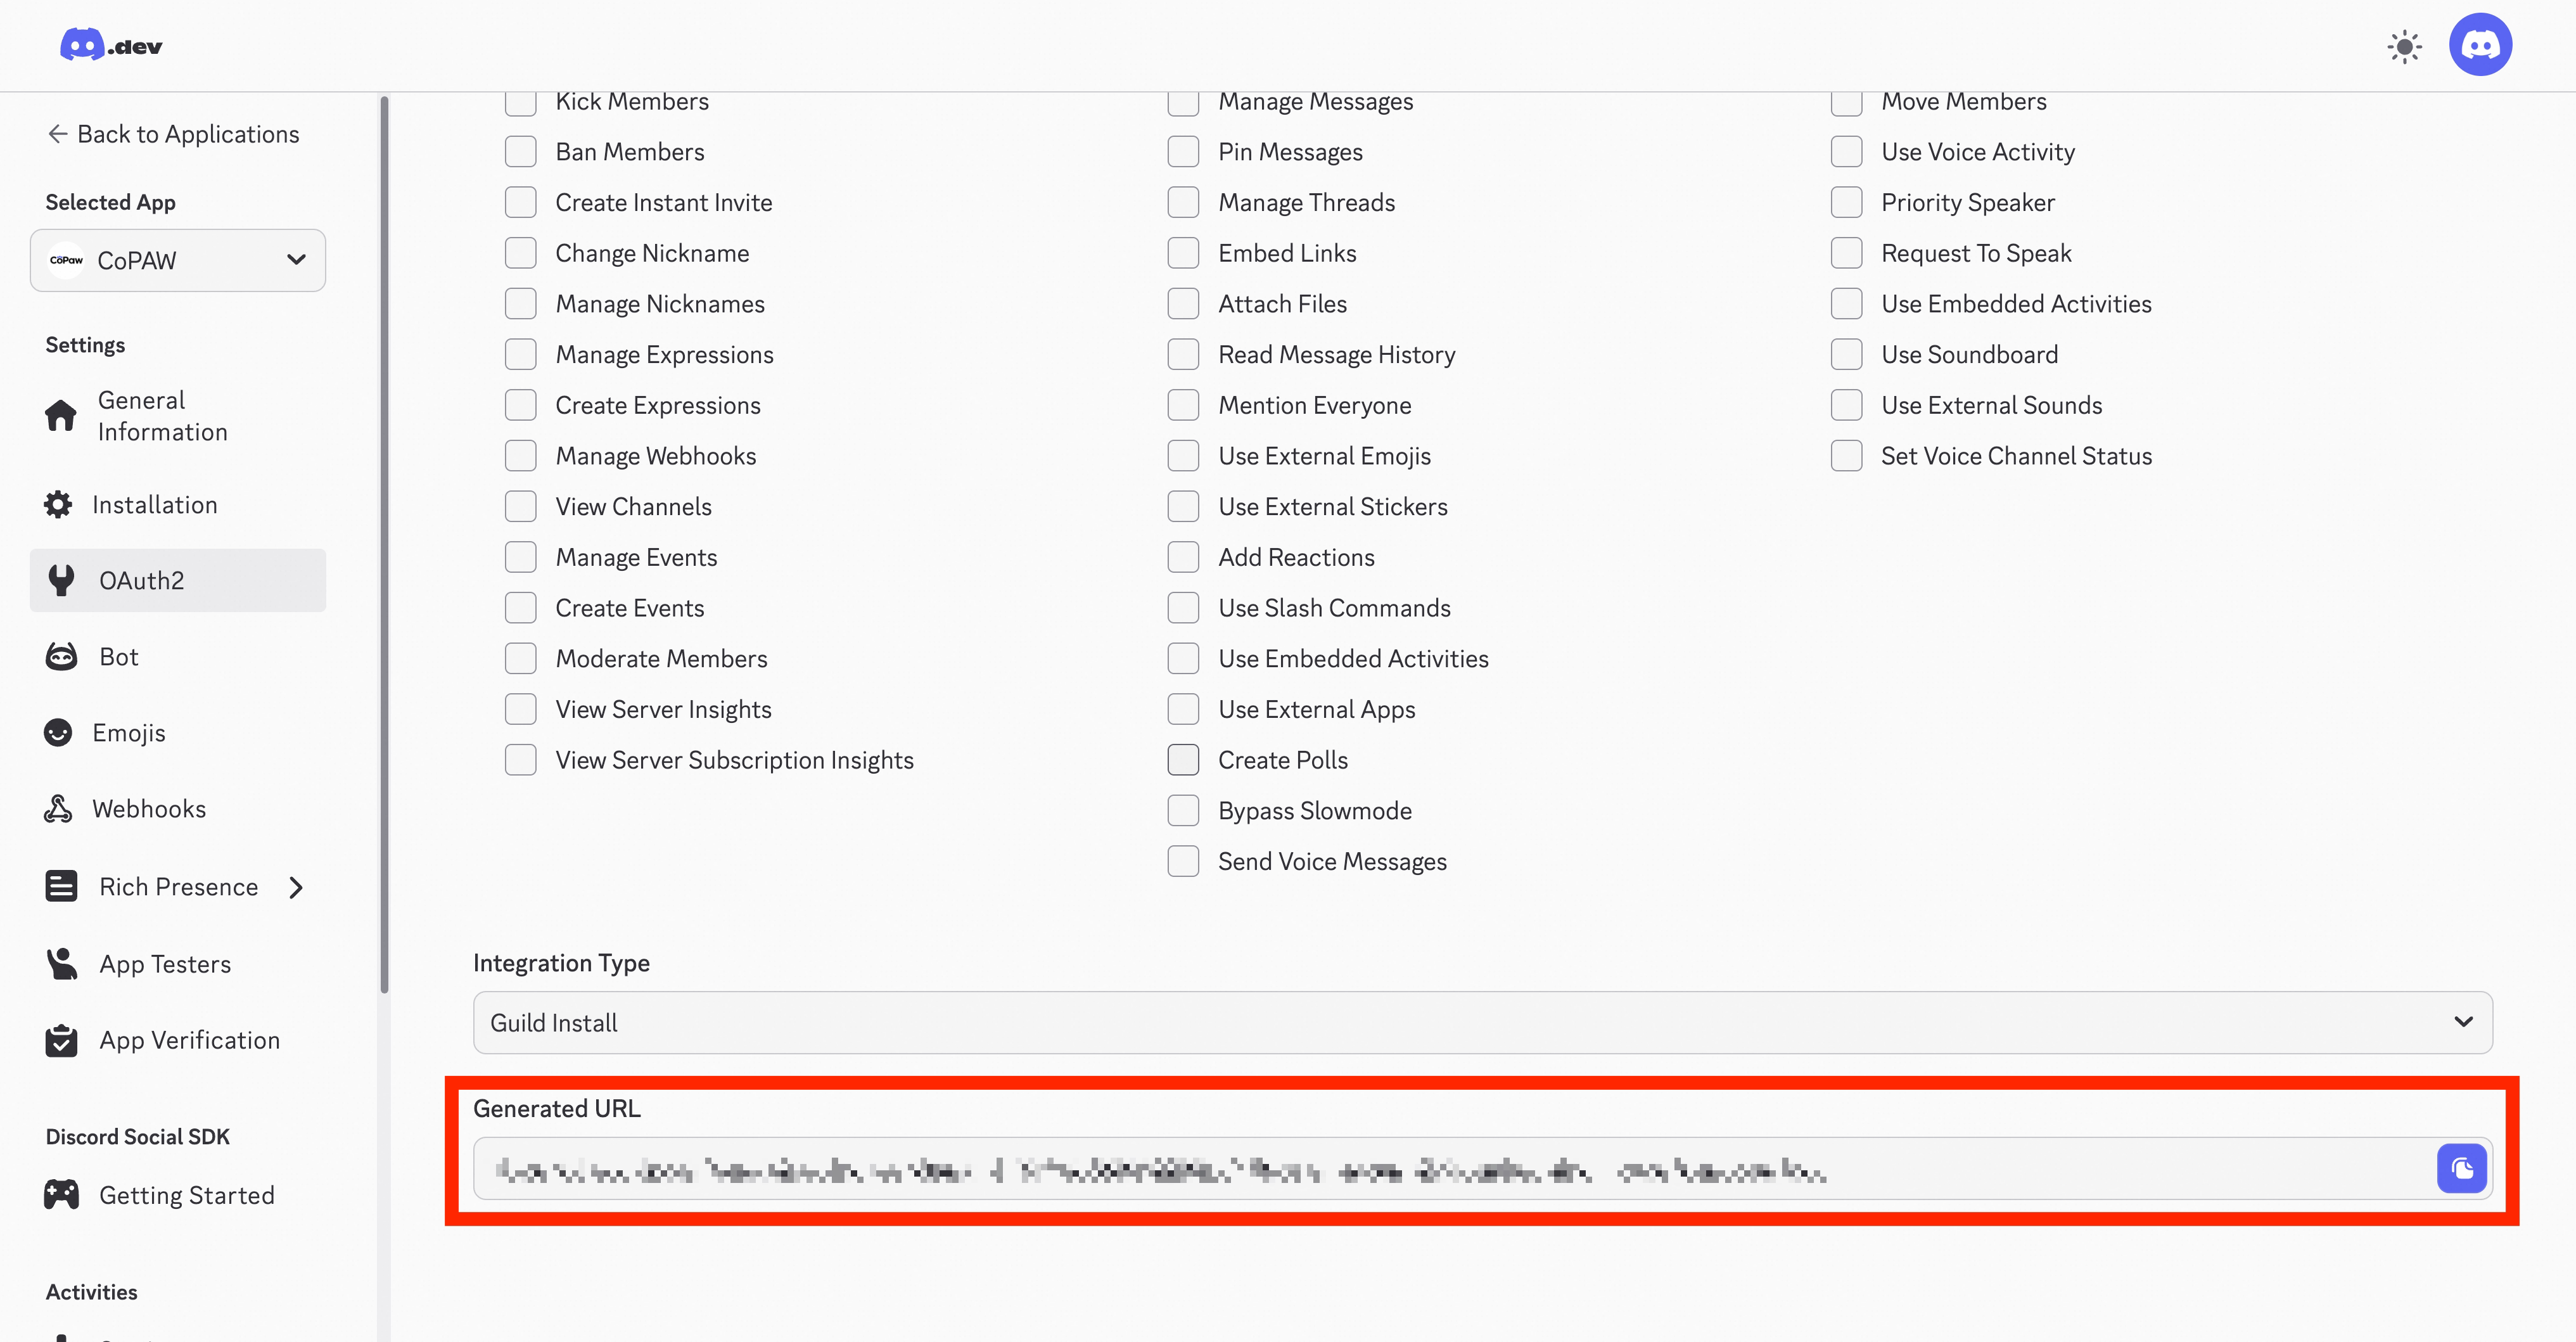
-
Open the link in your browser; it will redirect to Discord. Add the bot to your server
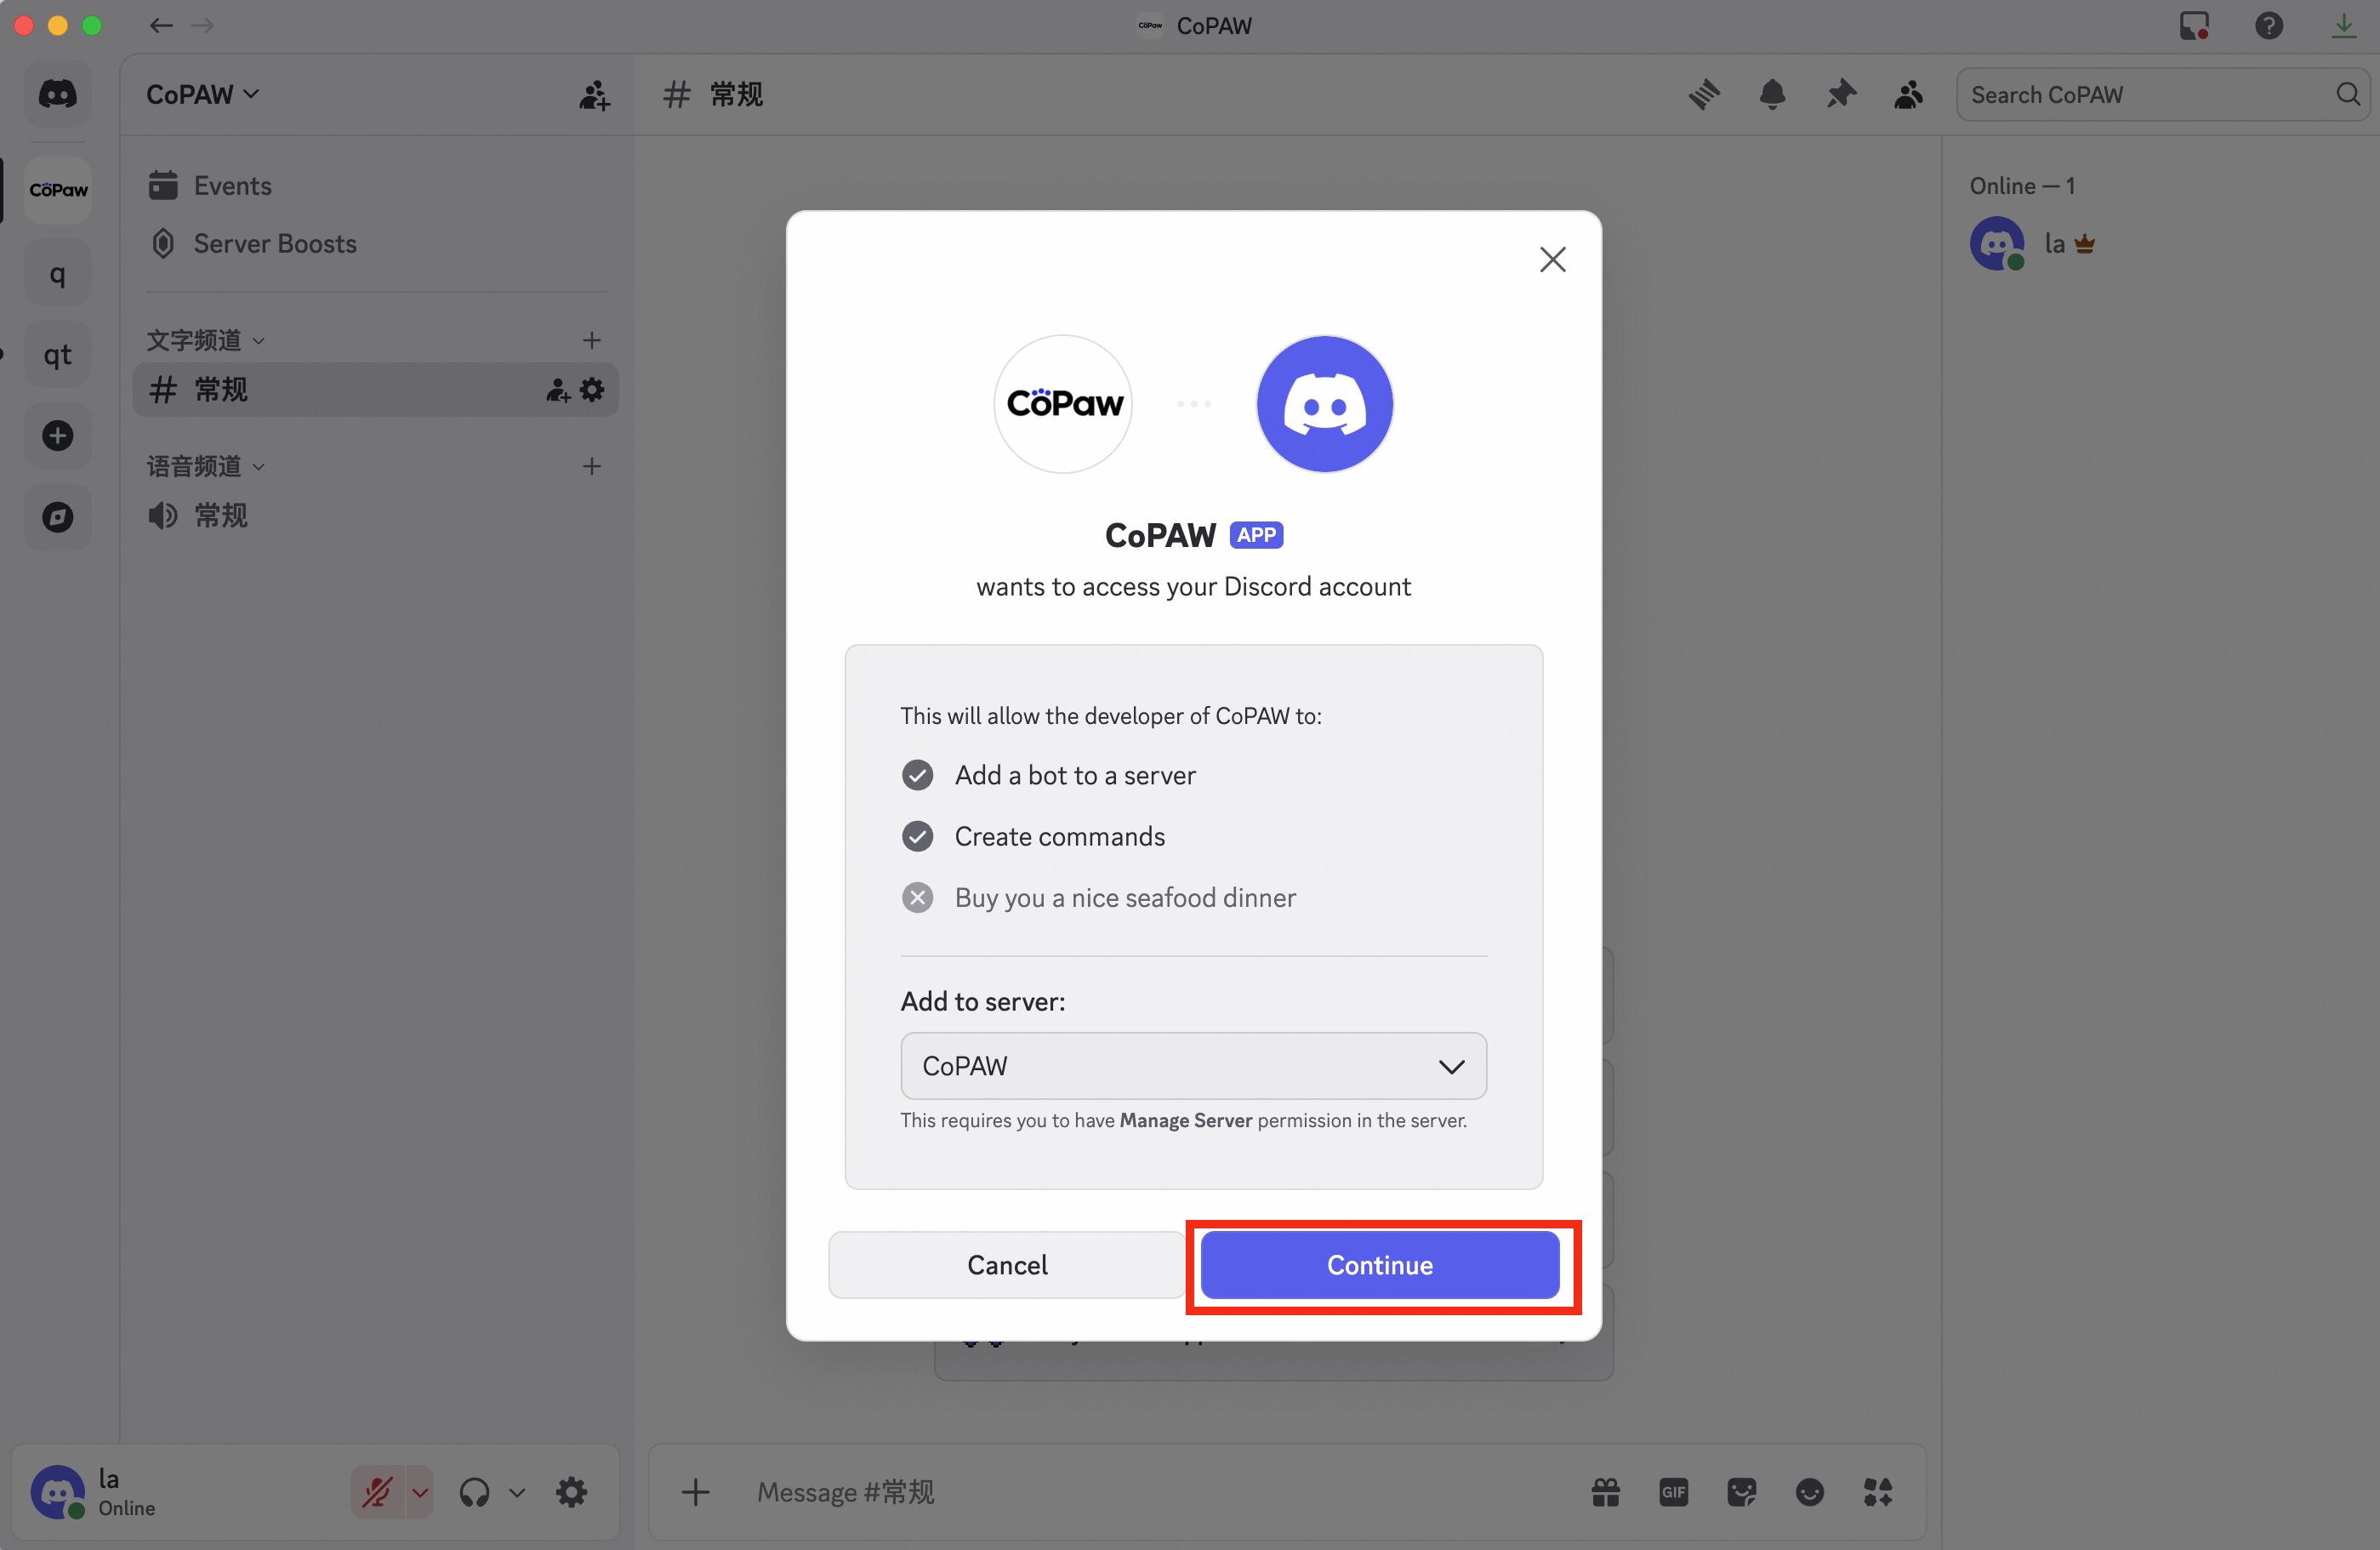
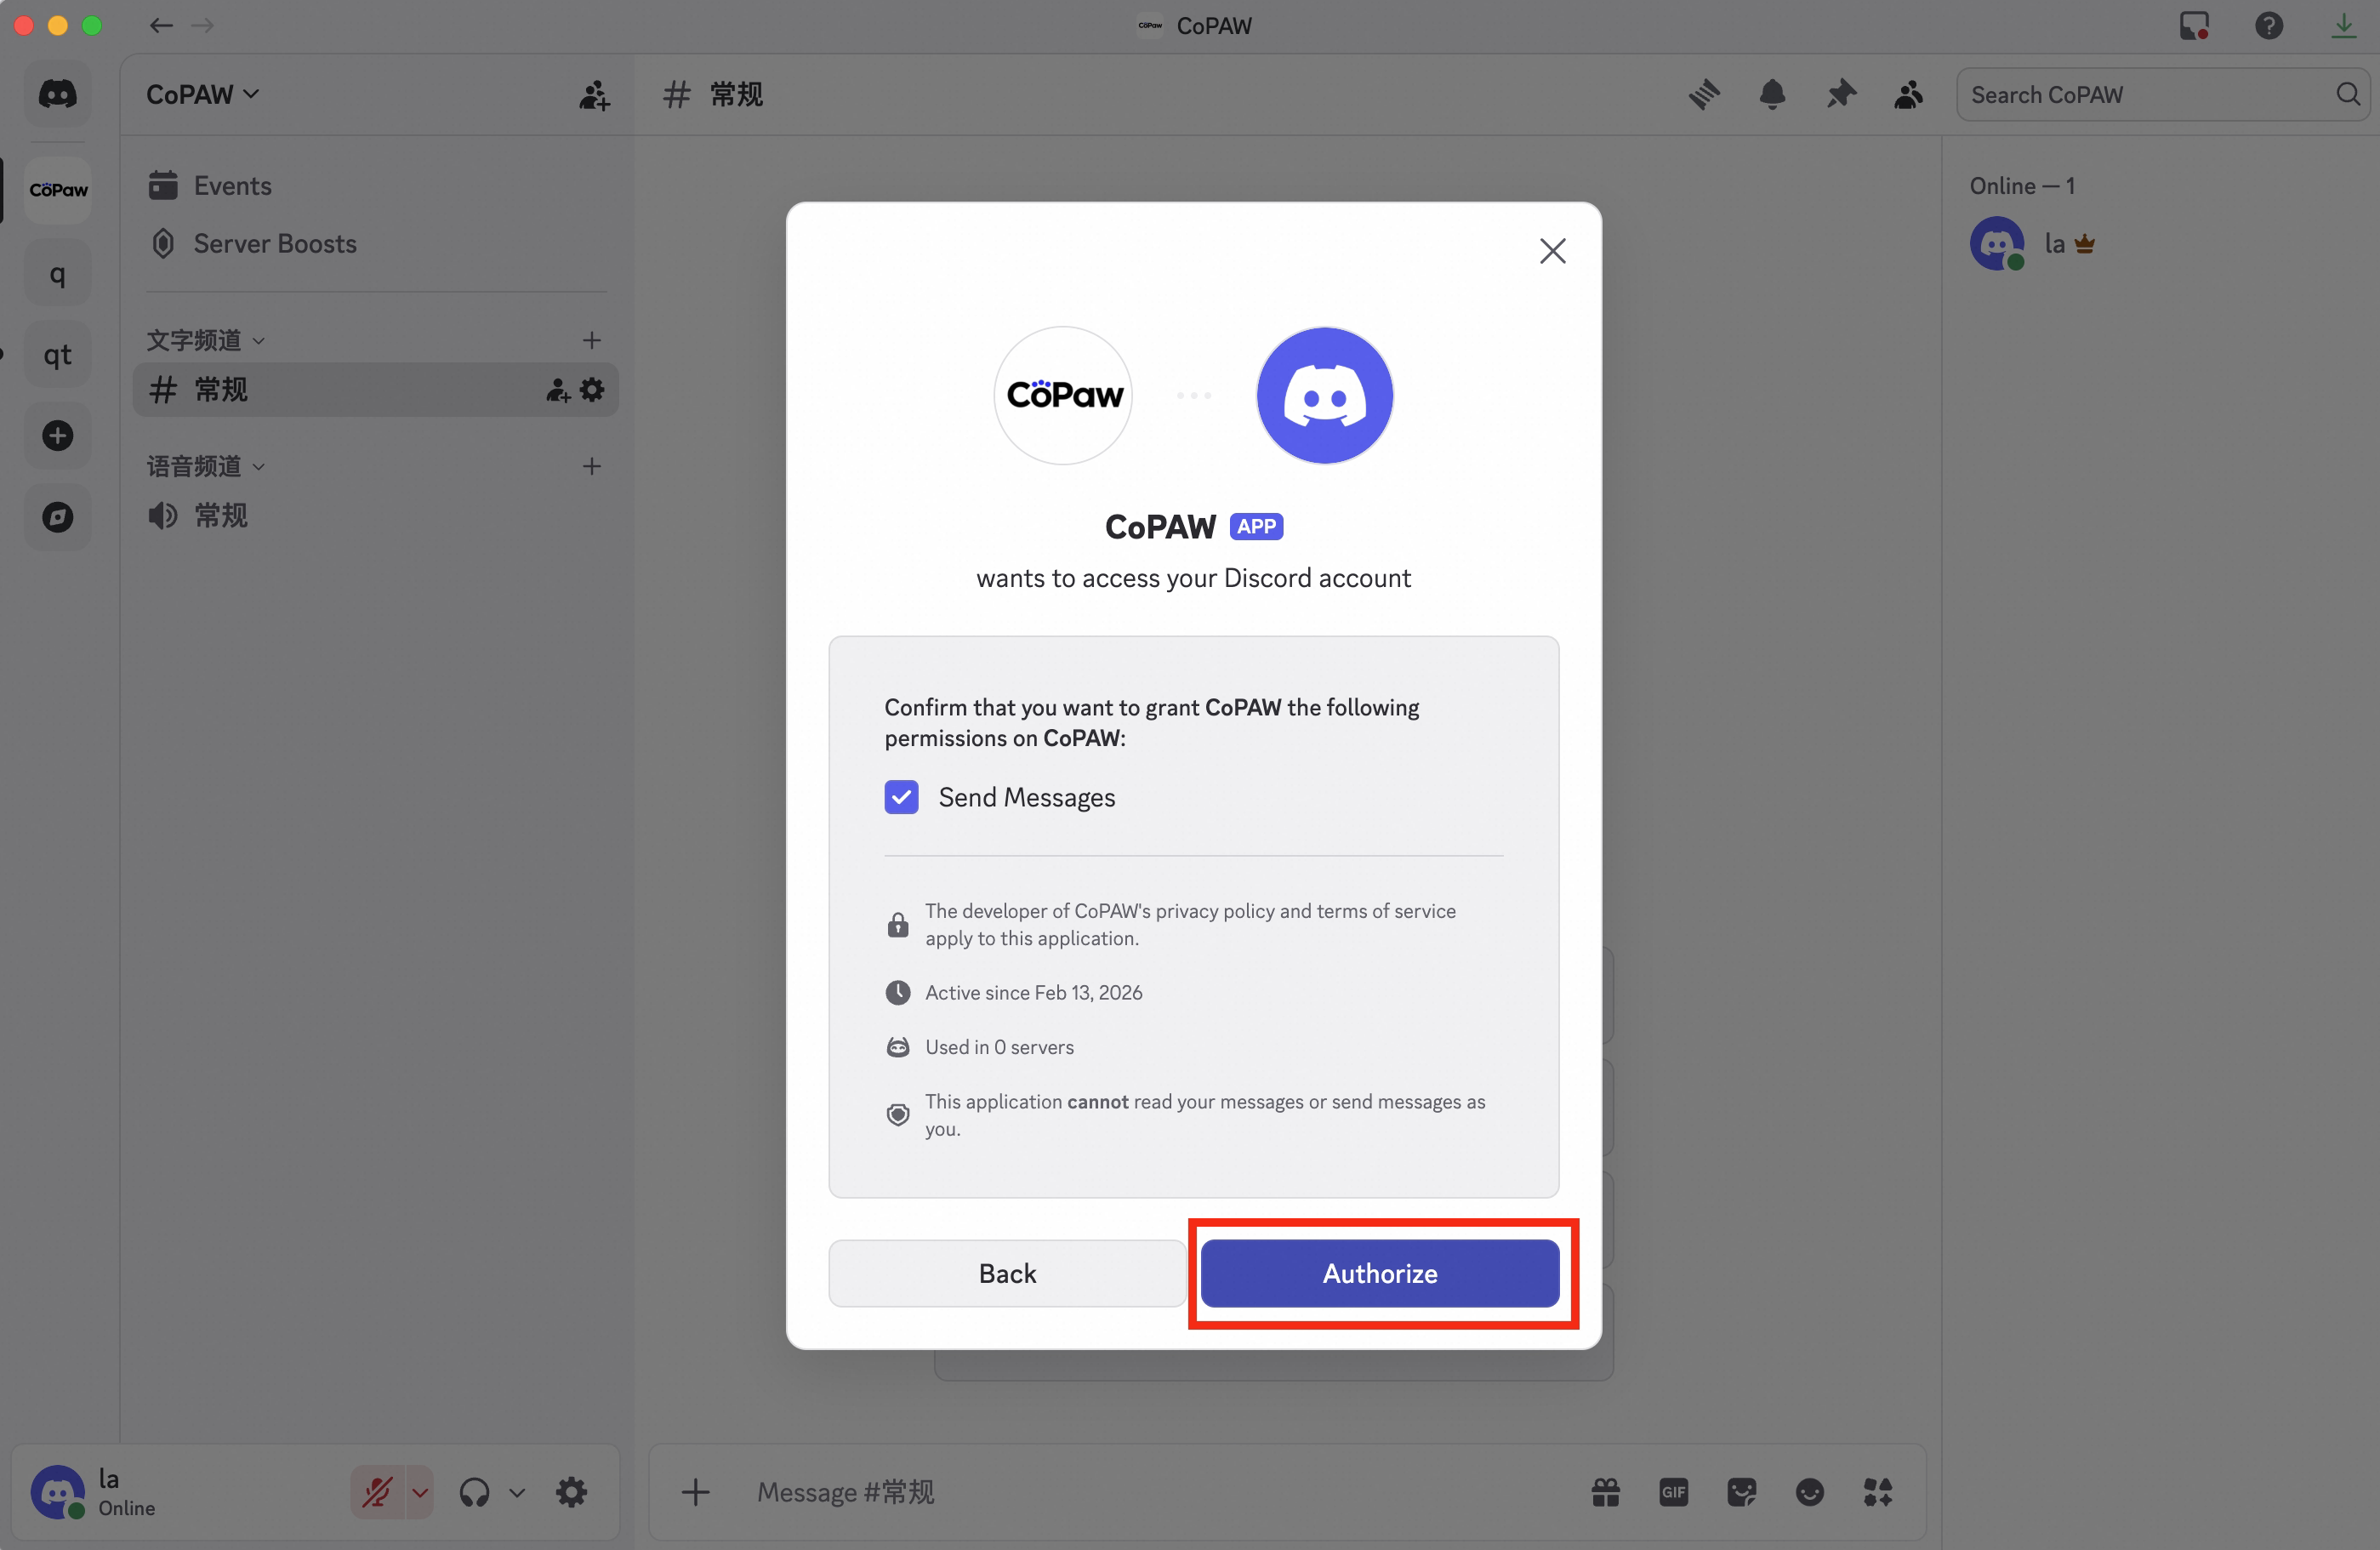
-
You can see the bot is now in your server
Configure the Bot
You can configure via the Console UI or by editing ~/.copaw/config.json.
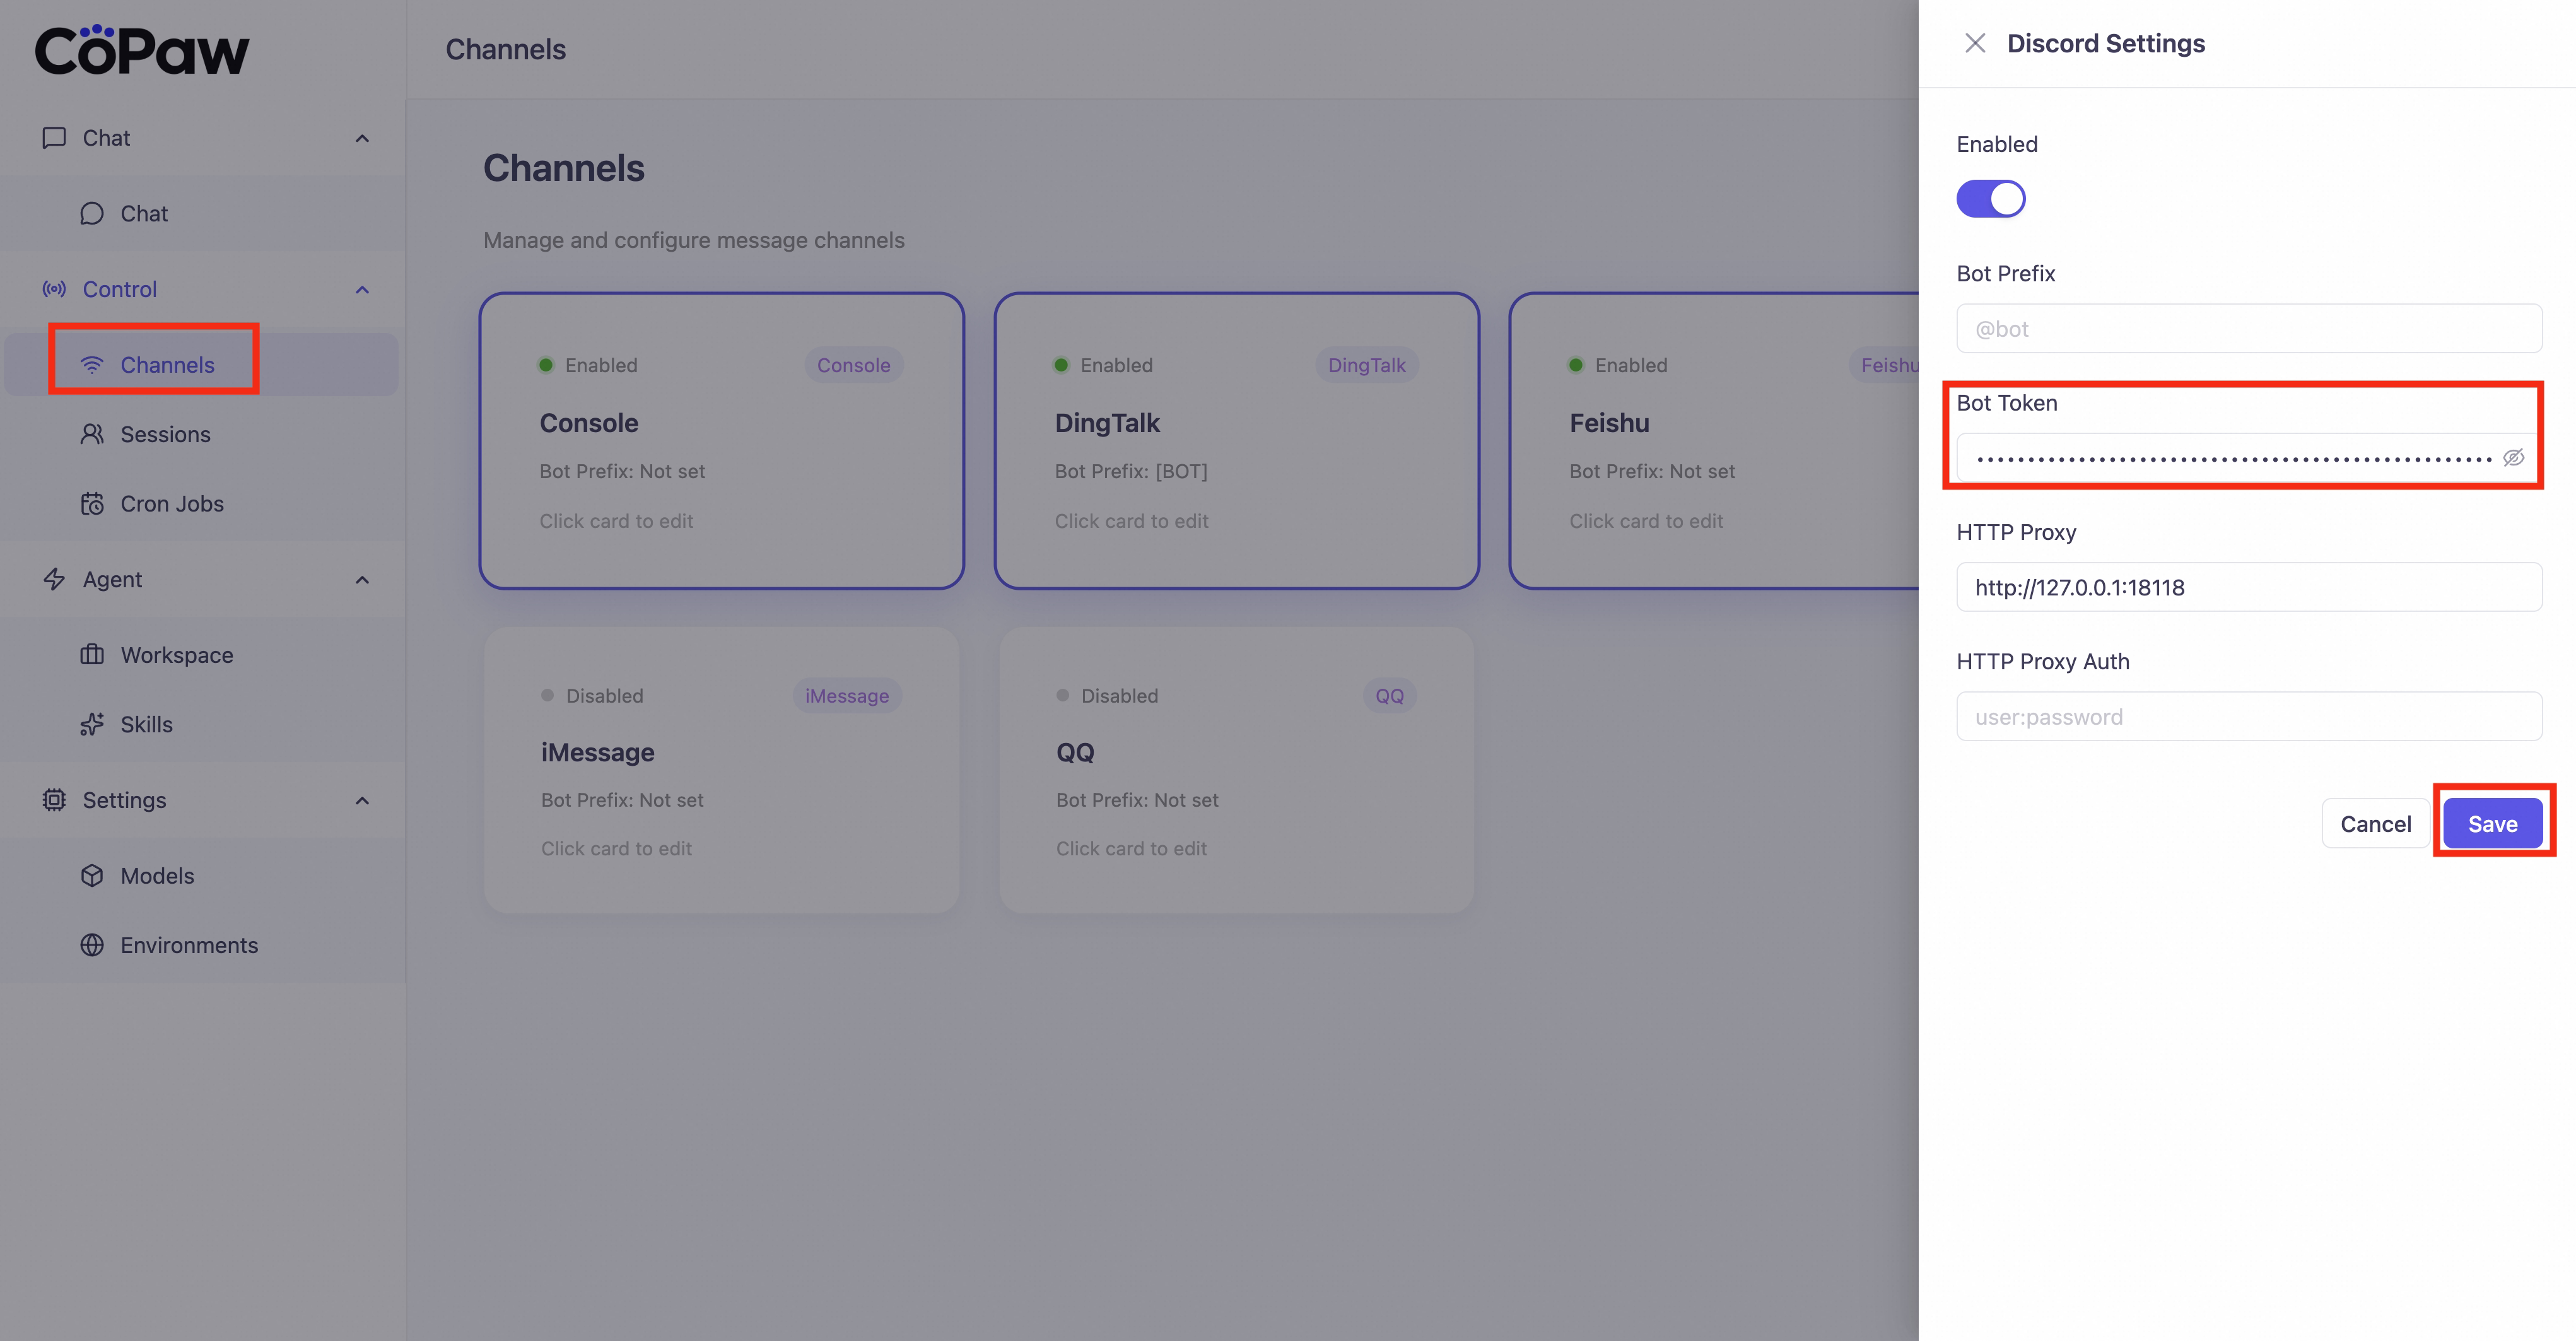
Method 1: Configure in the Console
Go to Control → Channels, click Discord, and enter the Bot Token you obtained.
Method 2: Edit ~/.copaw/config.json
Find channels.discord in config.json and fill in the fields, for example:
"discord": {
  "enabled": true,
  "bot_prefix": "[BOT]",
  "bot_token": "your Bot Token",
  "http_proxy": "",
  "http_proxy_auth": ""
}
If you need a proxy (e.g. for network restrictions):
- http_proxy — e.g.
http://127.0.0.1:7890 - http_proxy_auth —
username:passwordif the proxy requires auth, otherwise leave empty
Get QQ bot credentials
-
Open the QQ Developer Platform
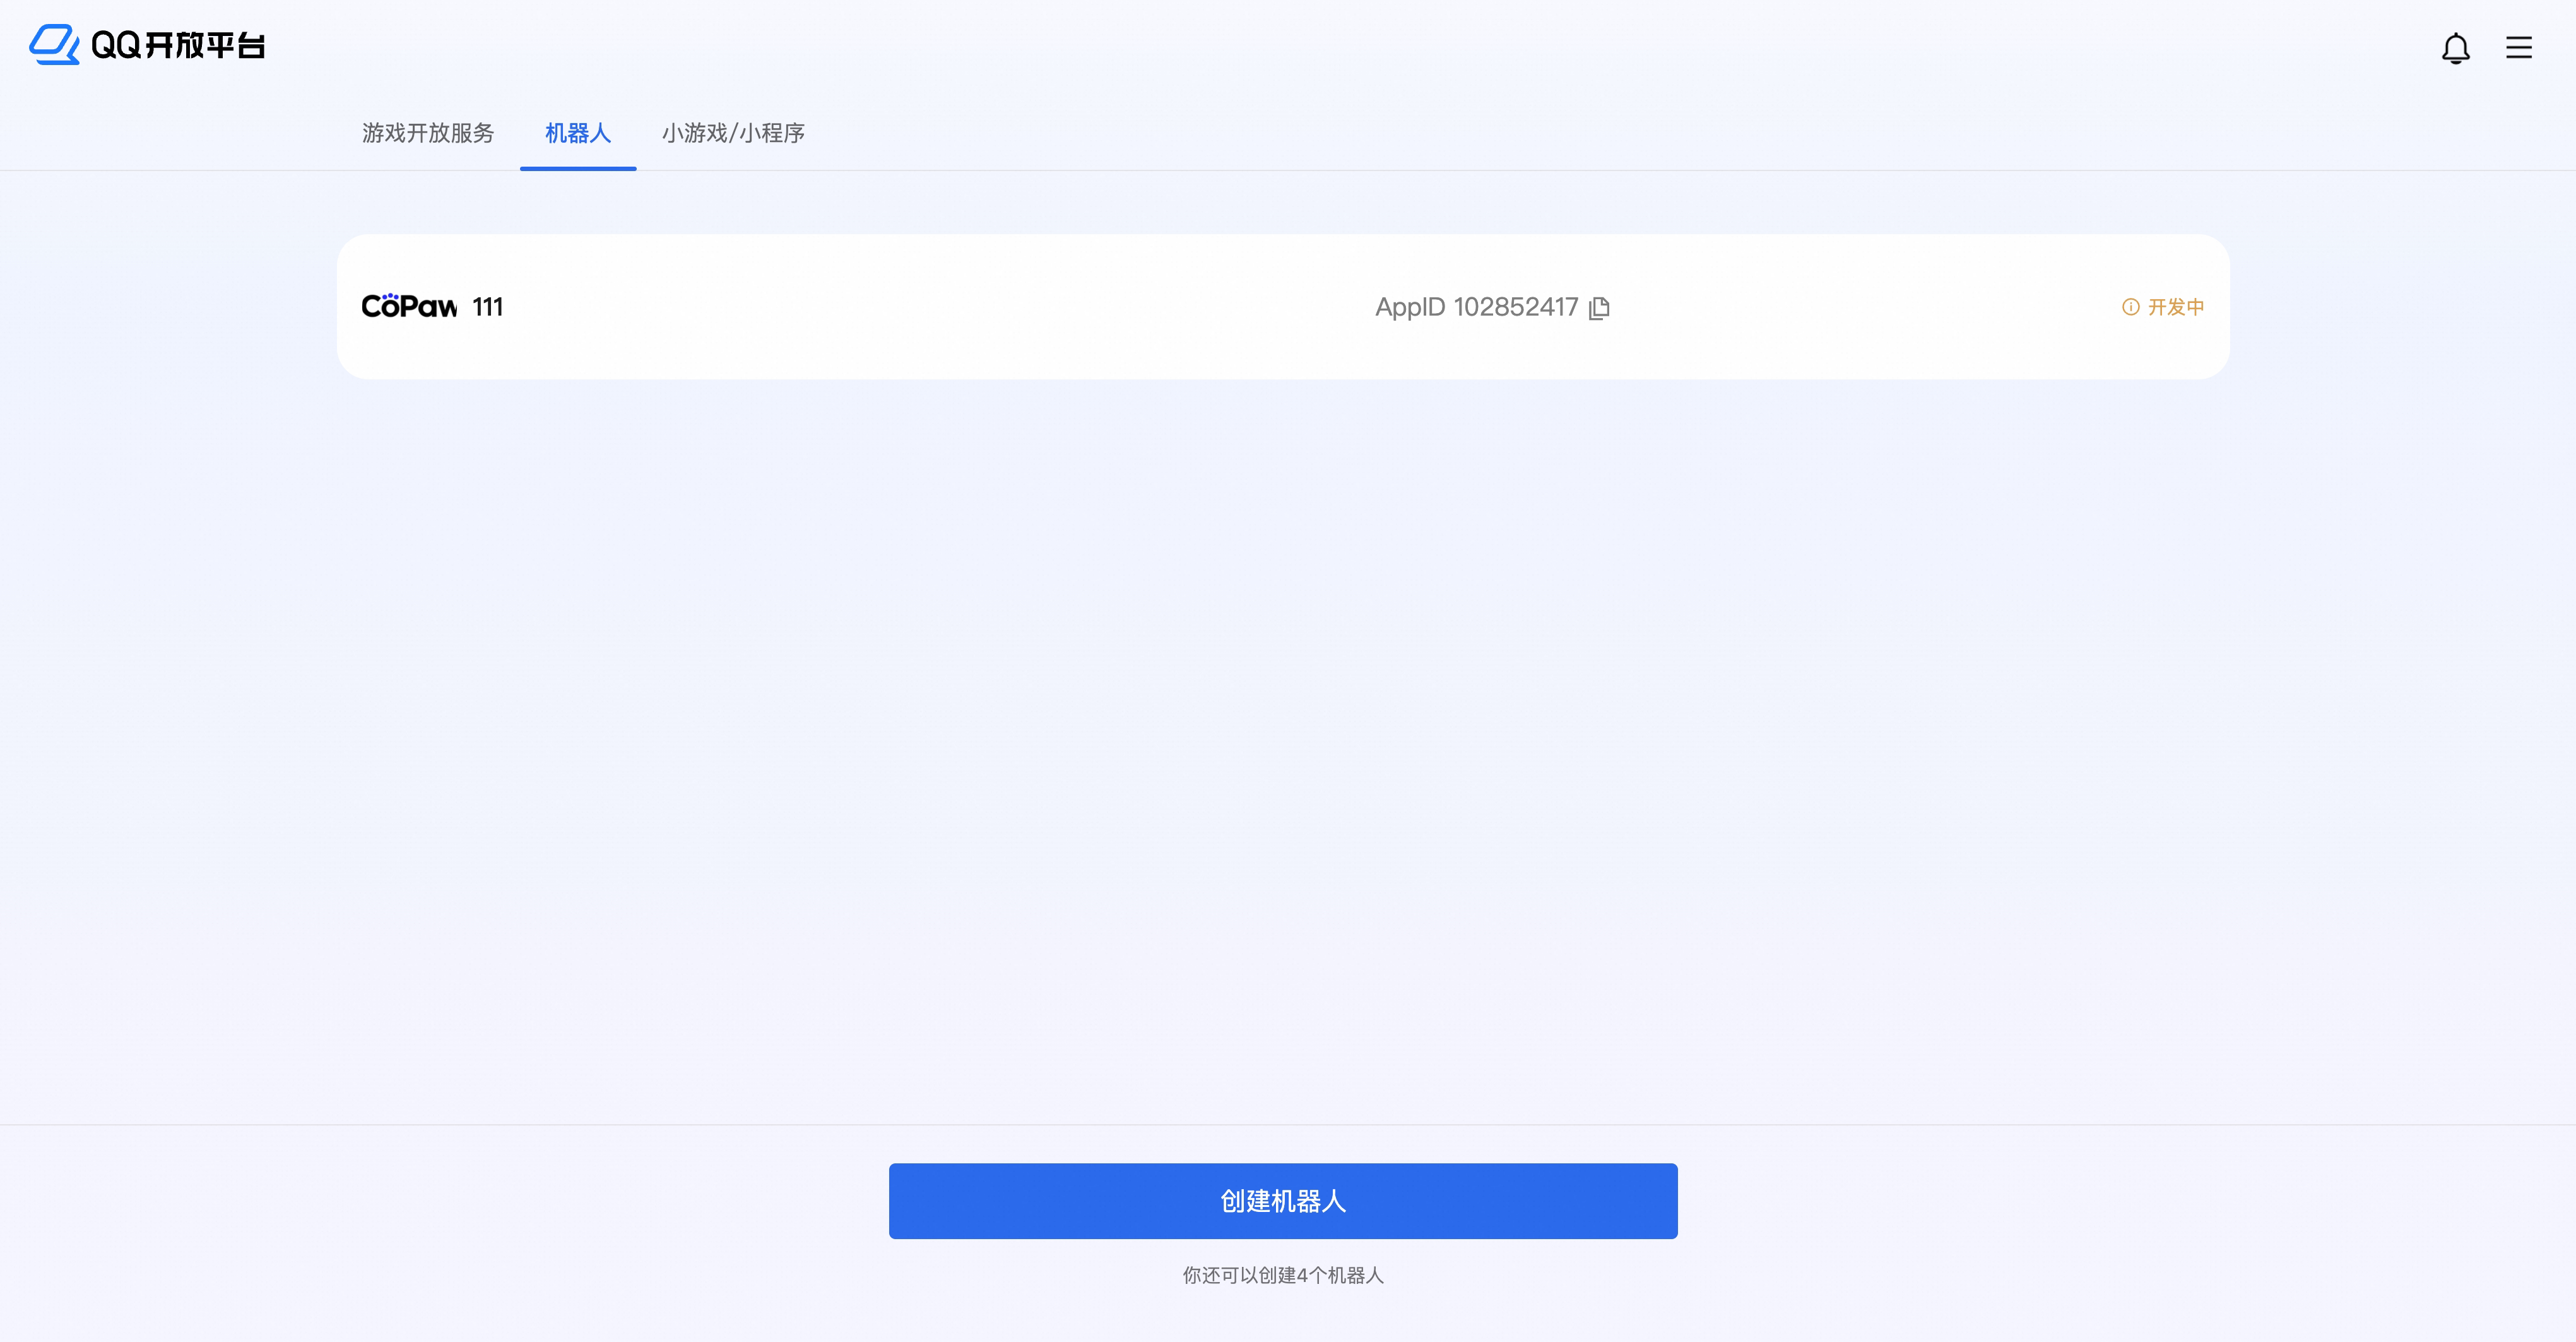
-
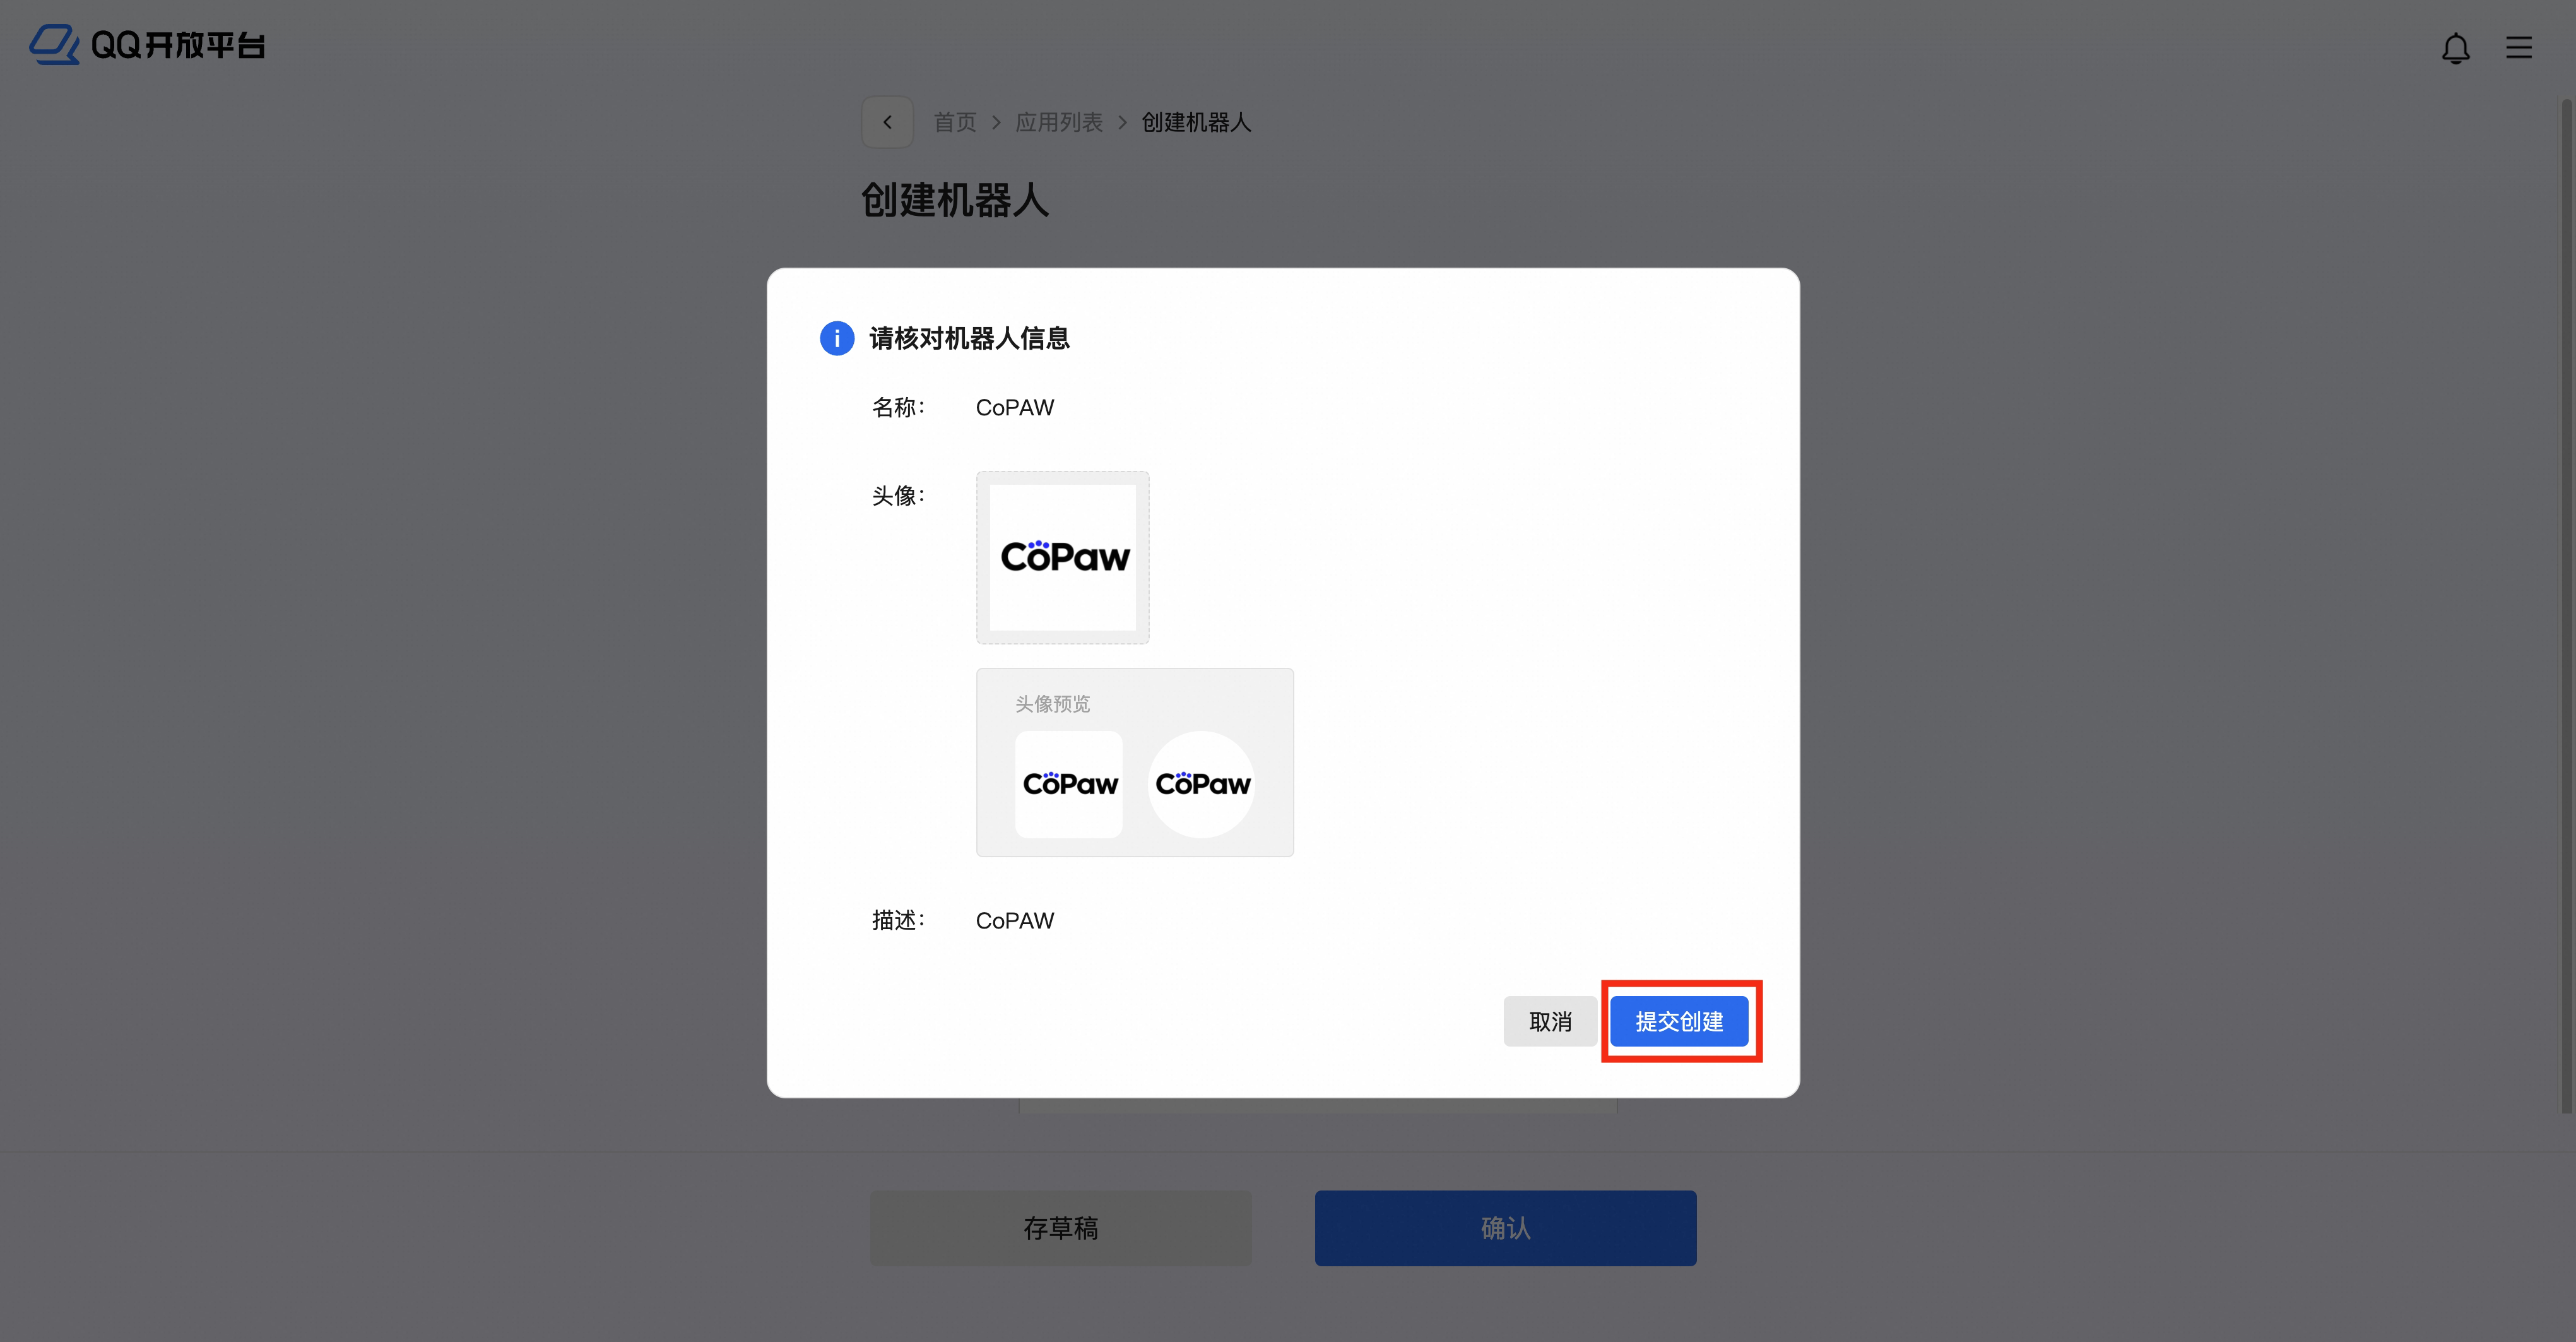
Create a bot application and click to open the edit page
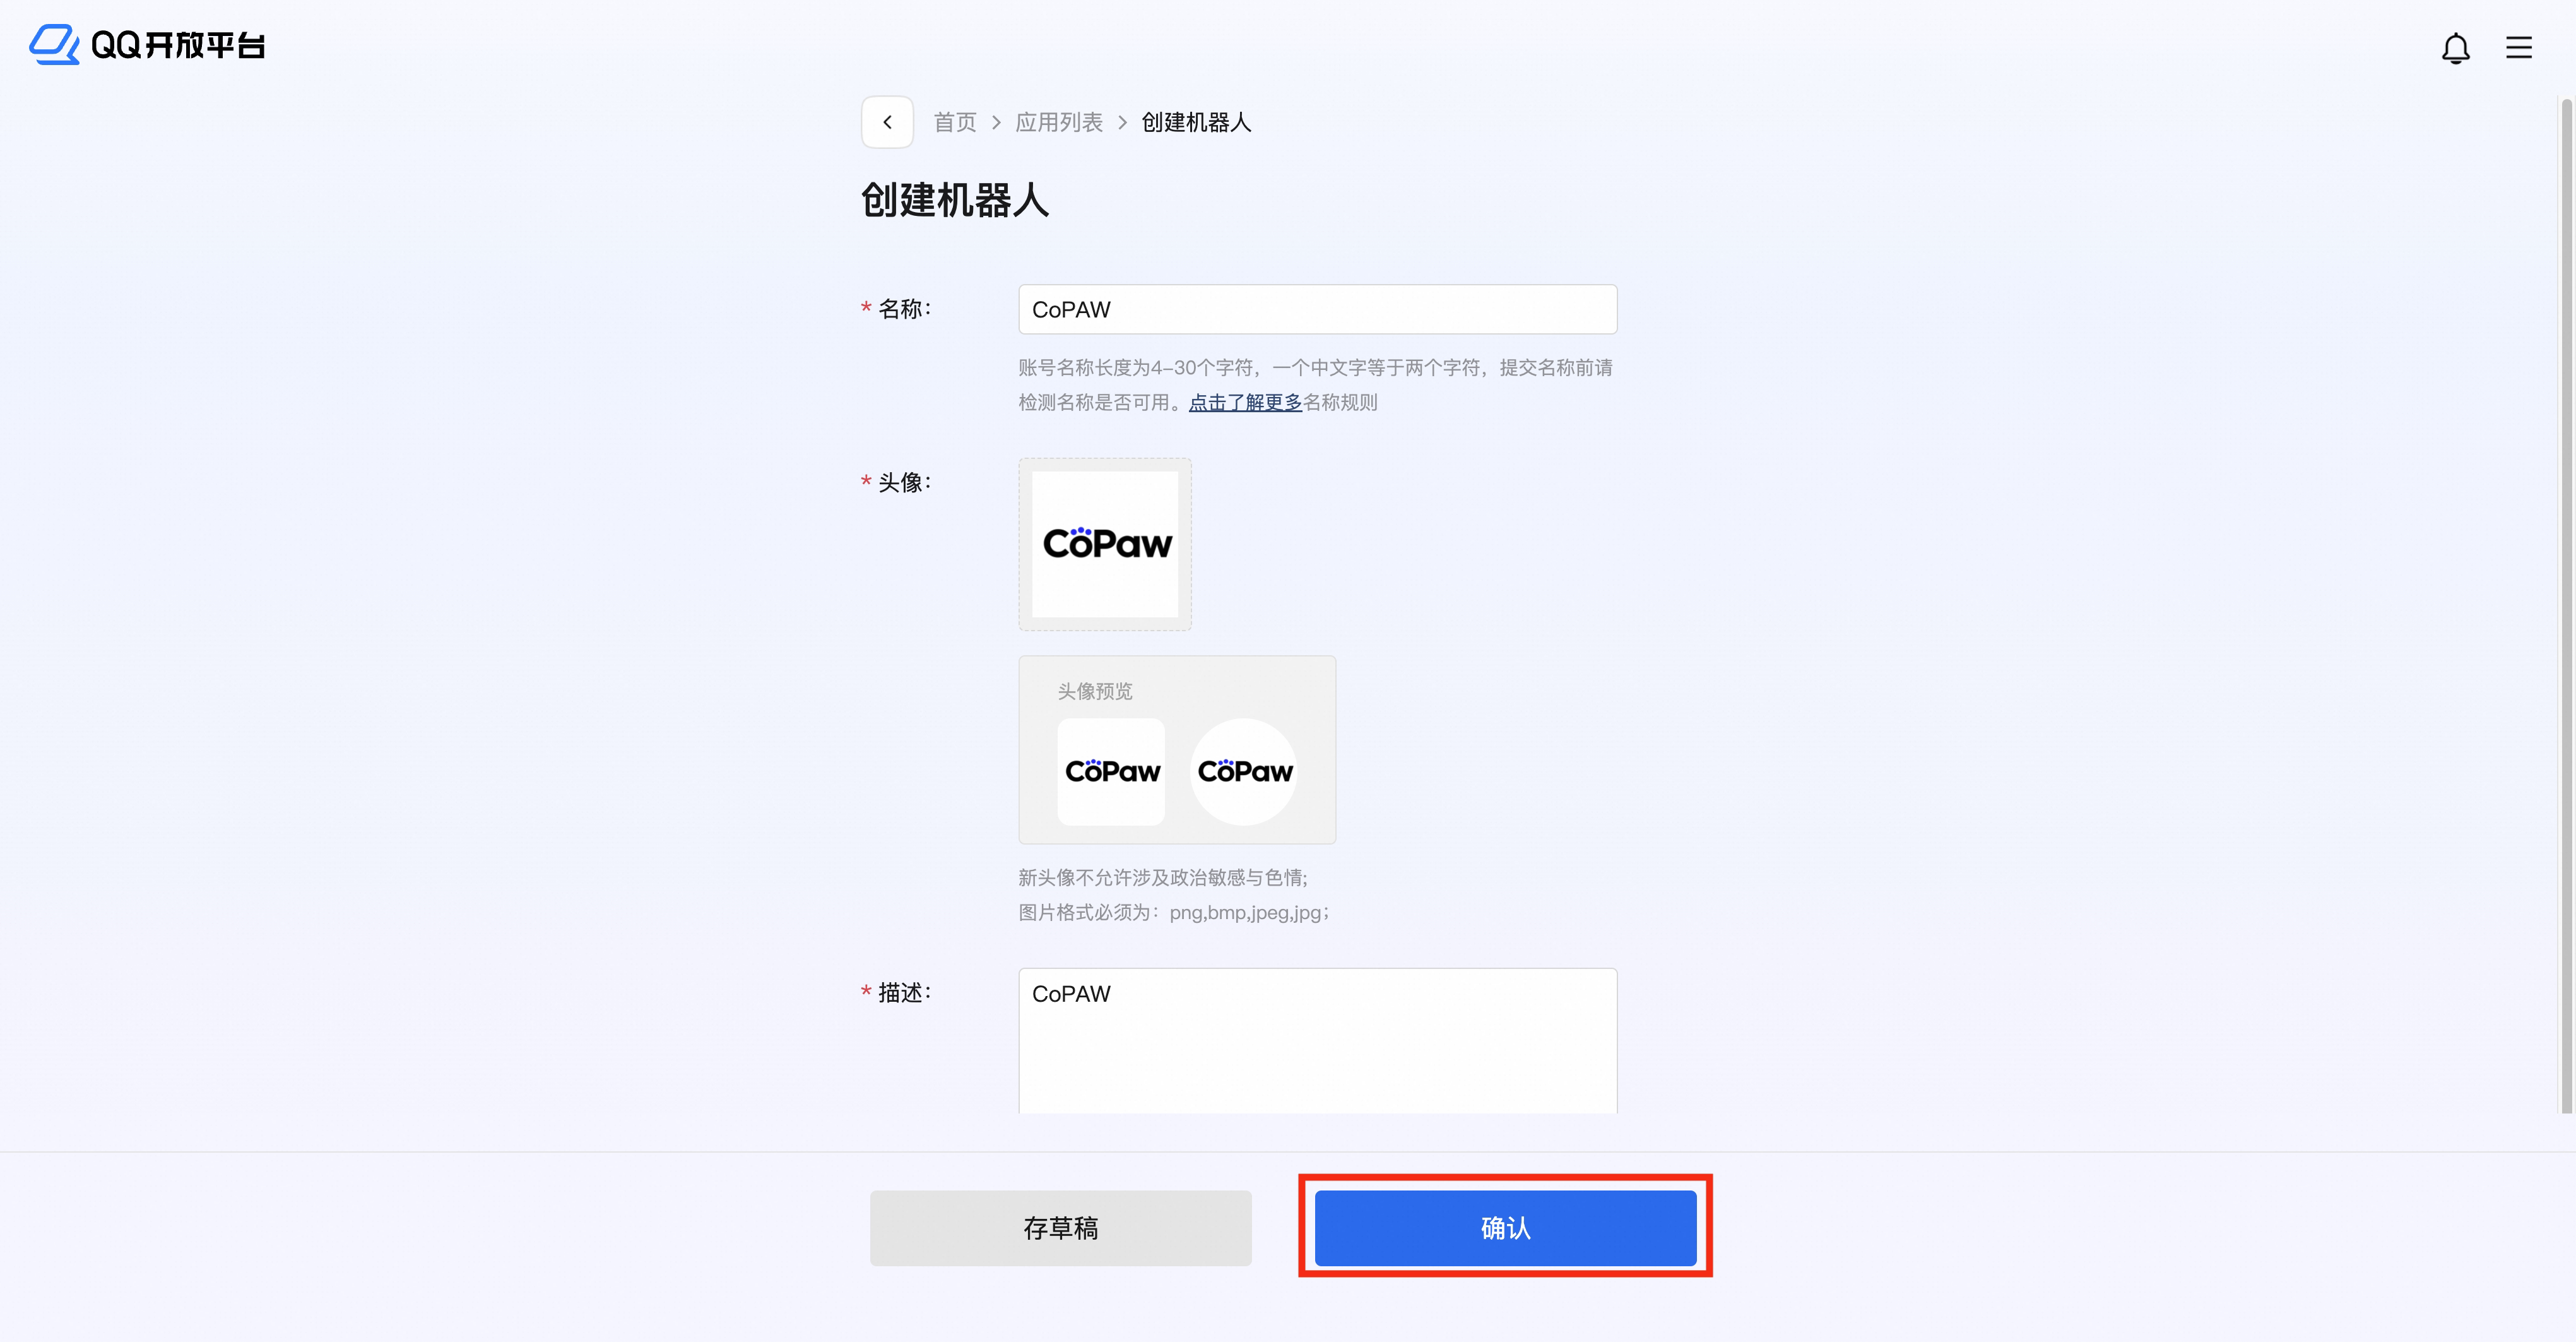
-
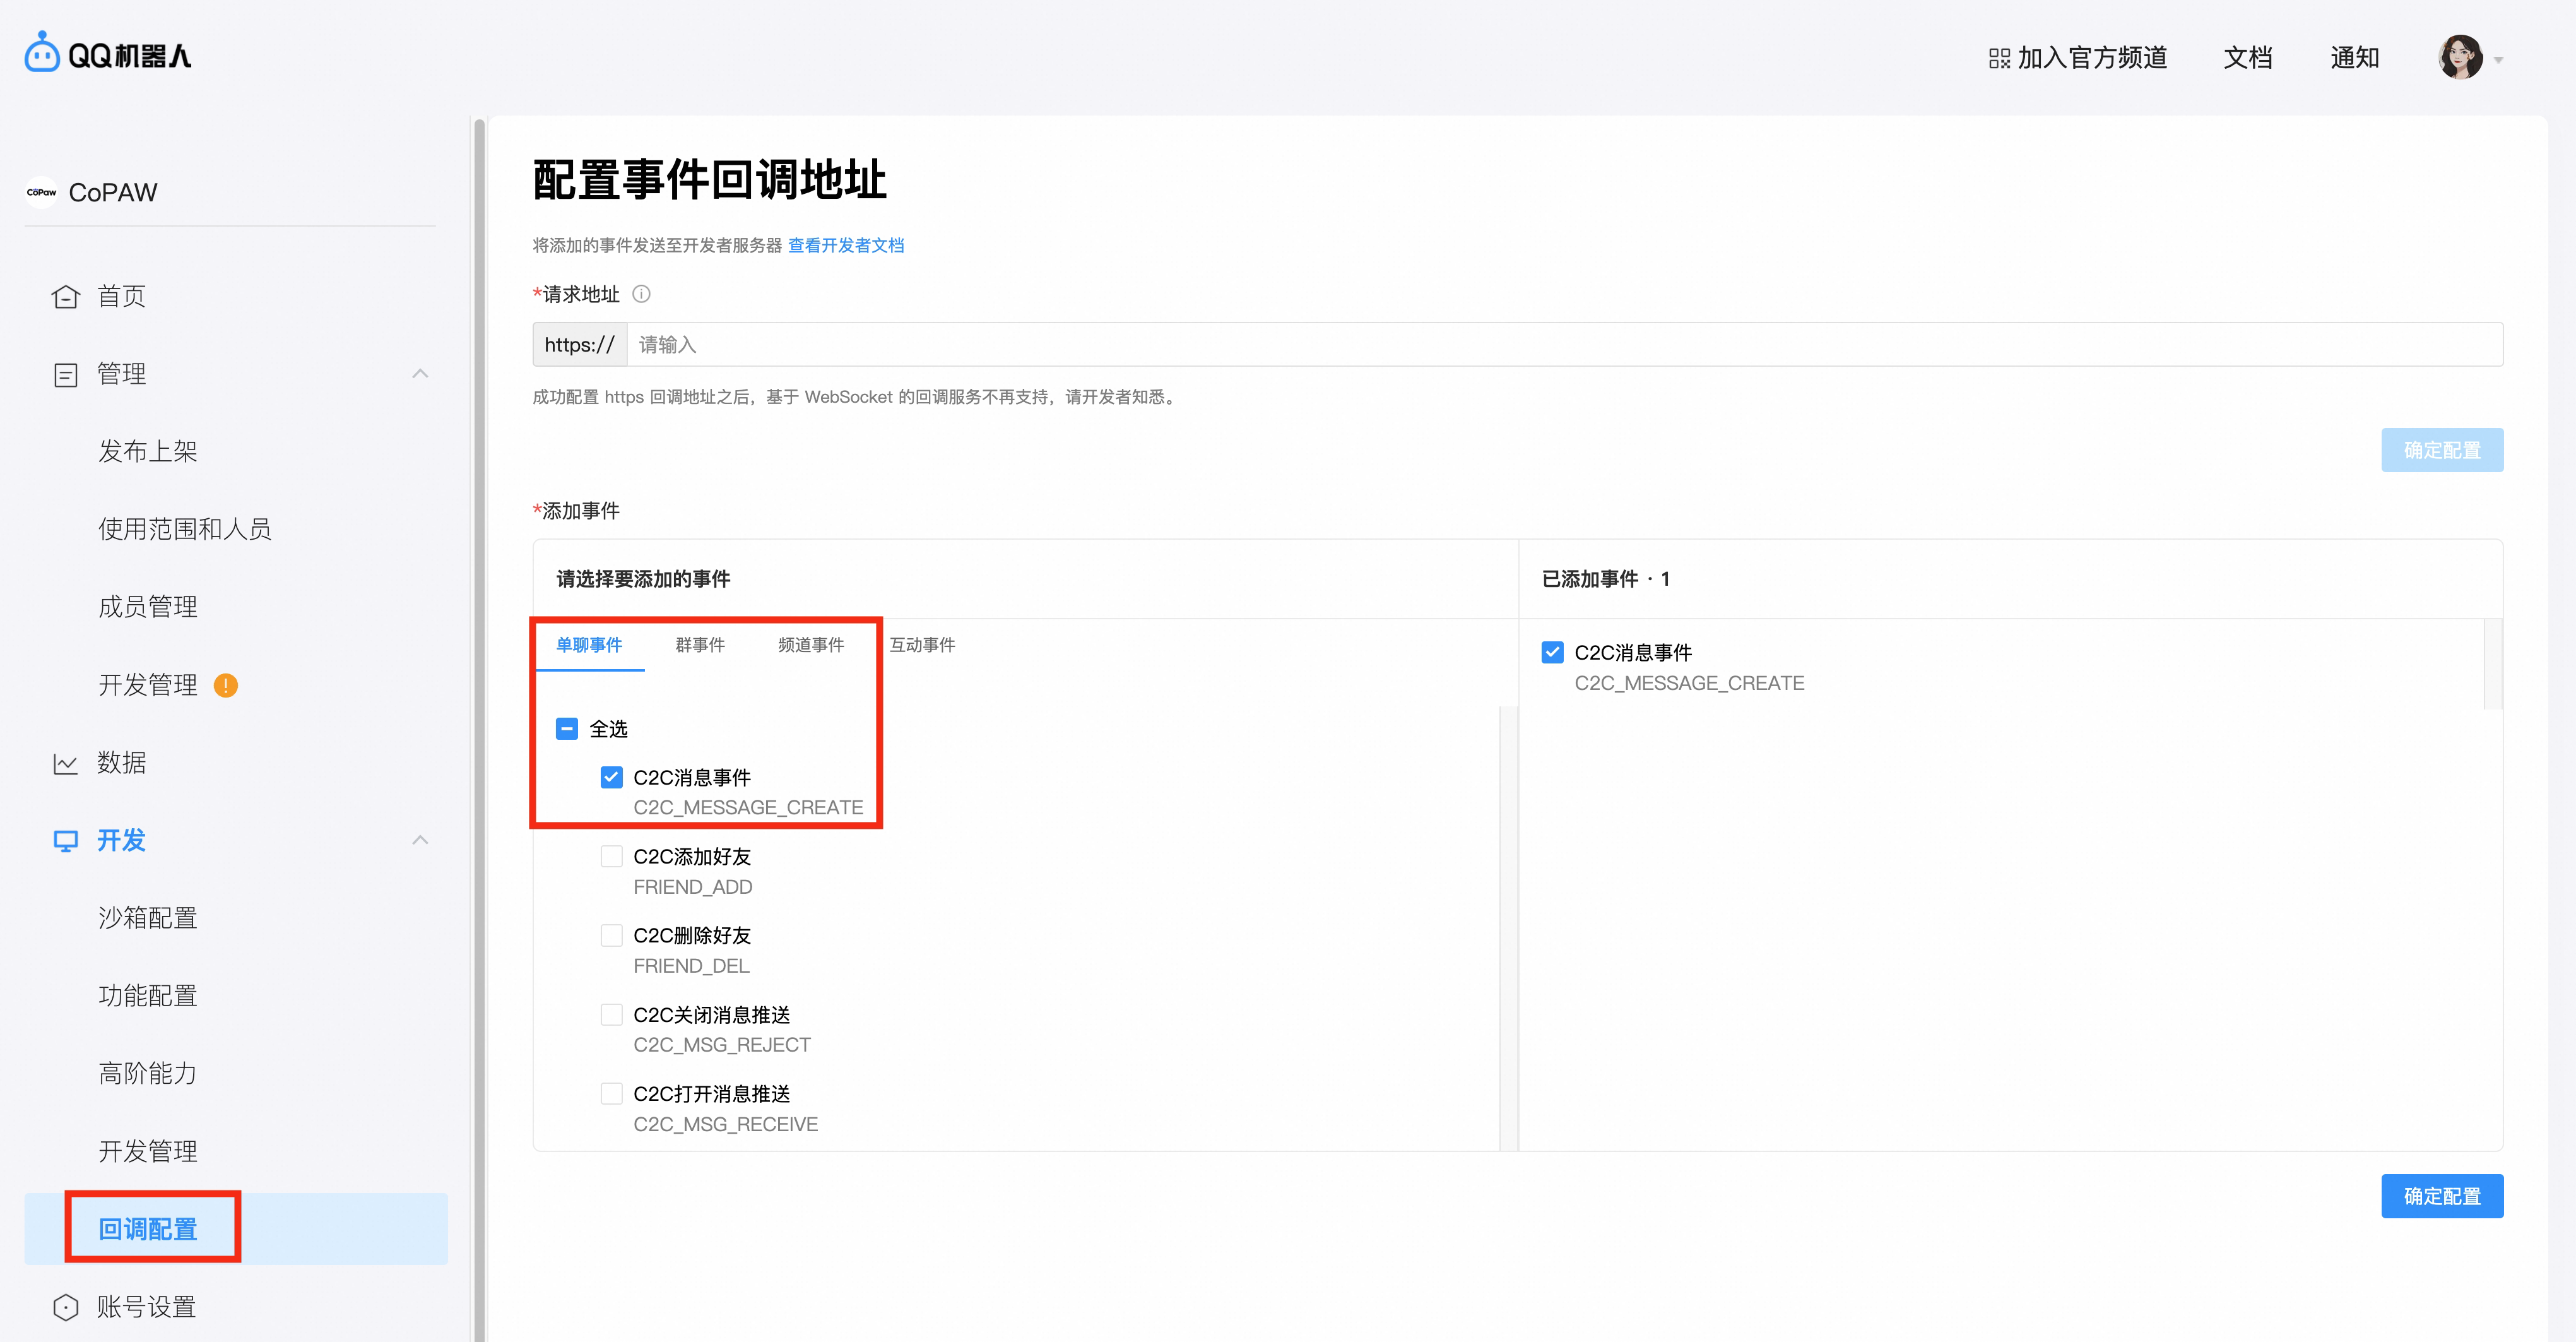
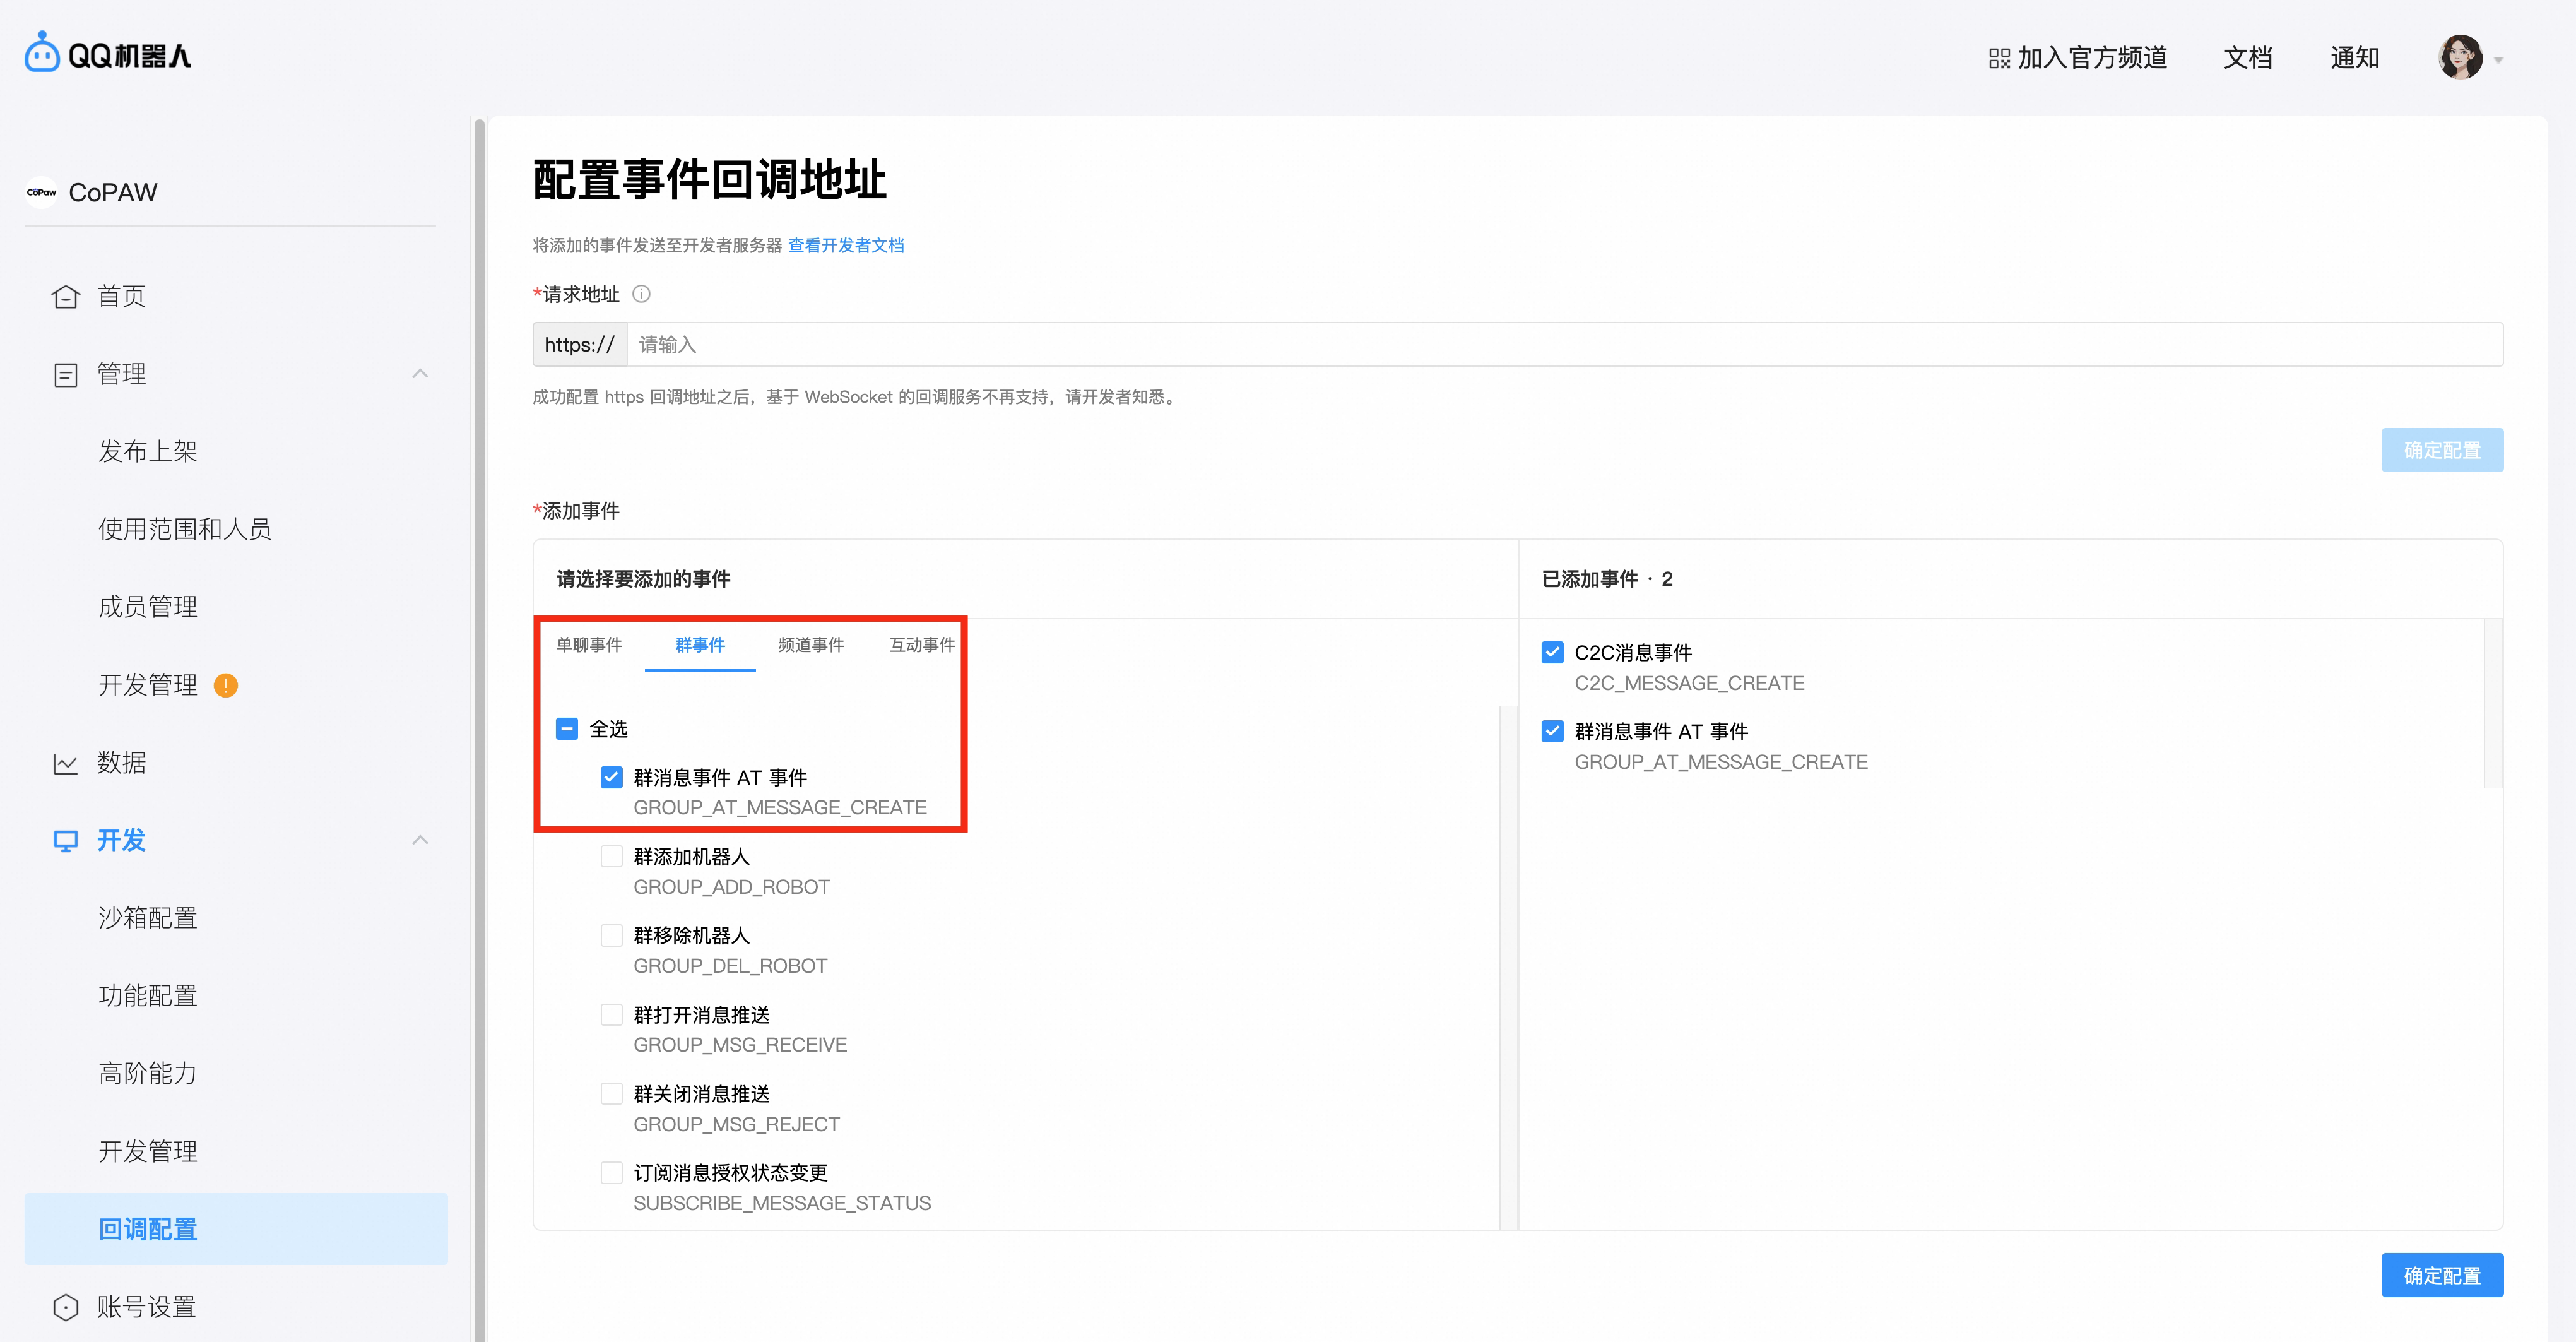
Go to Callback config → enable C2C message events under Direct message events, and At-event for group messages under Group events, then confirm
-
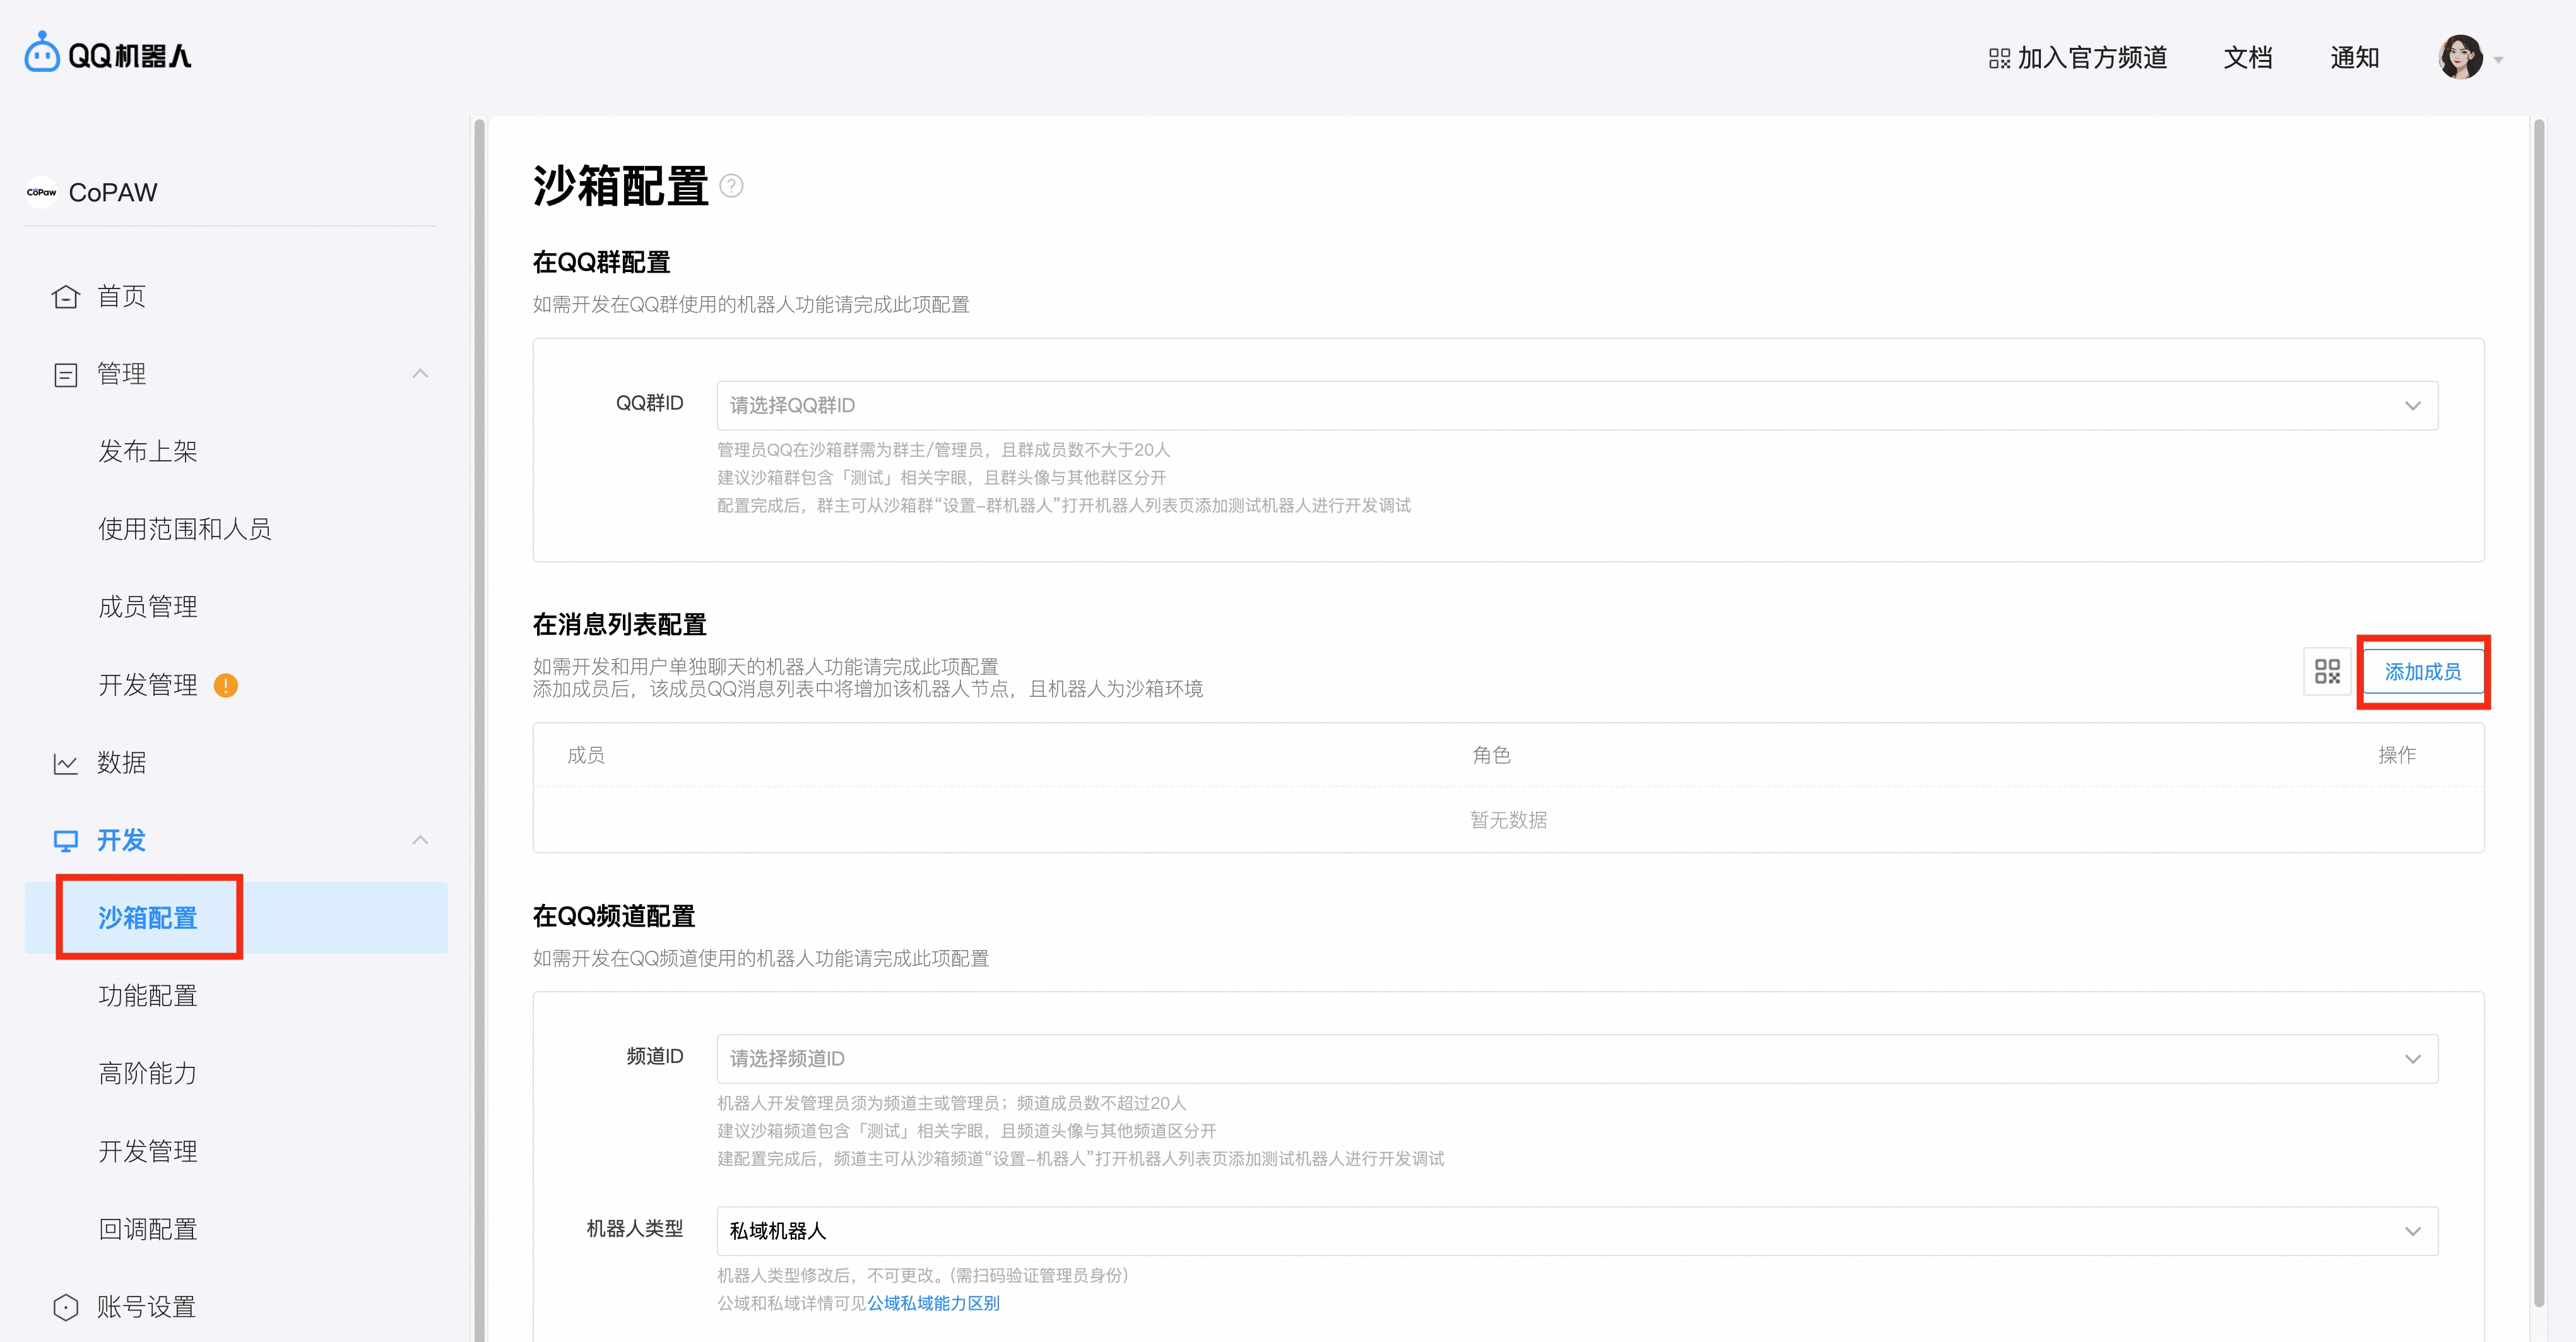
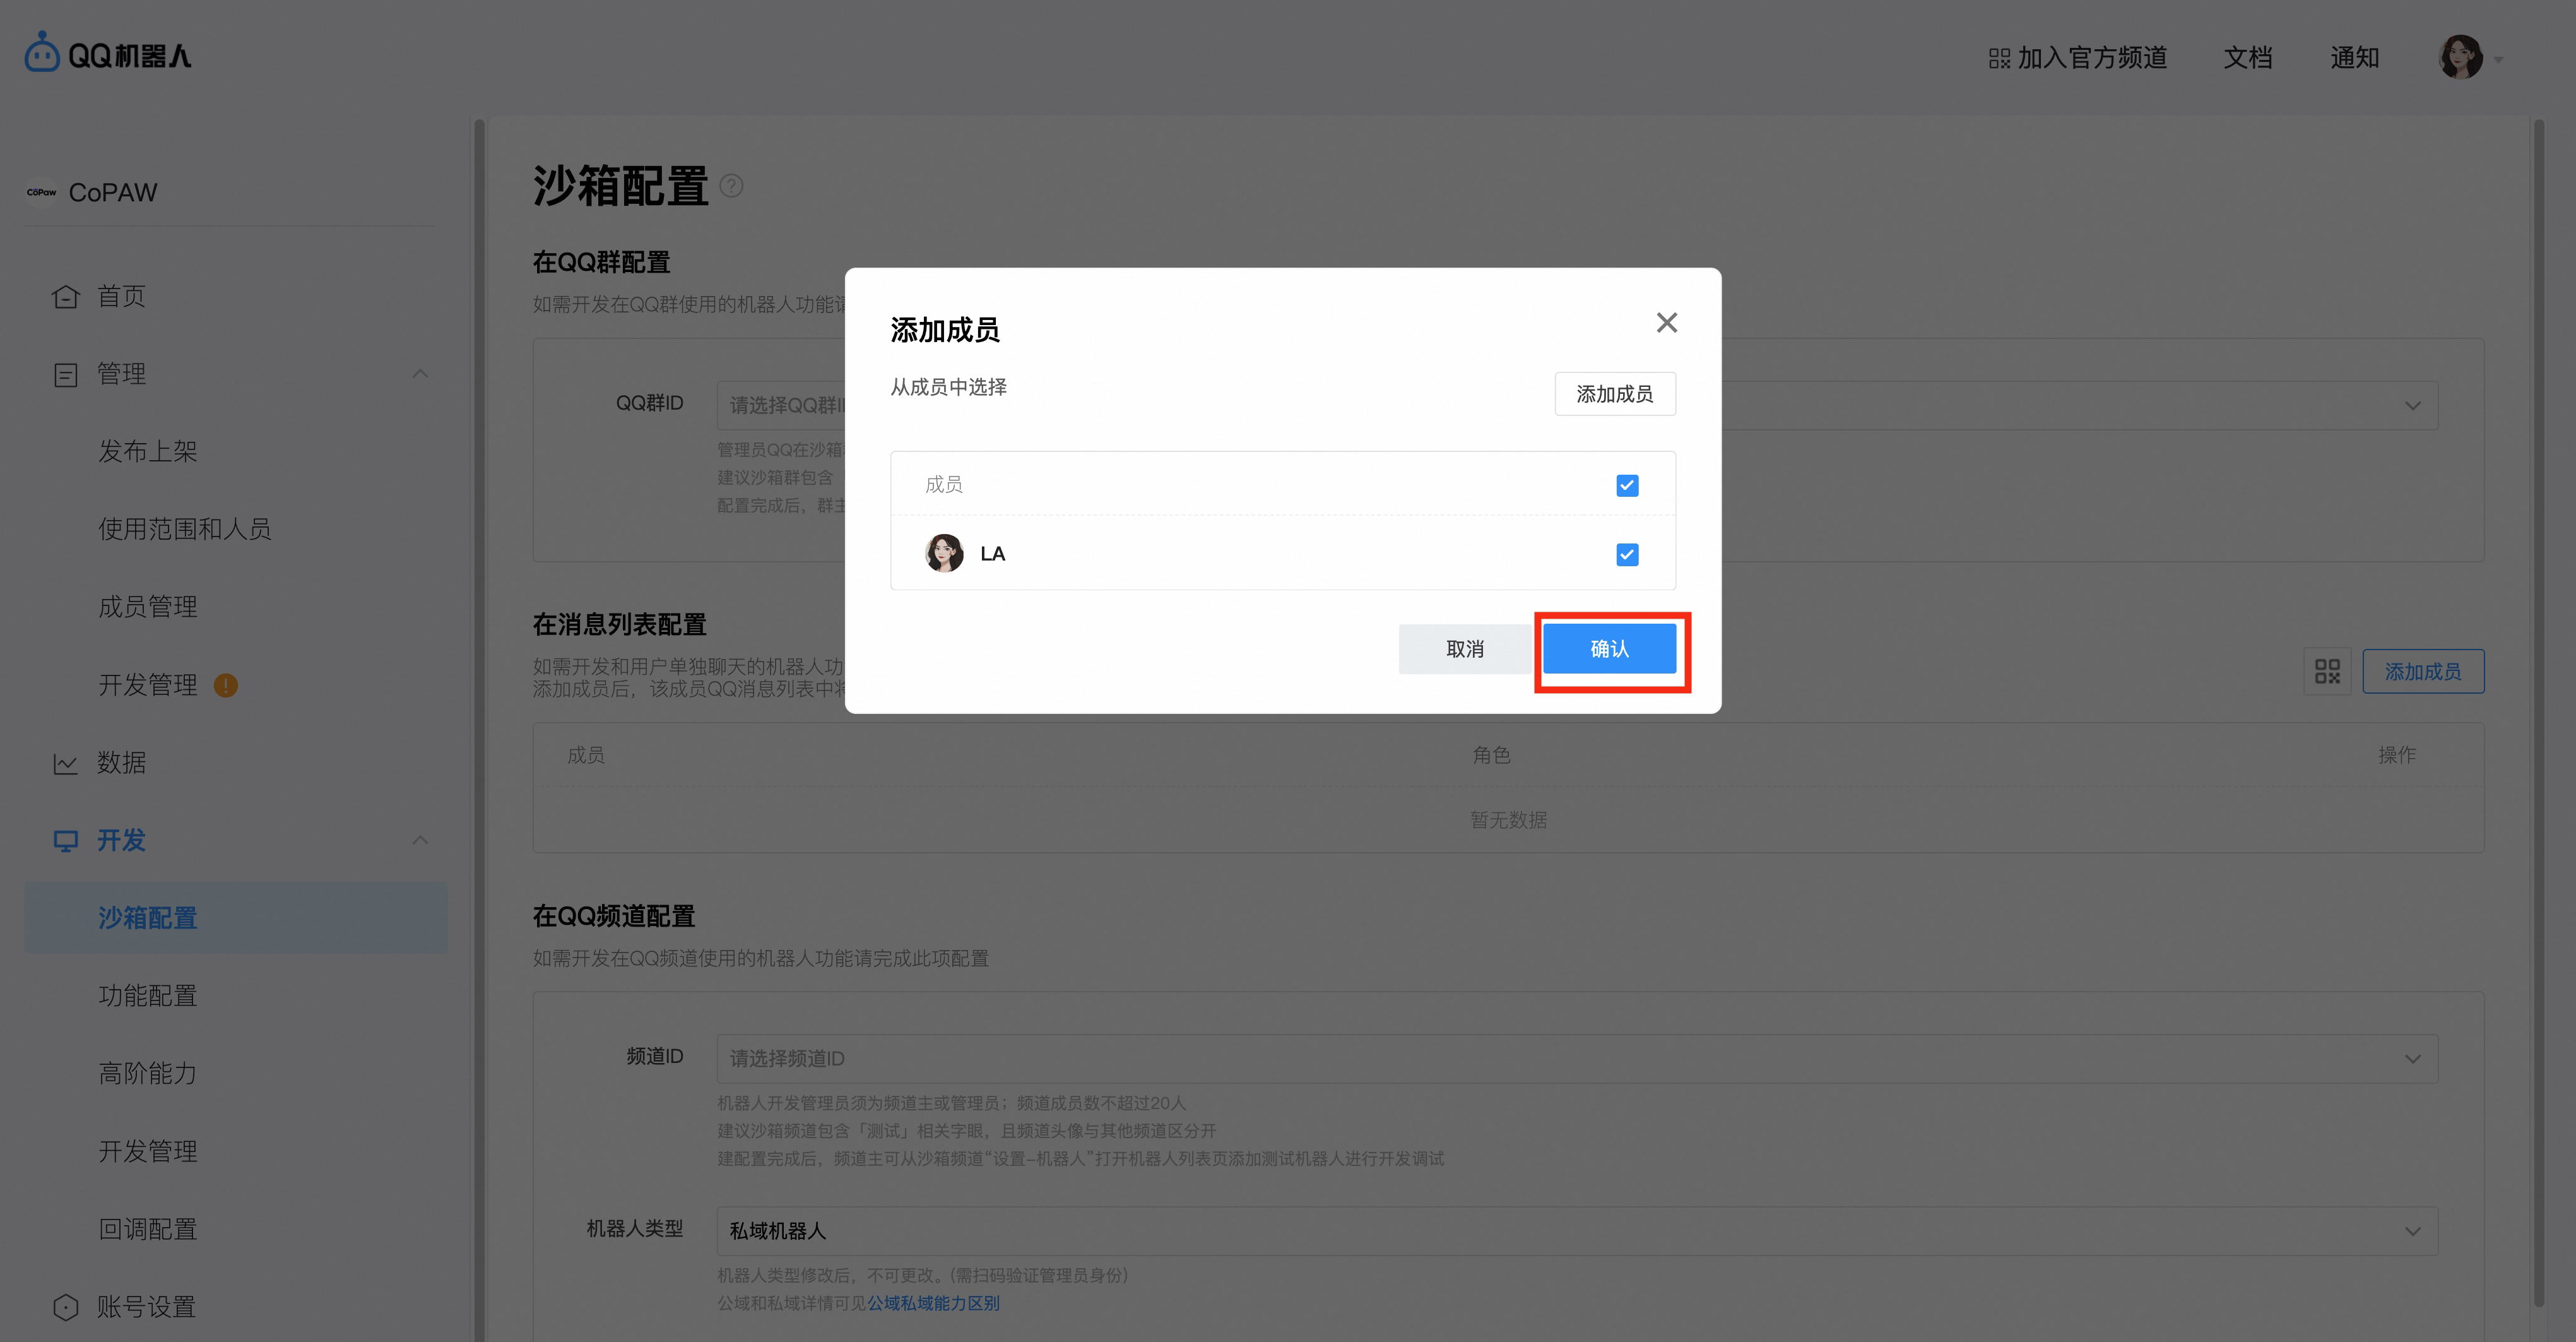
In Sandbox config → Message list, click Add member and add yourself
-
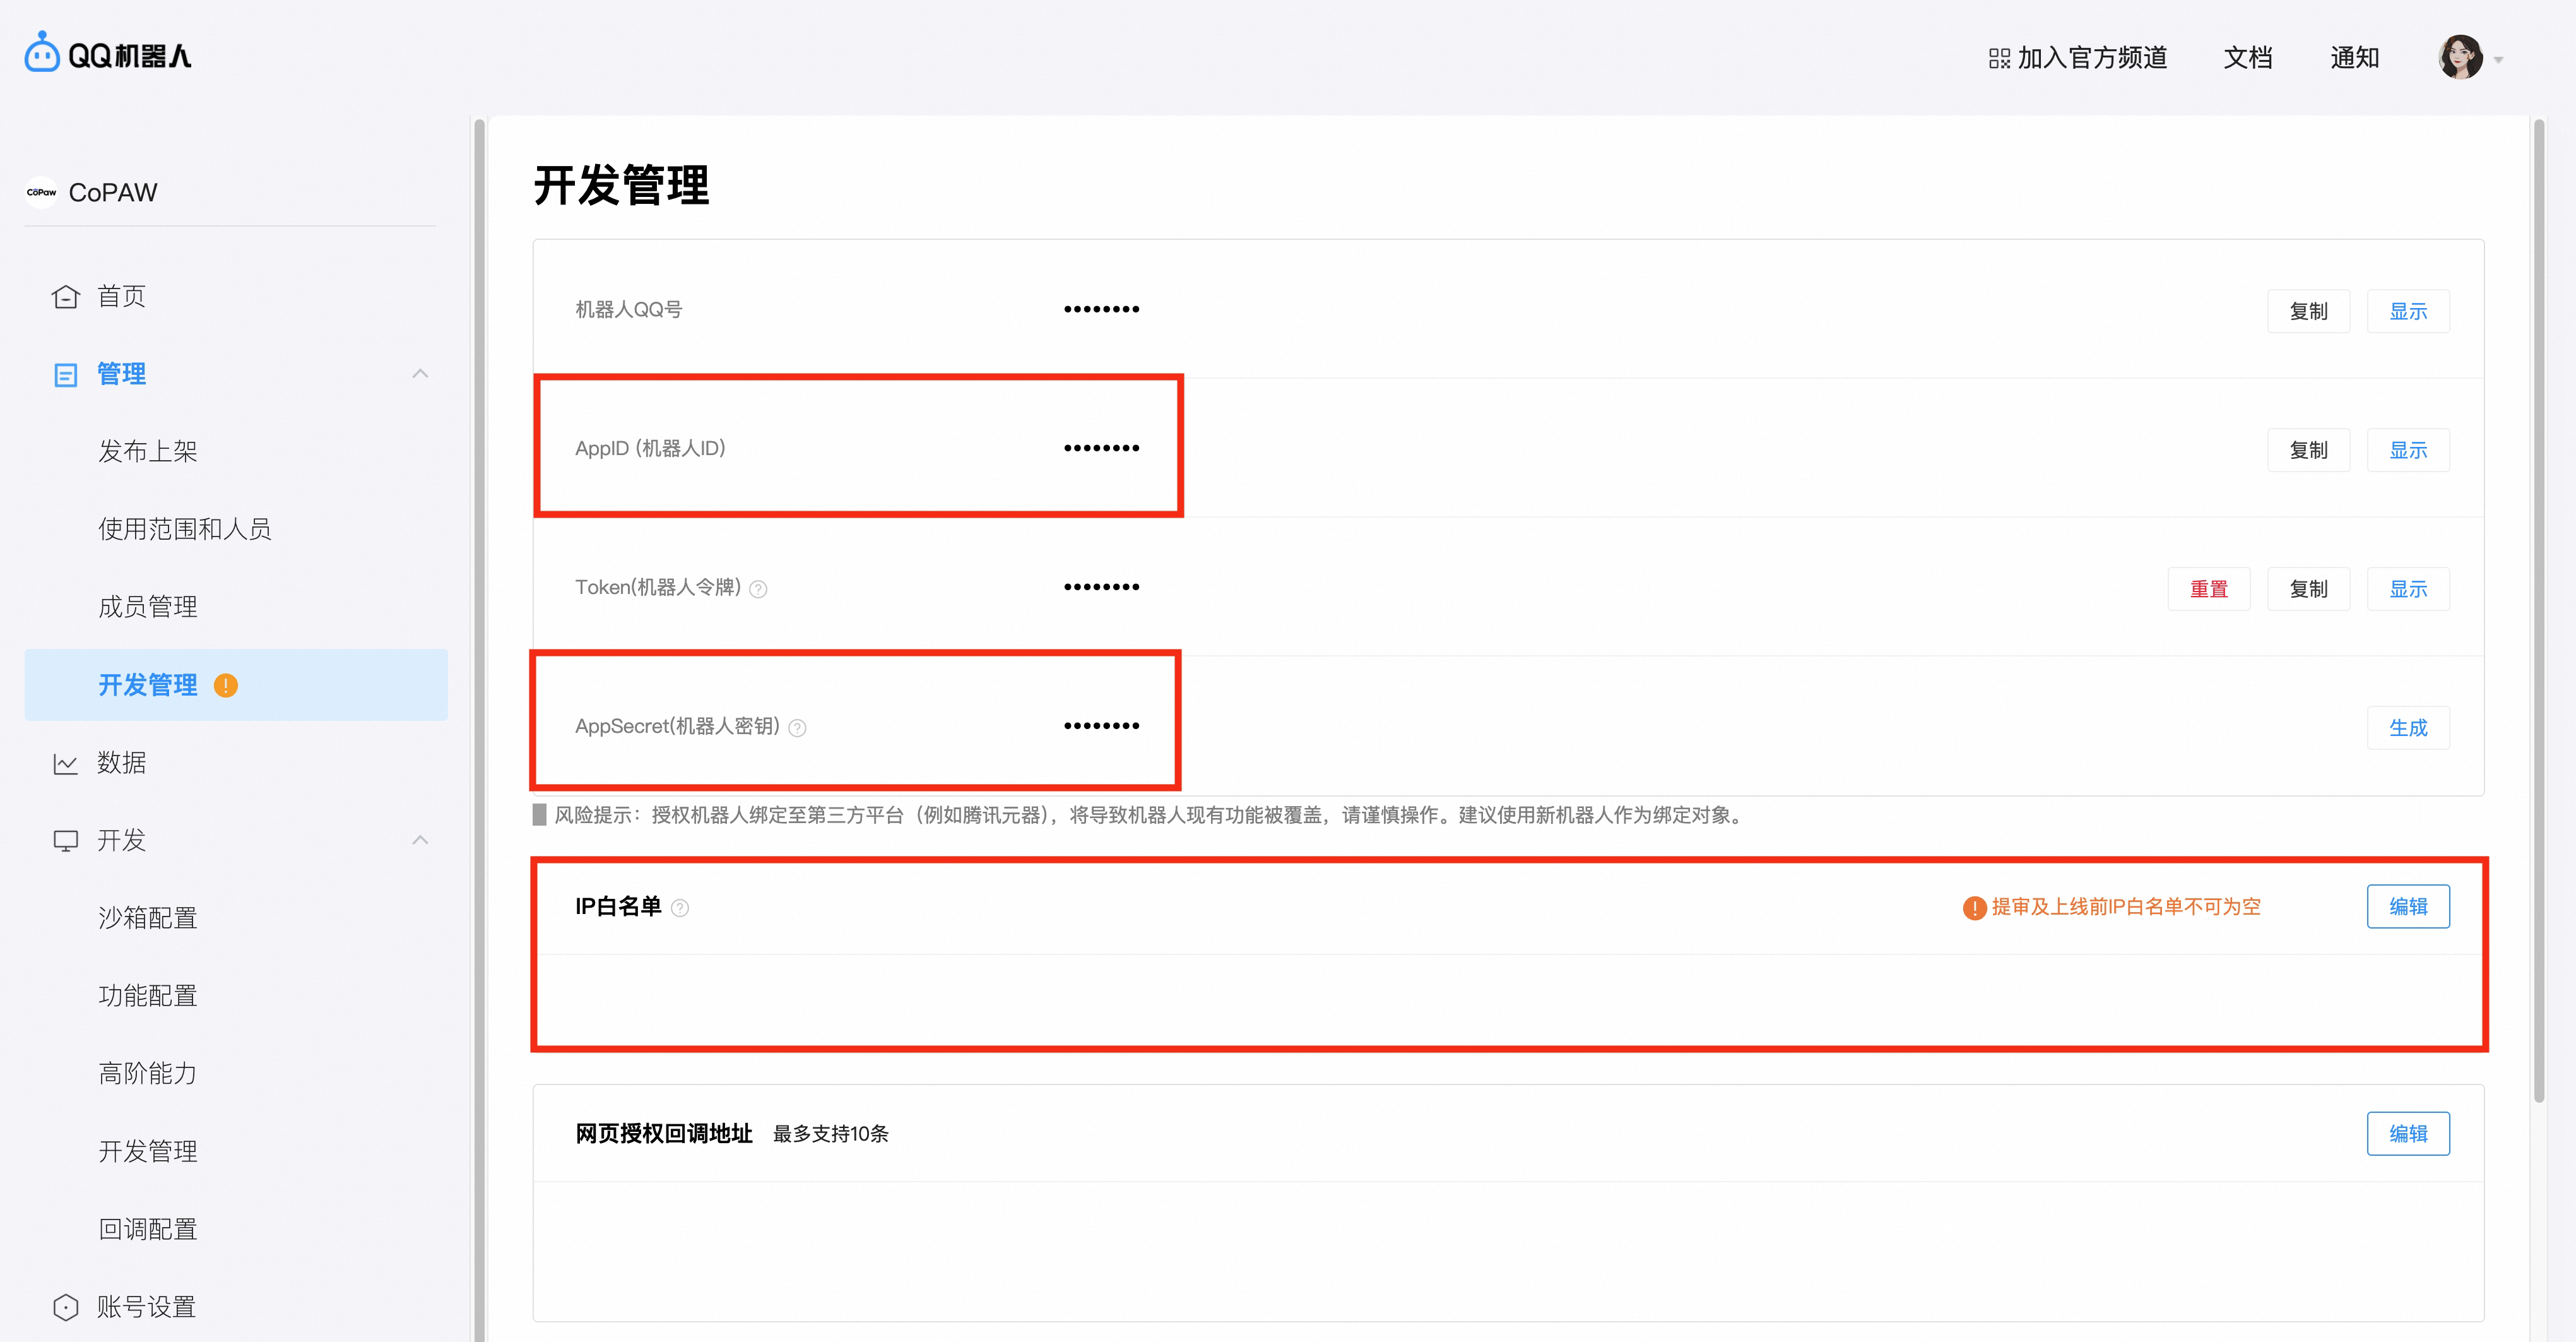
In Developer settings, get AppID and AppSecret (ClientSecret) and fill them into config (see below). Add your server's IP to the whitelist — only whitelisted IPs can call the Open API outside sandbox.
-
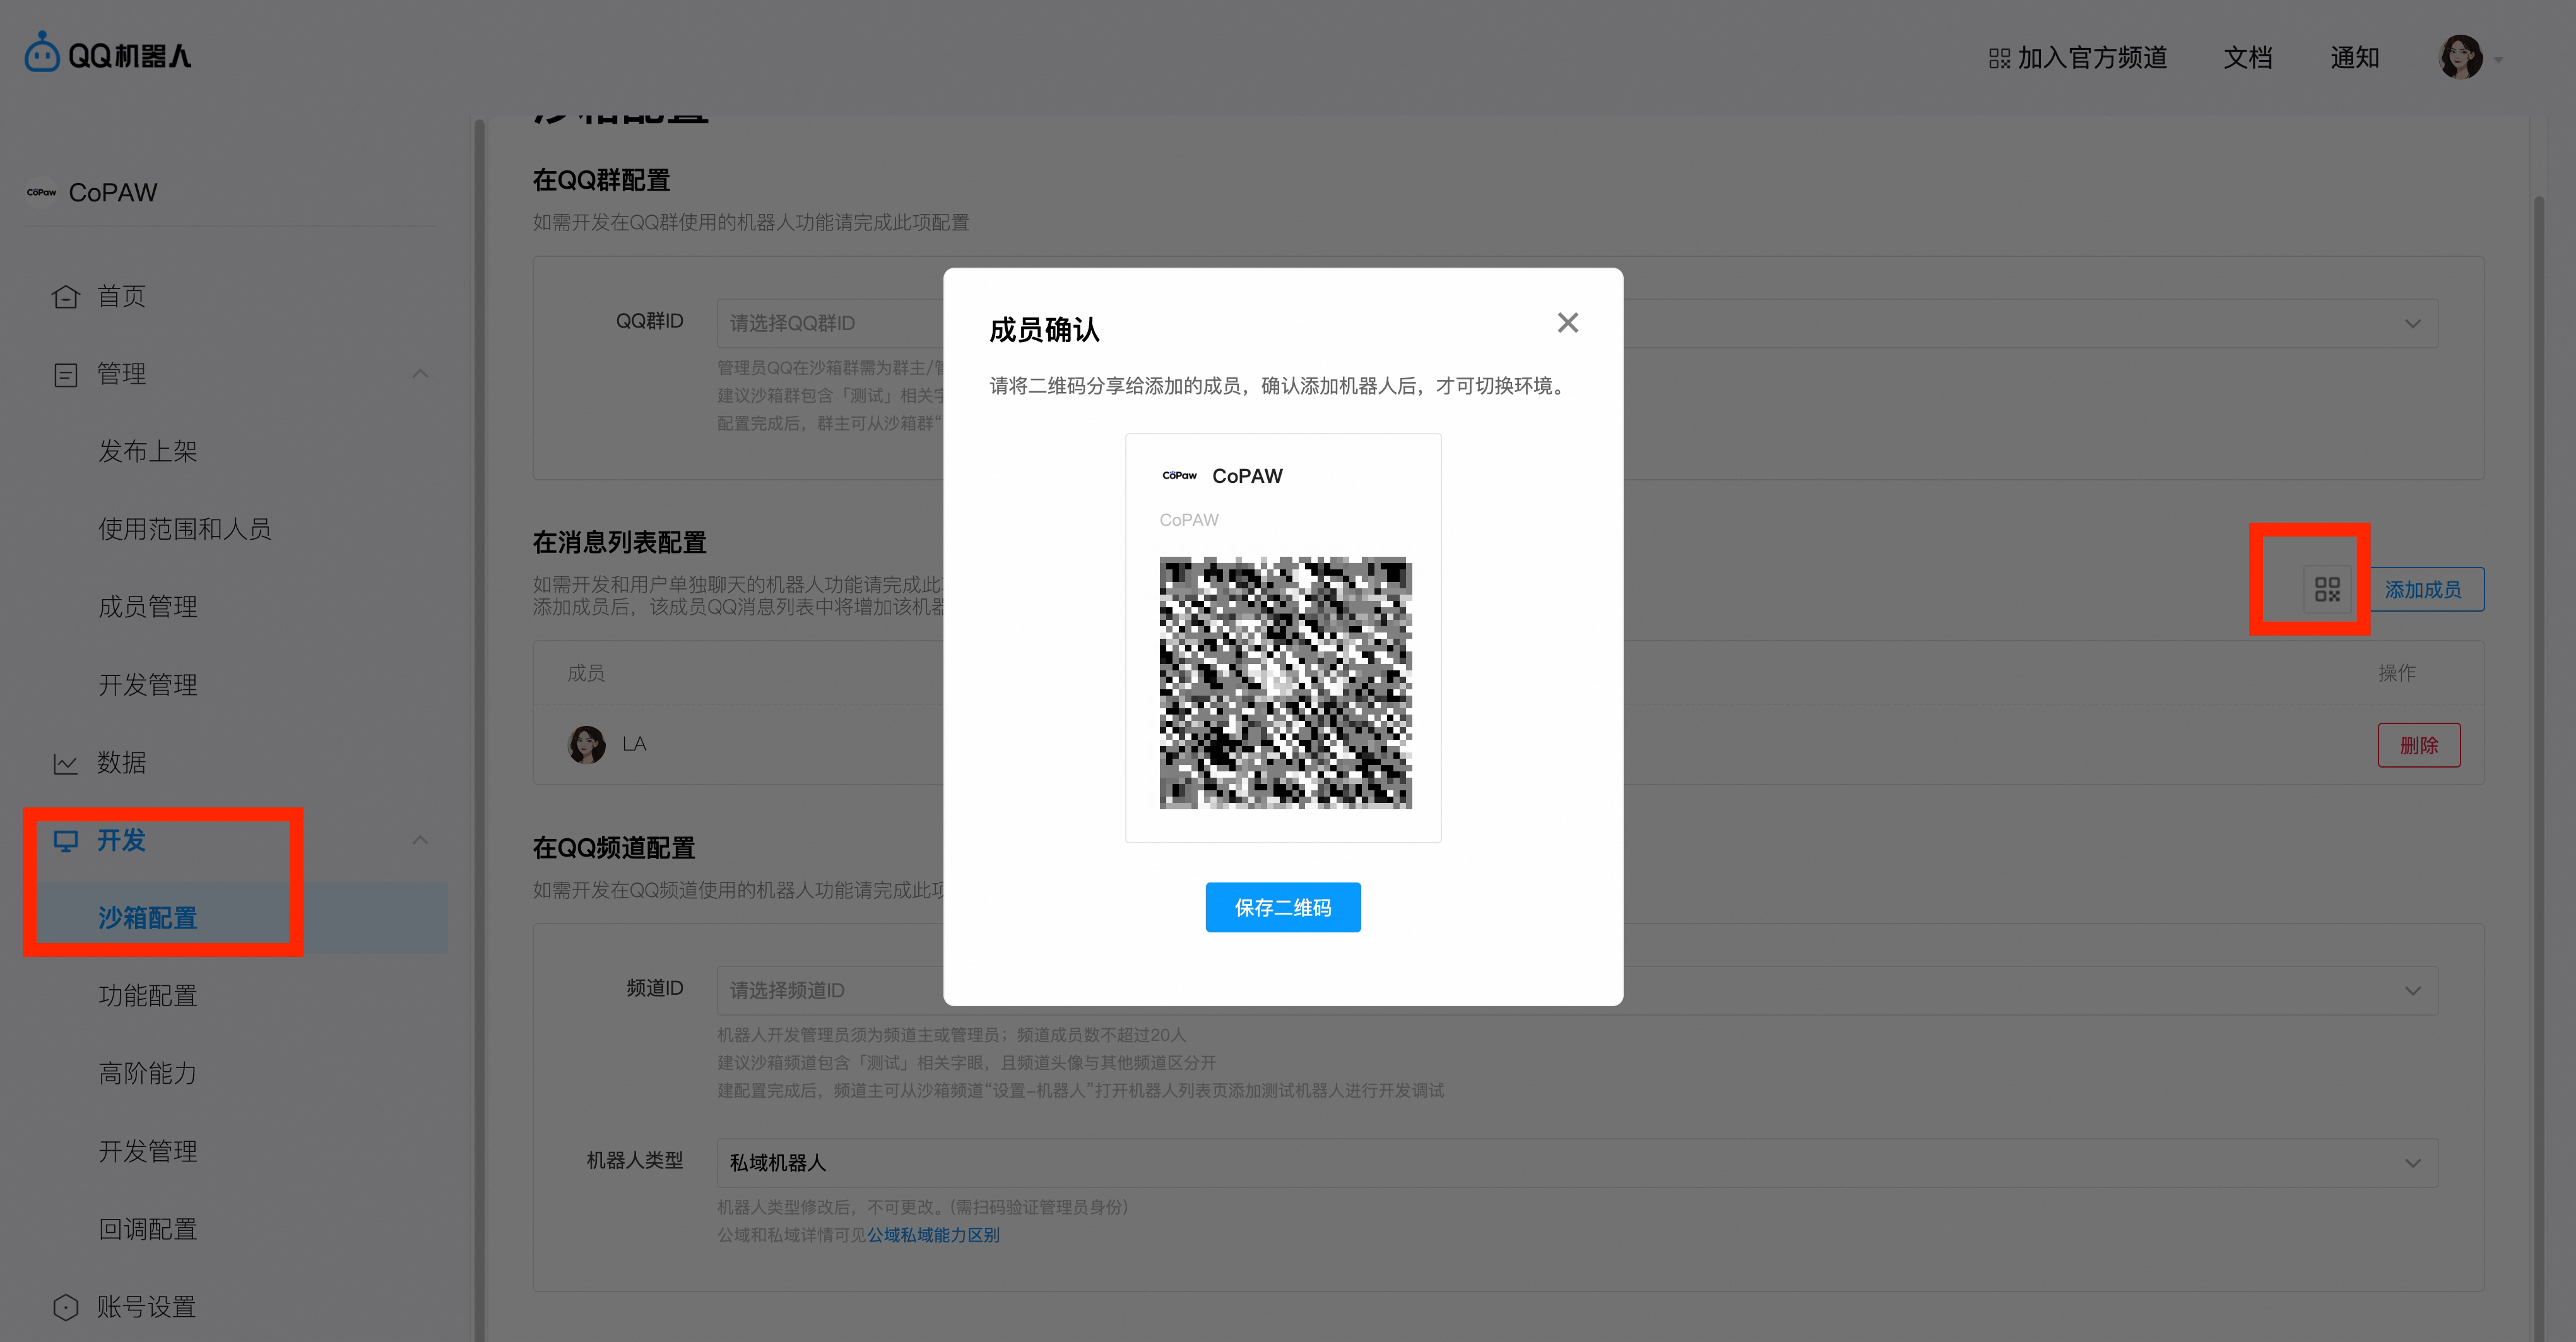
In sandbox config, scan the QR code with QQ to add the bot to your message list
Fill config.json
In config.json, find channels.qq and set app_id and client_secret to the values above:
"qq": {
  "enabled": true,
  "bot_prefix": "[BOT]",
  "app_id": "your AppID",
  "client_secret": "your AppSecret"
}
You provide AppID and AppSecret as two separate fields; do not concatenate them into a single token.
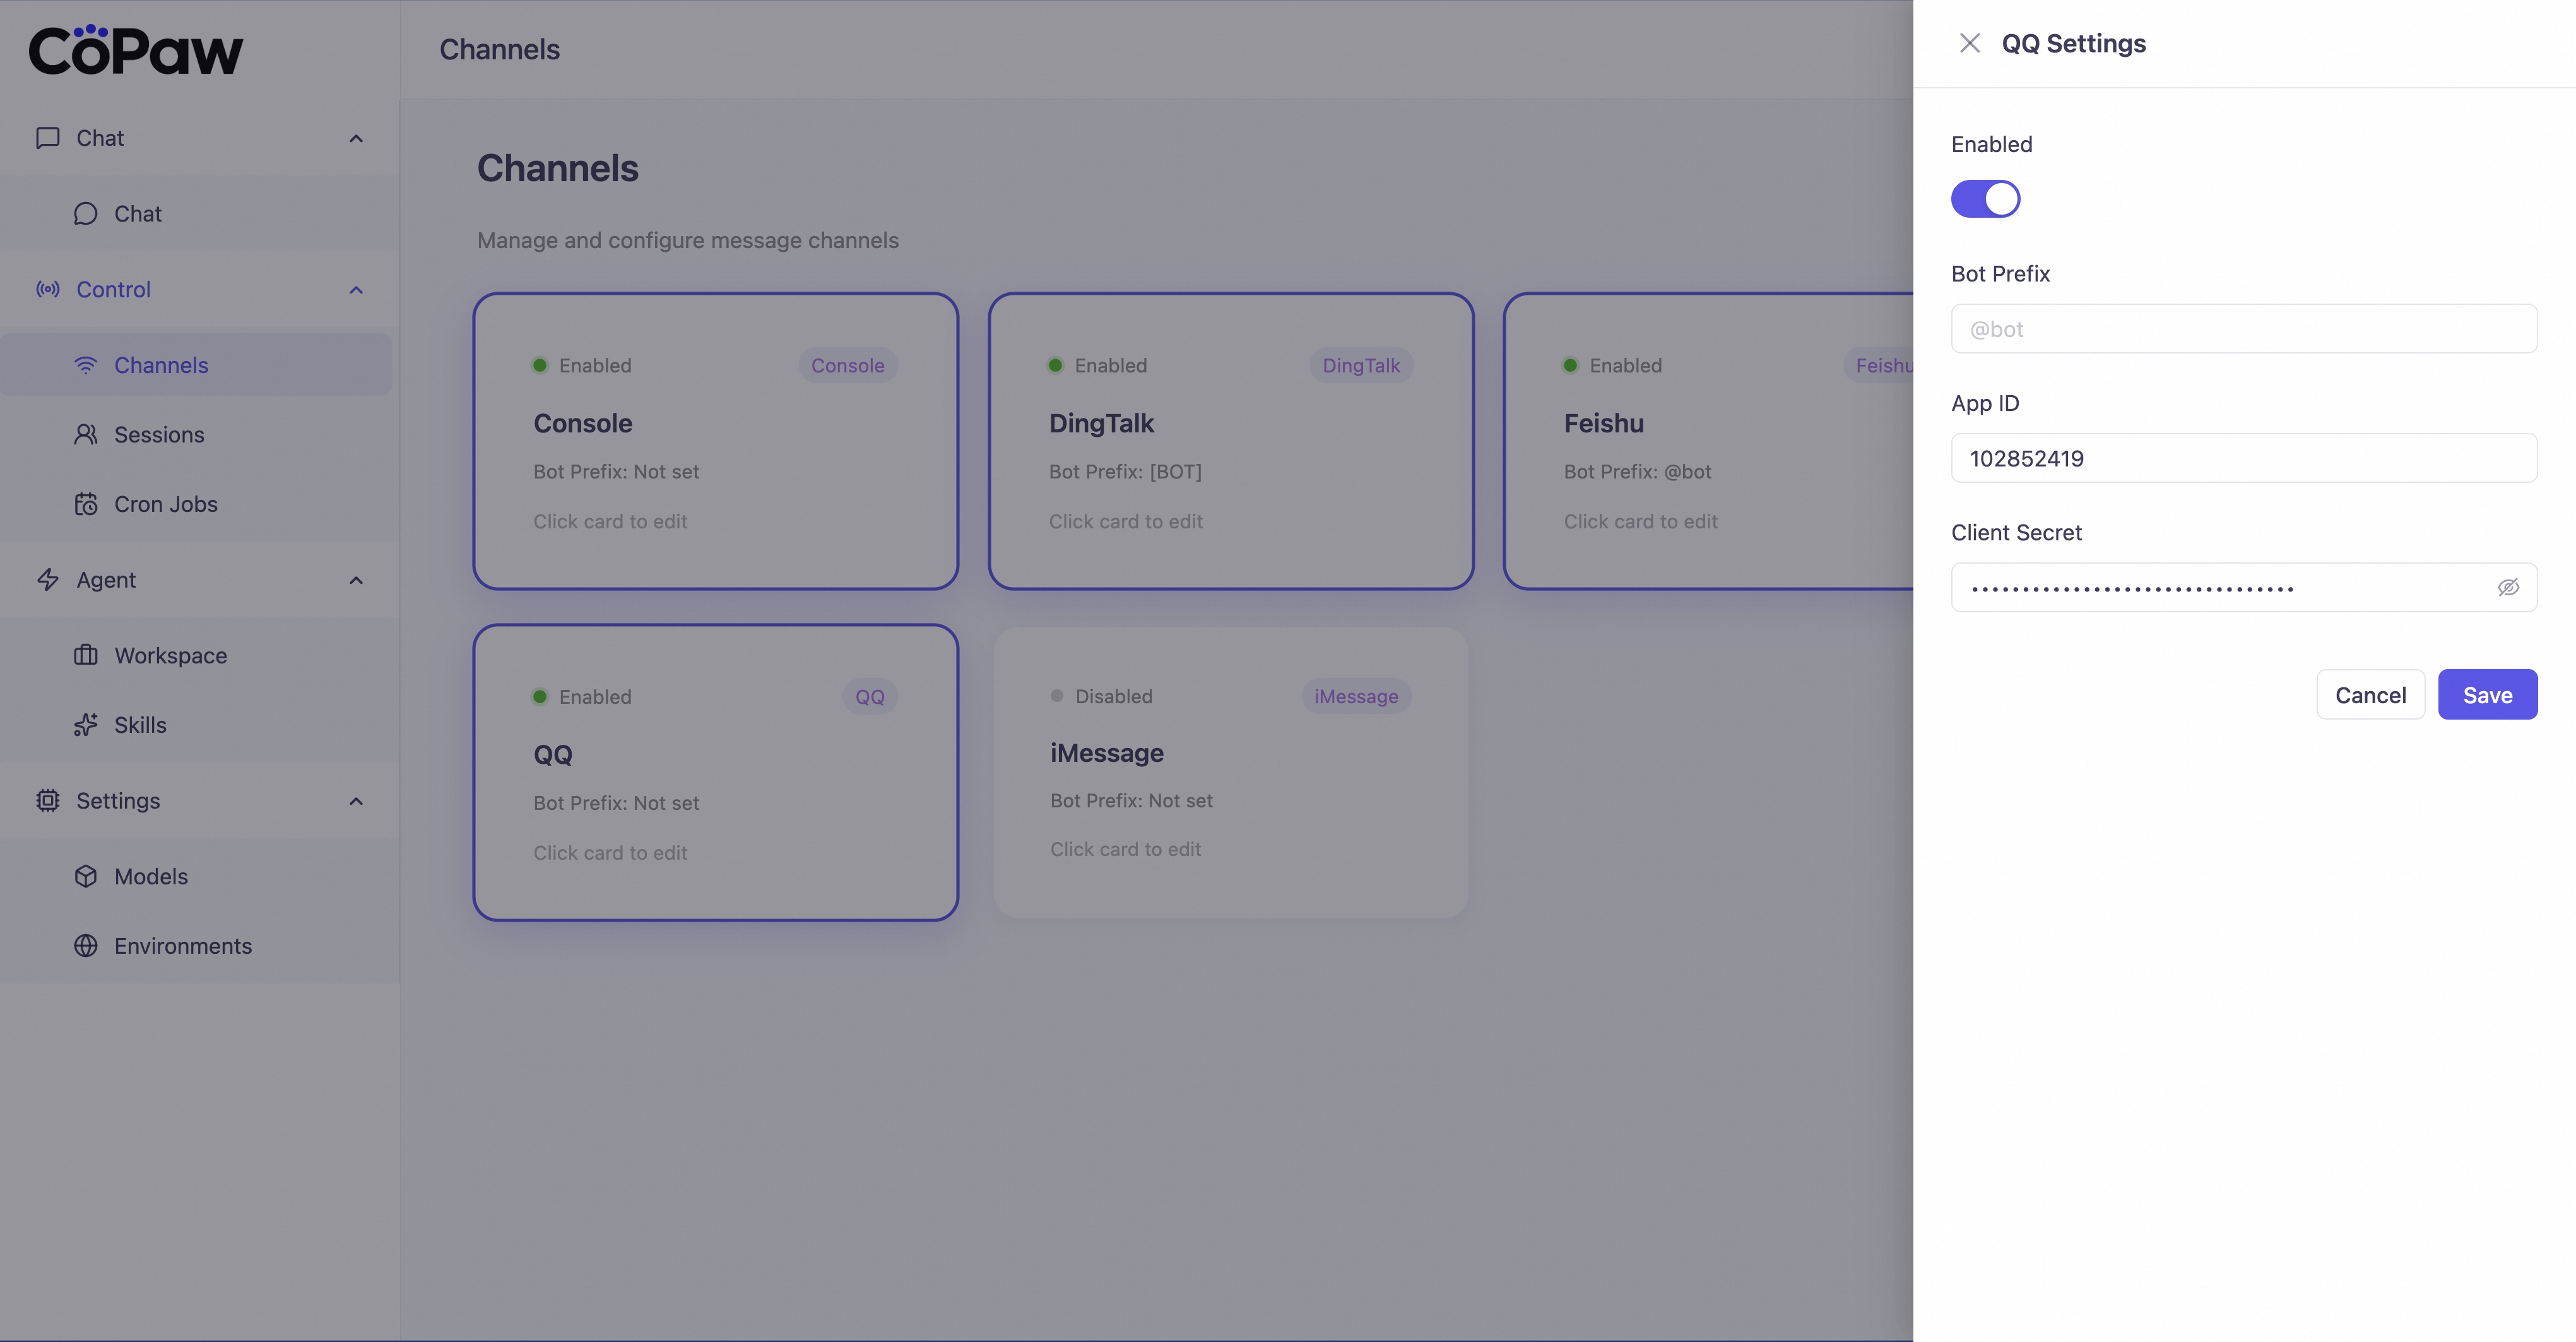
You can also fill them in the Console UI.
Appendix
Config overview
| Channel | Config key | Main fields |
|---|---|---|
| DingTalk | dingtalk | client_id, client_secret |
| Feishu | feishu | app_id, app_secret; optional encrypt_key, verification_token, media_dir |
| iMessage | imessage | db_path, poll_sec (macOS only) |
| Discord | discord | bot_token; optional http_proxy, http_proxy_auth |
| app_id, client_secret |
Field details and structure are in the tables above and Config & working dir.
Multi-modal message support
Support for receiving (user → bot) and sending (bot → user) text, image, video, audio, and file varies by channel.
| Channel | Recv text | Recv image | Recv video | Recv audio | Recv file | Send text | Send image | Send video | Send audio | Send file |
|---|---|---|---|---|---|---|---|---|---|---|
| DingTalk | ✓ | ✓ | ✓ | ✓ | ✓ | ✓ | ✓ | ✓ | ✓ | ✓ |
| Feishu | ✓ | ✓ | ✓ | ✓ | ✓ | ✓ | ✓ | ✓ | ✓ | ✓ |
| Discord | ✓ | ✓ | ✓ | ✓ | ✓ | ✓ | 🚧 | 🚧 | 🚧 | 🚧 |
| iMessage | ✓ | ✗ | ✗ | ✗ | ✗ | ✓ | ✗ | ✗ | ✗ | ✗ |
| ✓ | 🚧 | 🚧 | 🚧 | 🚧 | ✓ | 🚧 | 🚧 | 🚧 | 🚧 |
Notes:
- DingTalk: Receives rich text and single-file (downloadCode); sends image / voice / video / file via session webhook.
- Feishu: WebSocket long connection for receiving; Open API for sending. Text / image / file supported both ways; message metadata includes
feishu_chat_idandfeishu_message_idfor group context and dedup. - Discord: Attachments are parsed as image / video / audio / file for the agent; sending real media is under construction (currently link-only in reply).
- iMessage: imsg + database polling; text only; attachments are not supported (not possible on this channel).
- QQ: Receiving attachments as multimodal and sending real media are under construction; currently text + link-only.
Changing config via HTTP
With the app running you can read and update channel config; changes are written to config.json and applied automatically:
GET /config/channels— List all channelsPUT /config/channels— Replace allGET /config/channels/{channel_name}— Get one (e.g.dingtalk,imessage)PUT /config/channels/{channel_name}— Update one
Extending channels
To add a new platform (e.g. WeCom, Slack), implement a subclass of BaseChannel; core code stays unchanged.
Data flow and queue
- ChannelManager keeps one queue per channel that uses it. When a message arrives, the channel calls
self._enqueue(payload)(injected by the manager at startup); the manager's consumer loop then callschannel.consume_one(payload). - The base class implements a default
consume_one: turn payload intoAgentRequest, run_process, callsend_message_contentfor each completed message, and_on_consume_erroron failure. Most channels only need to implement "incoming → request" and "response → outgoing"; they do not overrideconsume_one.
Subclass must implement
| Method | Purpose |
|---|---|
build_agent_request_from_native(self, native_payload) |
Convert the channel's native message to AgentRequest (using runtime Message / TextContent / ImageContent etc.) and set request.channel_meta for sending. |
from_env / from_config |
Build instance from environment or config. |
async start() / async stop() |
Lifecycle (connect, subscribe, cleanup). |
async send(self, to_handle, text, meta=None) |
Send one text (and optional attachments). |
What the base class provides
- Consume flow:
_payload_to_request,get_to_handle_from_request(defaultuser_id),get_on_reply_sent_args,_before_consume_process(e.g. save receive_id),_on_consume_error(default:send_content_parts), and optionalrefresh_webhook_or_token(no-op; override when the channel needs to refresh tokens). - Helpers:
resolve_session_id,build_agent_request_from_user_content,_message_to_content_parts,send_message_content,send_content_parts,to_handle_from_target.
Override consume_one only when the flow differs (e.g. console printing, debounce). Override get_to_handle_from_request / get_on_reply_sent_args when the send target or callback args differ.
Example: minimal channel (text only)
For text-only channels using the manager queue, you do not need to implement consume_one; the base default is enough:
# my_channel.py
from agentscope_runtime.engine.schemas.agent_schemas import TextContent, ContentType
from copaw.app.channels.base import BaseChannel
from copaw.app.channels.schema import ChannelType

class MyChannel(BaseChannel):
    channel: ChannelType = "my_channel"

    def __init__(self, process, enabled=True, bot_prefix="", **kwargs):
        super().__init__(process, on_reply_sent=kwargs.get("on_reply_sent"))
        self.enabled = enabled
        self.bot_prefix = bot_prefix

    @classmethod
    def from_config(cls, process, config, on_reply_sent=None, show_tool_details=True):
        return cls(process=process, enabled=getattr(config, "enabled", True),
                   bot_prefix=getattr(config, "bot_prefix", ""), on_reply_sent=on_reply_sent)

    @classmethod
    def from_env(cls, process, on_reply_sent=None):
        return cls(process=process, on_reply_sent=on_reply_sent)

    def build_agent_request_from_native(self, native_payload):
        payload = native_payload if isinstance(native_payload, dict) else {}
        channel_id = payload.get("channel_id") or self.channel
        sender_id = payload.get("sender_id") or ""
        meta = payload.get("meta") or {}
        session_id = self.resolve_session_id(sender_id, meta)
        text = payload.get("text", "")
        content_parts = [TextContent(type=ContentType.TEXT, text=text)]
        request = self.build_agent_request_from_user_content(
            channel_id=channel_id, sender_id=sender_id, session_id=session_id,
            content_parts=content_parts, channel_meta=meta,
        )
        request.channel_meta = meta
        return request

    async def start(self):
        pass

    async def stop(self):
        pass

    async def send(self, to_handle, text, meta=None):
        # Call your HTTP API etc. to send
        pass
When you receive a message, build a native dict and enqueue (_enqueue is injected by the manager):
native = {
    "channel_id": "my_channel",
    "sender_id": "user_123",
    "text": "Hello",
    "meta": {},
}
self._enqueue(native)
Example: multimodal (text + image / video / audio / file)
In build_agent_request_from_native, parse attachments into runtime content and call build_agent_request_from_user_content:
from agentscope_runtime.engine.schemas.agent_schemas import (
    TextContent, ImageContent, VideoContent, AudioContent, FileContent, ContentType,
)

def build_agent_request_from_native(self, native_payload):
    payload = native_payload if isinstance(native_payload, dict) else {}
    channel_id = payload.get("channel_id") or self.channel
    sender_id = payload.get("sender_id") or ""
    meta = payload.get("meta") or {}
    session_id = self.resolve_session_id(sender_id, meta)
    content_parts = []
    if payload.get("text"):
        content_parts.append(TextContent(type=ContentType.TEXT, text=payload["text"]))
    for att in payload.get("attachments") or []:
        t = (att.get("type") or "file").lower()
        url = att.get("url") or ""
        if not url:
            continue
        if t == "image":
            content_parts.append(ImageContent(type=ContentType.IMAGE, image_url=url))
        elif t == "video":
            content_parts.append(VideoContent(type=ContentType.VIDEO, video_url=url))
        elif t == "audio":
            content_parts.append(AudioContent(type=ContentType.AUDIO, data=url))
        else:
            content_parts.append(FileContent(type=ContentType.FILE, file_url=url))
    if not content_parts:
        content_parts = [TextContent(type=ContentType.TEXT, text="")]
    request = self.build_agent_request_from_user_content(
        channel_id=channel_id, sender_id=sender_id, session_id=session_id,
        content_parts=content_parts, channel_meta=meta,
    )
    request.channel_meta = meta
    return request
Custom channel directory and CLI
- Directory: Channels under the working dir at
custom_channels/(default~/.copaw/custom_channels/) are loaded at runtime. The manager scans.pyfiles and packages (subdirs with__init__.py), loadsBaseChannelsubclasses, and registers them by the class'schannelattribute. - Install:
copaw channels install <key>creates a template<key>.pyincustom_channels/for you to edit, or use--path <local path>/--url <URL>to copy a channel module from disk or the web.copaw channels add <key>does the same and also adds a default entry to config (with optional--path/--url). - Remove:
copaw channels remove <key>deletes that channel's module fromcustom_channels/(custom channels only; built-ins cannot be removed). By default it also removes the key fromchannelsinconfig.json; use--keep-configto leave config unchanged. - Config:
ChannelConfigusesextra="allow", so any channel key can appear underchannelsinconfig.json. Usecopaw channels configfor interactive setup or edit config by hand.
Related pages
- Introduction — What the project can do
- Quick start — Install and first run
- Heartbeat — Scheduled check-in / digest
- CLI — init, app, cron, clean
- Config & working dir — config.json and working directory